
2020 has hardly been the yr any of us anticipated. In March, when the world abruptly went into full lockdown mode and our worldwide journey plans got here to a halt, we discovered ourselves questioning what the remainder of the yr had in retailer for us.
After months in self-isolation, our need for a brand new venture grew stronger than ever. For nomads like us, the thought of “staying dwelling” was difficult on many ranges. We haven’t had a house in over 5 years and inside a number of months, we felt like we have been starting to overstay our welcome with household.
As Canadians, we had all the time talked about touring round Canada, exploring our personal yard, one which we have now successfully ignored whereas exploring all corners of the world. We felt like if there was going to be a chance for us to journey domestically, THIS can be the yr to do it. And what a novel expertise it will be to discover Canada with our camper van construct.
We’d traveled in campervans earlier than. We’ve taken many journeys in Australia, New Zealand, and the USA. We cherished the liberty of van life and the alternatives it will supply!
 Having fun with time on Cable Seashore in Western Australia throughout one in every of our campervan adventures in Australia again in 2014
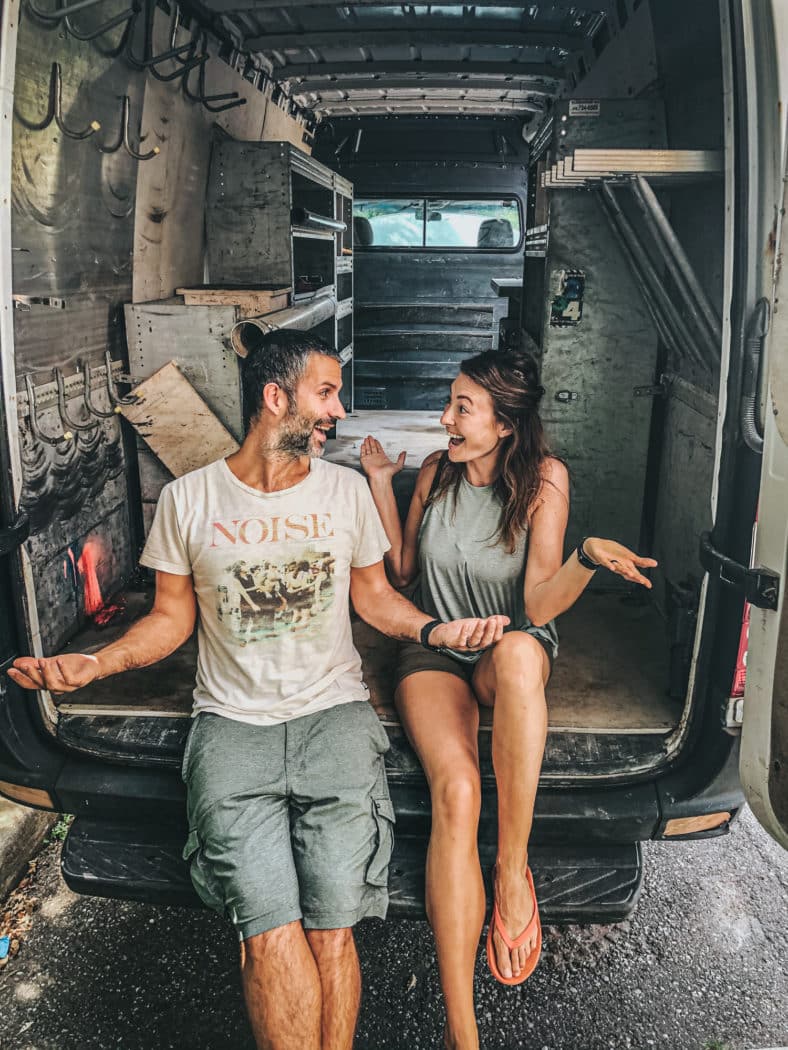
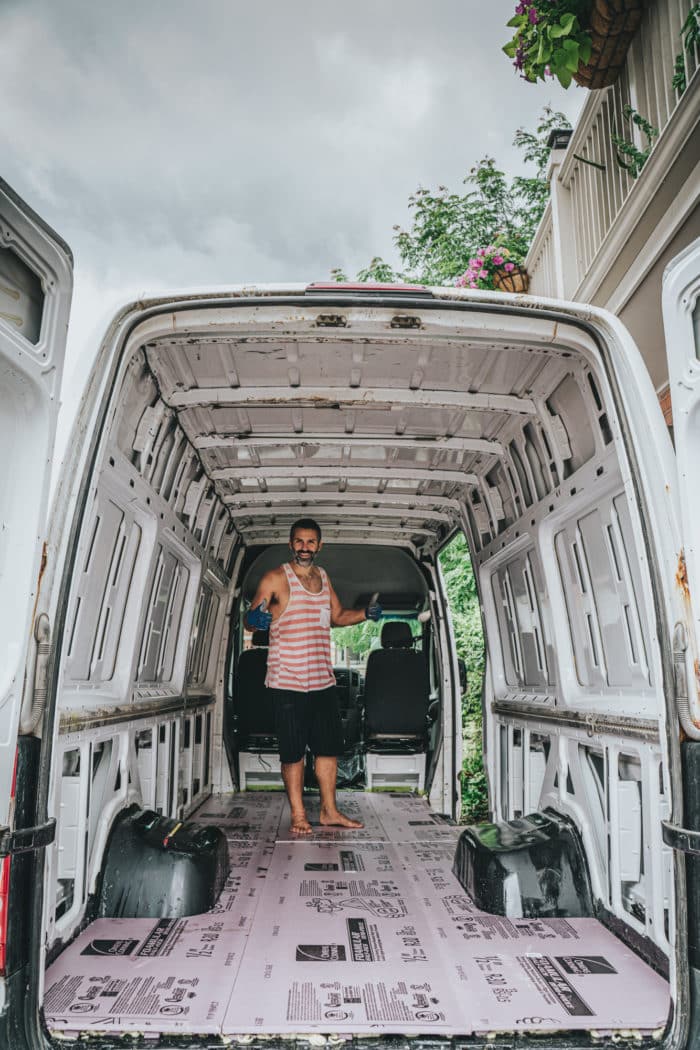
Initially, we didn’t plan on constructing a van. However after a fast seek for campervan rental prices, it turned very apparent that constructing our personal would make a lot better economical sense. Plus, a camper van construct conversion seemed like a enjoyable problem!
So, we jumped into the venture head first!
The Prep Work
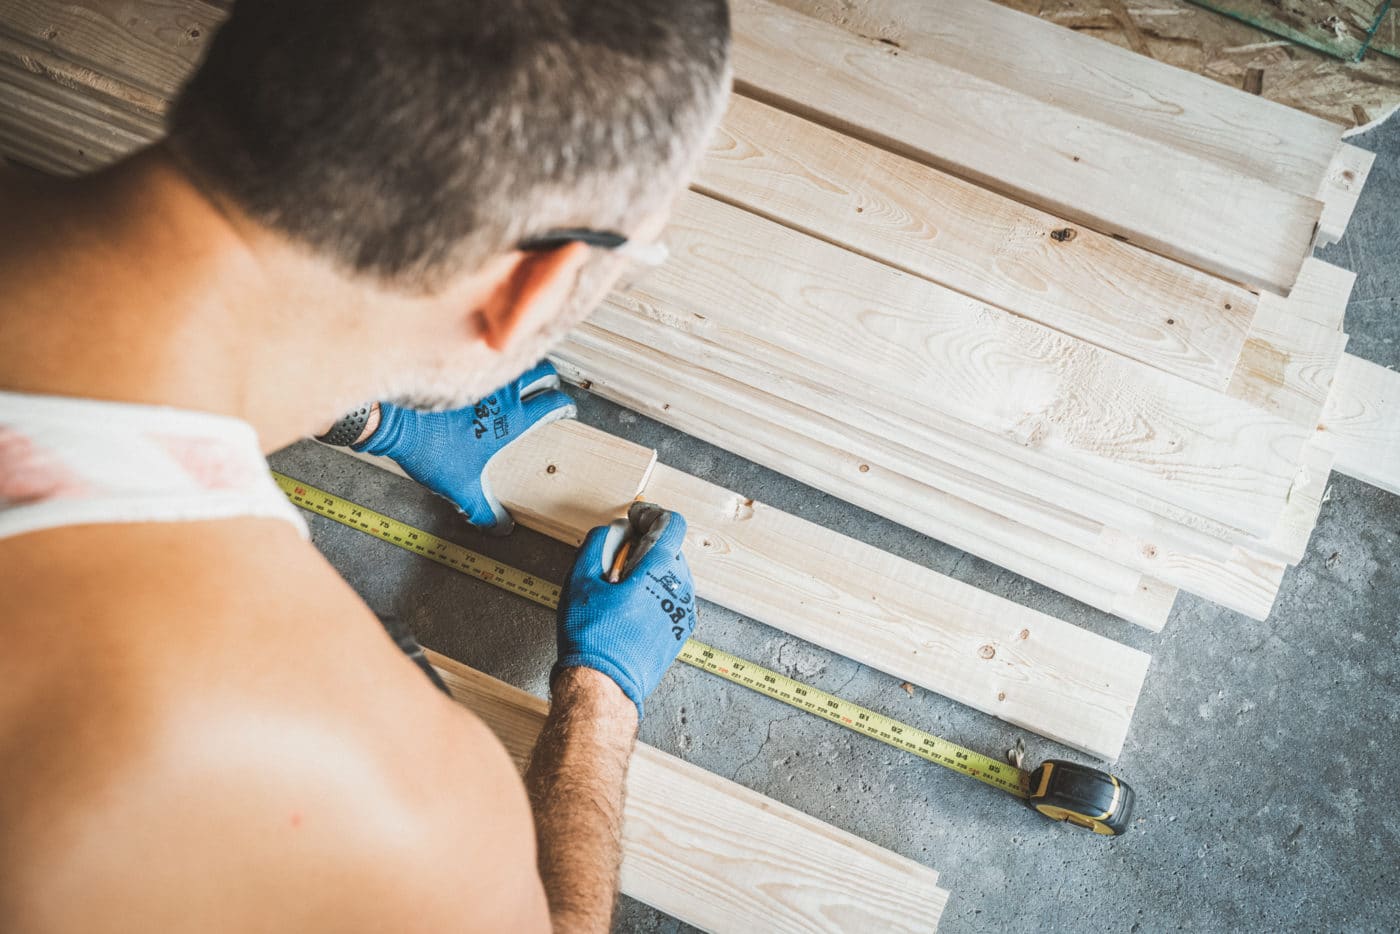
We spent a couple of month in analysis mode for our camper van construct venture, watching YouTube movies and studying articles in an try to search out the right varied van conversion information. We grabbed concepts from varied articles and movies and slowly compiled all the information into our personal information on changing a van into a house.
By the tip of our month of analysis, we had a fairly good understanding of easy methods to convert a van and have been prepared to begin.
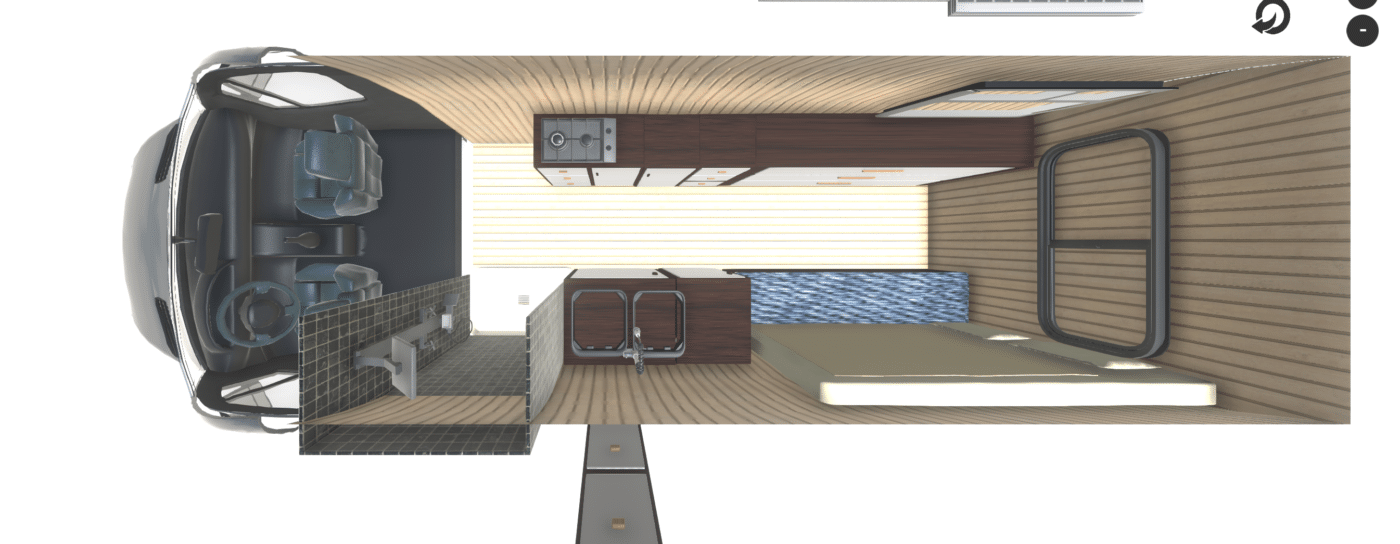
Here’s what our draft structure regarded like earlier than we began this DIY van construct. Should you learn till the tip, you’ll discover how a lot the design/structure modified as we began the van conversion.
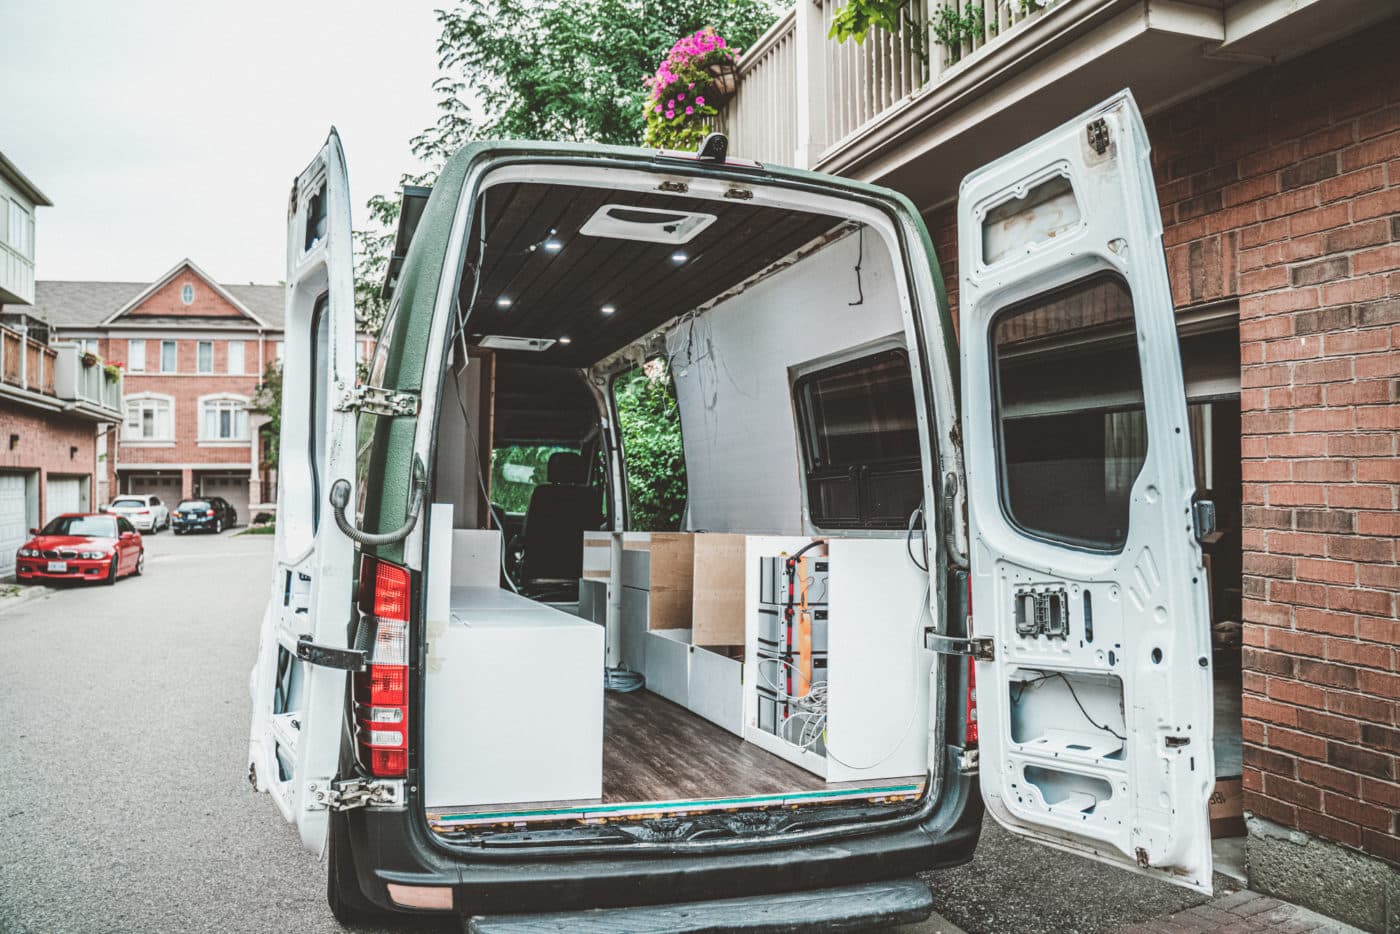
The Van Buy
We searched excessive and low for the van that will match our wants, contemplating any Mercedes Sprinter, Ford Transit, RAM ProMasters and even some distinctive cargo vans that popped up on {the marketplace}.
We spent 2 weeks evaluating the accessible vans for camper van construct and compiled all of the choices right into a spreadsheet that rated every van based mostly on the next:
- Automobile Sort: Ford vs Mercedes vs Different
- Measurement: 144 wheelbase vs 170 wheelbase vs 170 Ext wheelbase
- Yr
- KMs pushed
- Value
- Location: distance from Toronto, the place we have been based mostly
- Situation: rust vs no rust
- Extras: navigation cams, further home windows, cruise management, and many others
- Sort of Vendor: Seller vs Personal
We assigned a score (1-5) for every evaluation class and tallied the general rating.
We had over 35 van choices on the listing which we narrowed down to only 5. Solely 2 have been worthy of a take a look at drive ultimately. We purchased our van inside a number of days of take a look at driving it.
Our Van
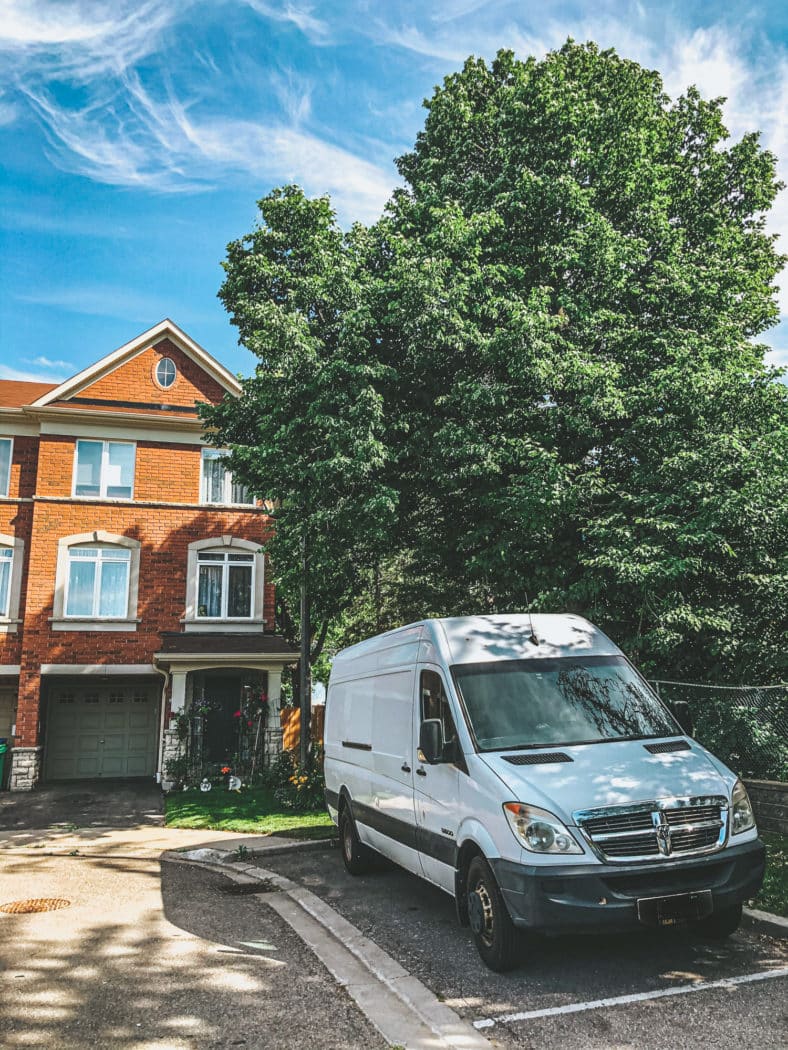
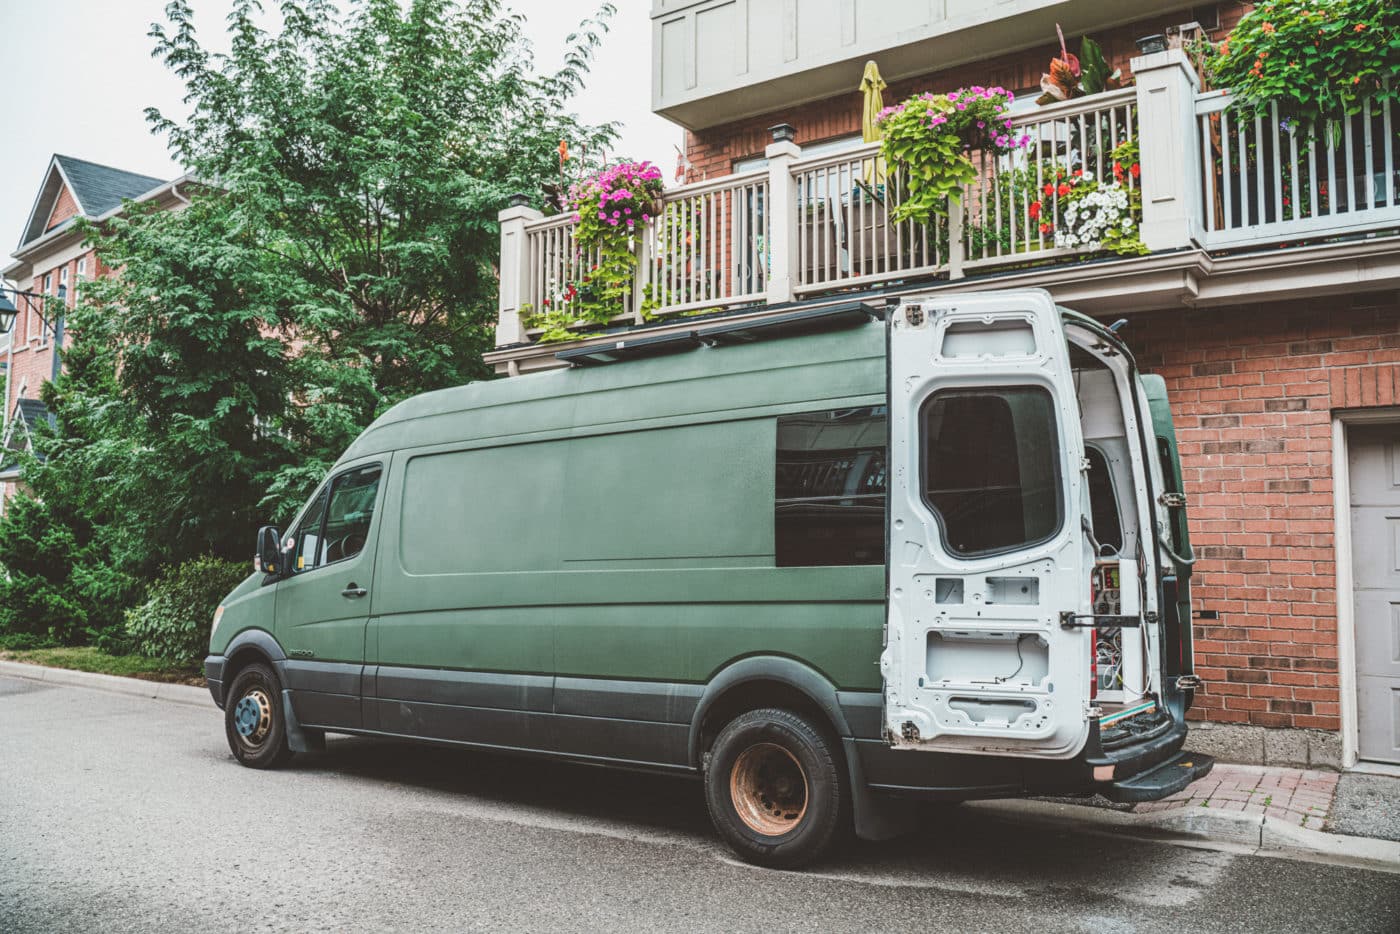
We ended up with a 2008 Dodge Sprinter 170WB 3500 work van, which we bought for $15,000 CAD.
The van had a bit extra rust than we’d have preferred. However, it additionally had $10,000 in current repairs, which we felt was added worth.
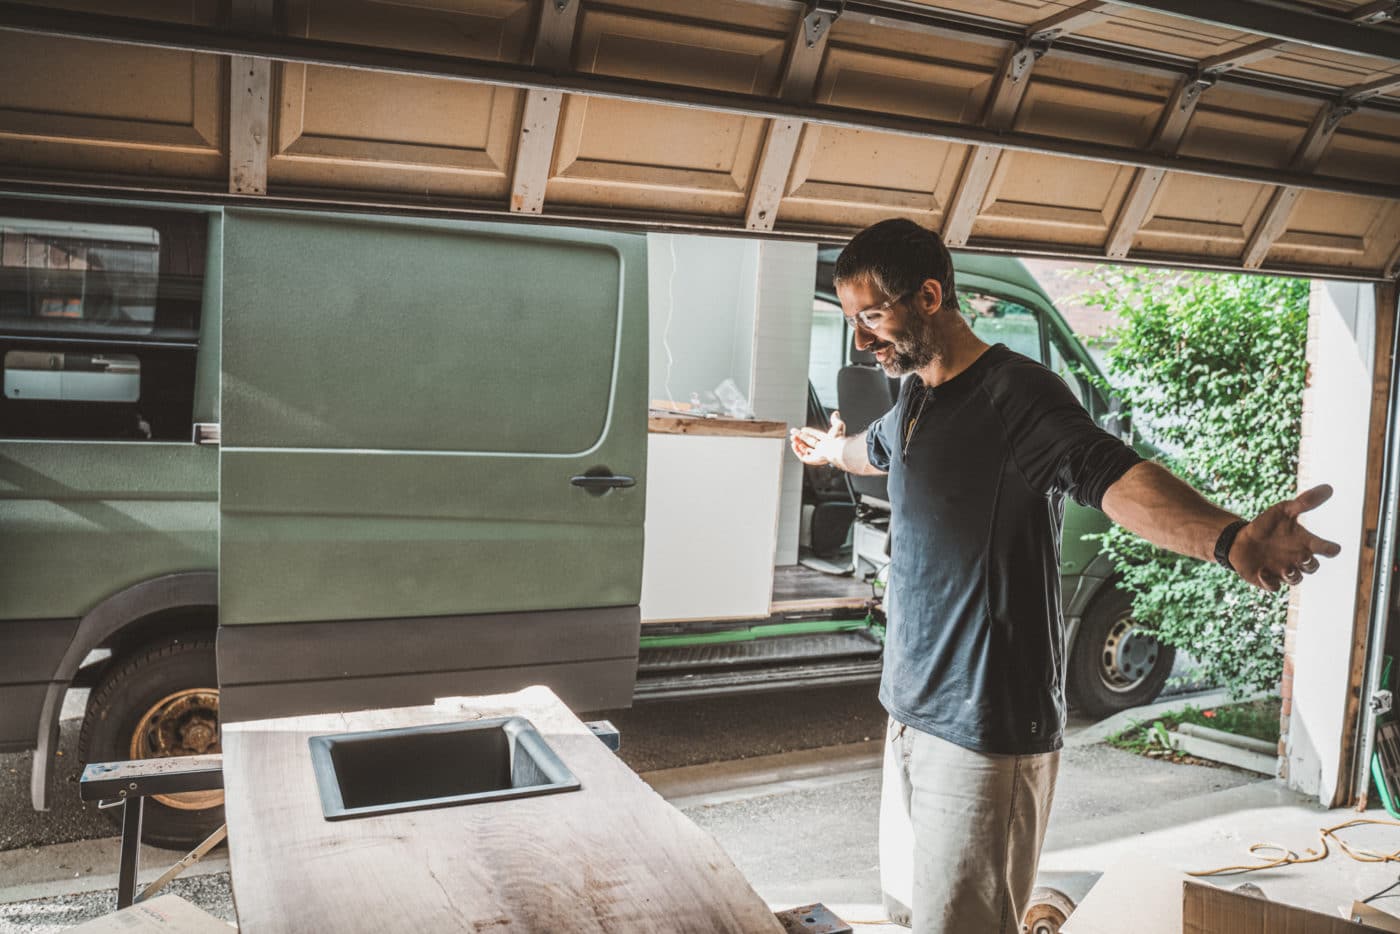
Van Construct Plan
Van Conversion price range: 25K
Timeline: 50 days
Our objective for this DIY Van Conversion was to construct out a excessive finish 4 season campervan, appropriate for full-time van life. We arrange a price range and a timeline and set to work.
It’s price noting that we spent a couple of month previous to the van buy studying as a lot as we might concerning the van construct course of. Whereas we had no earlier expertise with van conversion, we had watched a whole bunch of hours of YouTube movies and browse dozens of articles on each step of the method.
Earlier than attending to work, we created a day-by-day timeline, compiled an in depth listing of supplies required for every step of van conversion, and agreed on the van structure.
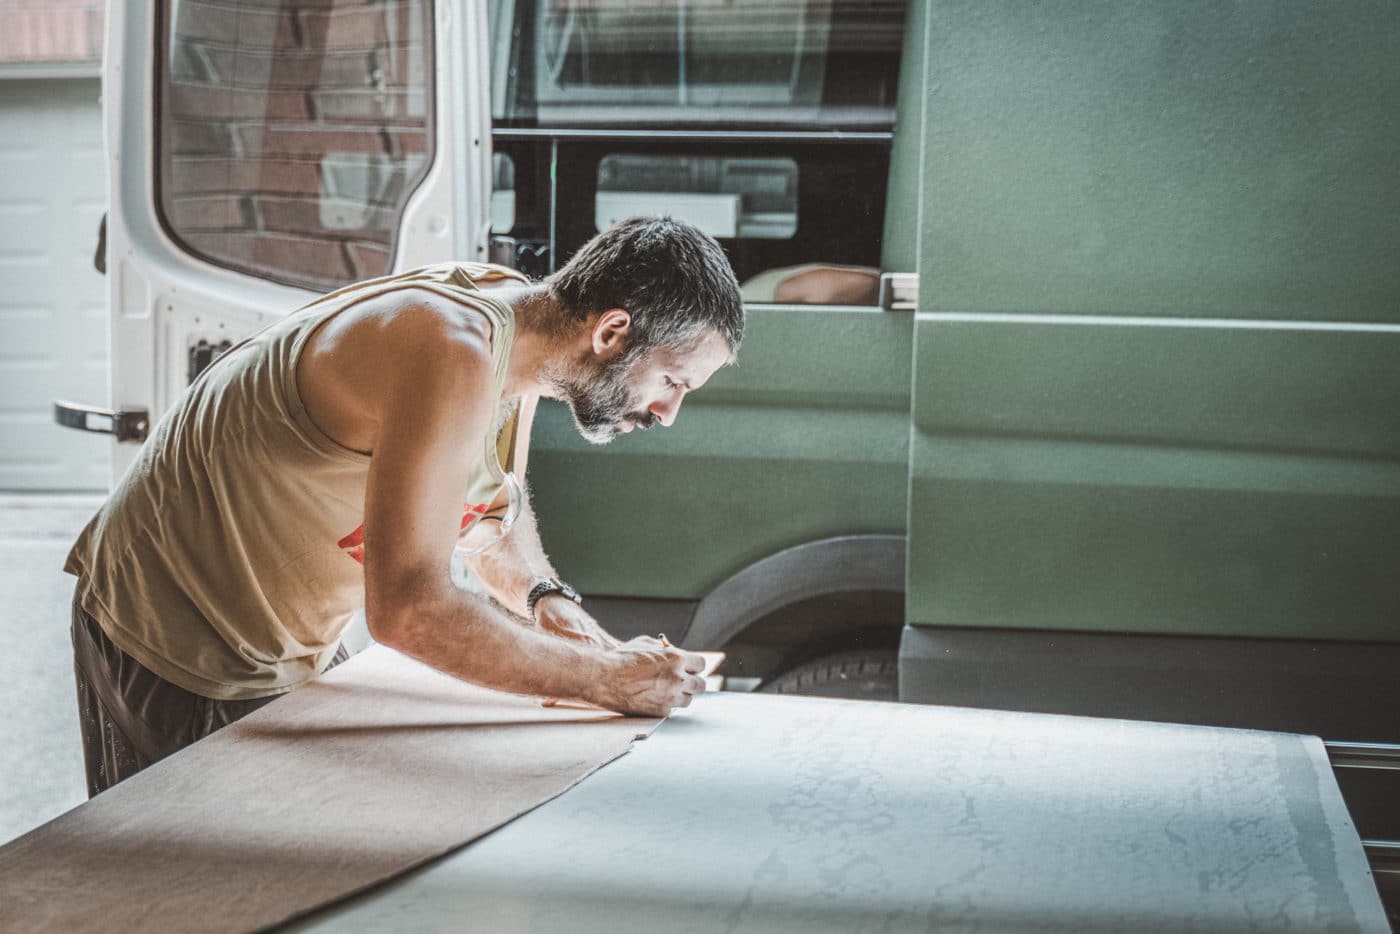
Van Conversion: The Particulars
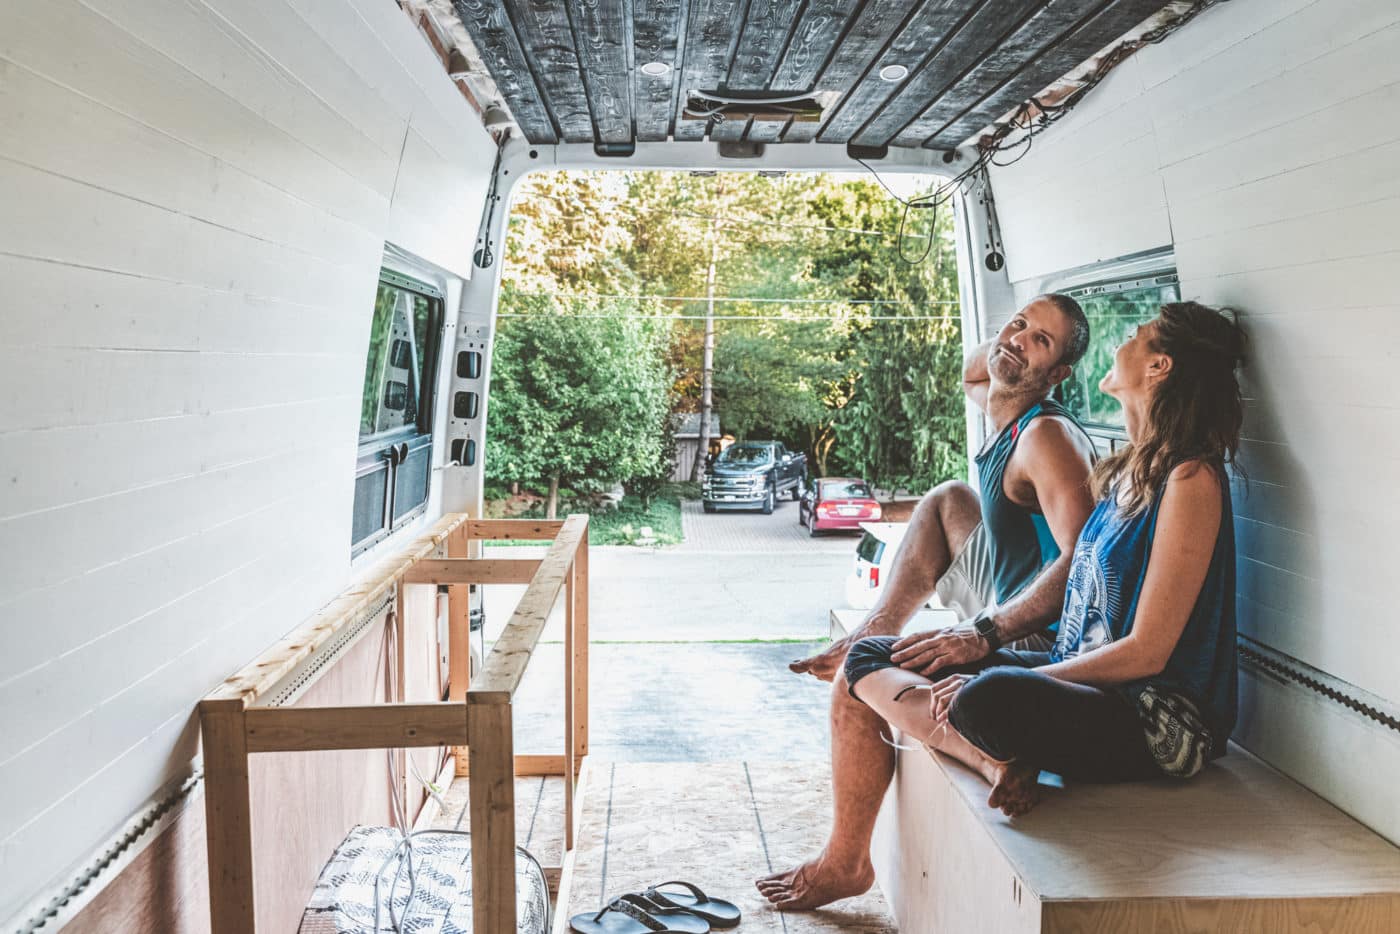
People who adopted our camper van construct dwell on Instagram, already know that we ran right into a plethora of points alongside the way in which that prolonged our timeline properly past the unique 50 days. The excellent news is that we did handle to remain inside our van conversion price range.
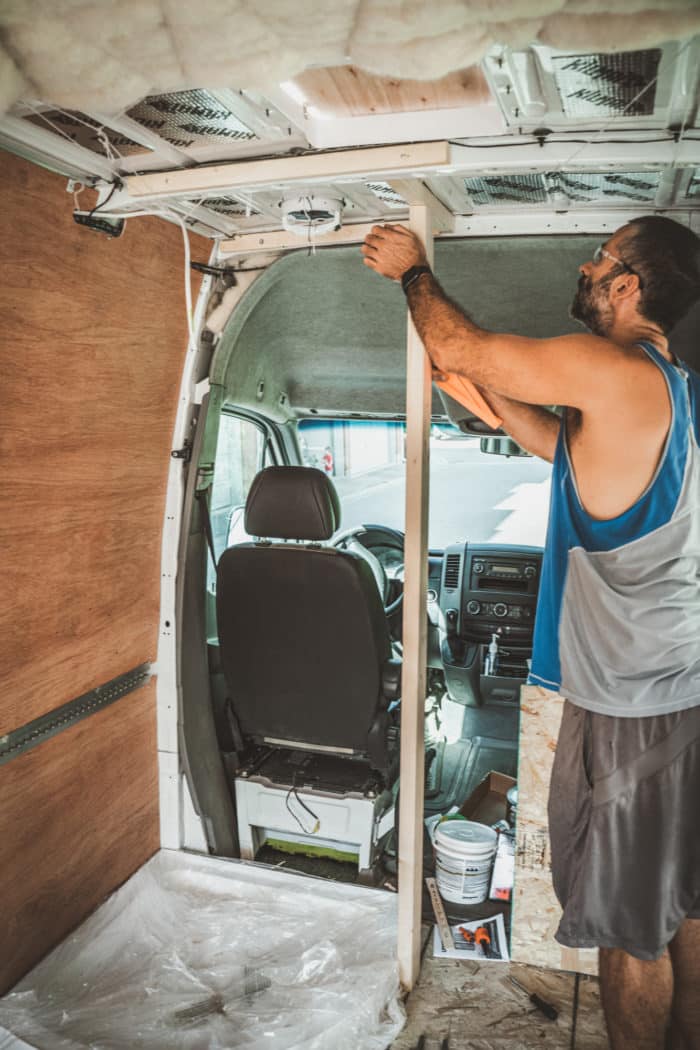
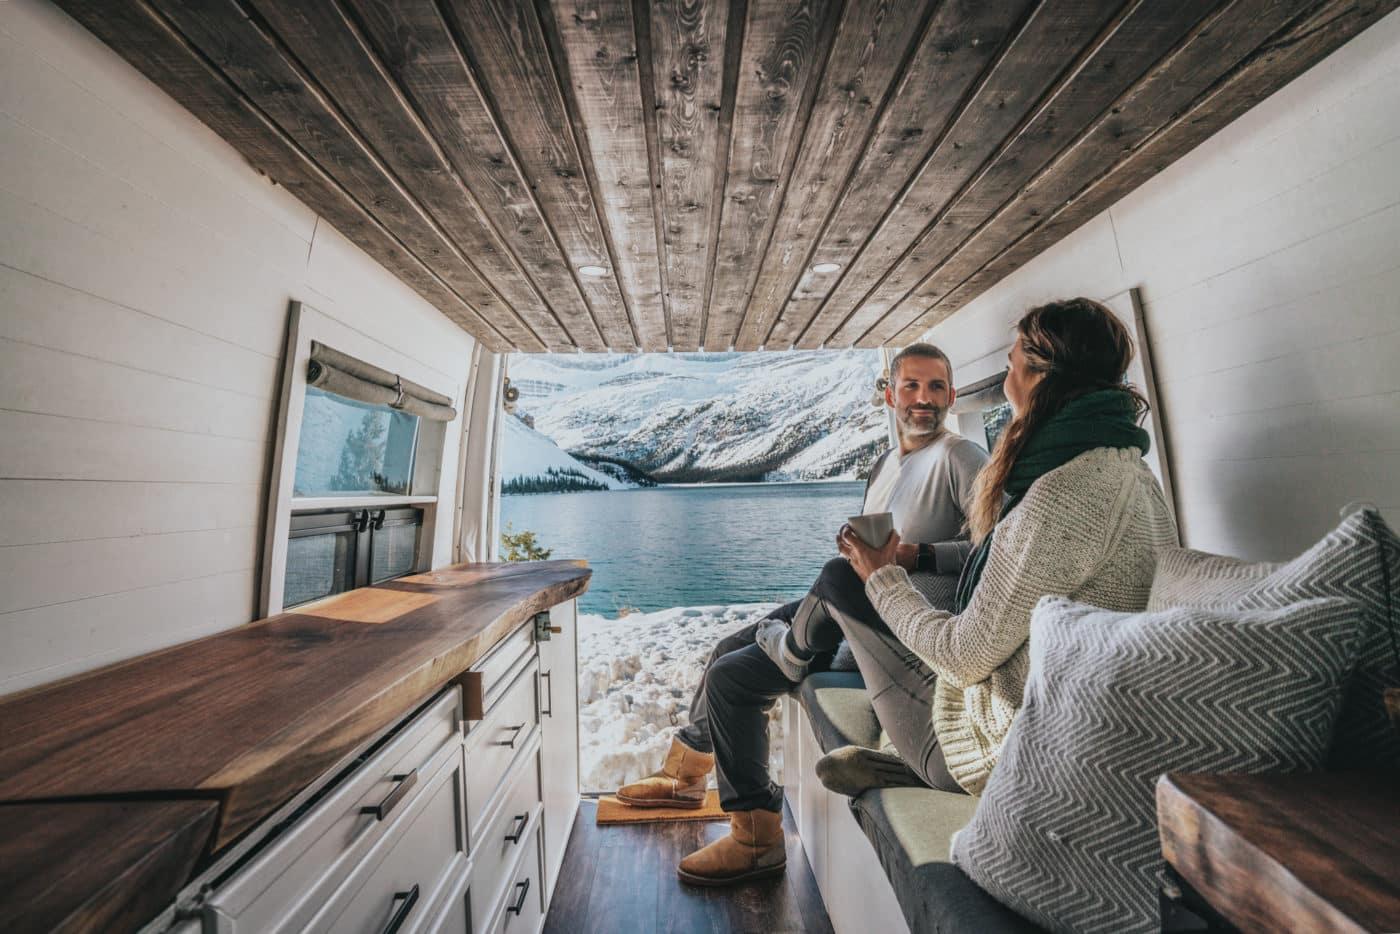
The Format
Time Spent: weeks main as much as the beginning of the construct
We got here up with the structure of the inside of the camper van construct venture properly earlier than we even had a van! With Excel Spreadsheet and VanSpace 3D program, we discovered how each aspect will match into our tiny 70sq ft area.
We opted for a really distinctive Van Format that accommodated all of our wants. We wished a design that will:
- Give us a lot of fo space for storing
- Have a spacious working space
- Have a everlasting bathe/bathroom
- and a mattress that we didn’t must arrange each night!
Our last structure included:
-
- 10 drawers + 4 cupboards with further cabinets
- Pull out kitchen pantry
- 31”x 31” nook bathe/rest room
- 15”x 15” sink
- 80” lengthy sofa
- 80” lengthy desk
- Queen Mattress
We have been fairly happy with our last structure and though we bumped into many points with making this come to life, we have been finally in a position to deliver this design to life.
Beneath you’ll discover all of the nitty-gritty particulars of the method we adopted to transform a van to a camper
From Sprinter Van to a Camper: Step by Step
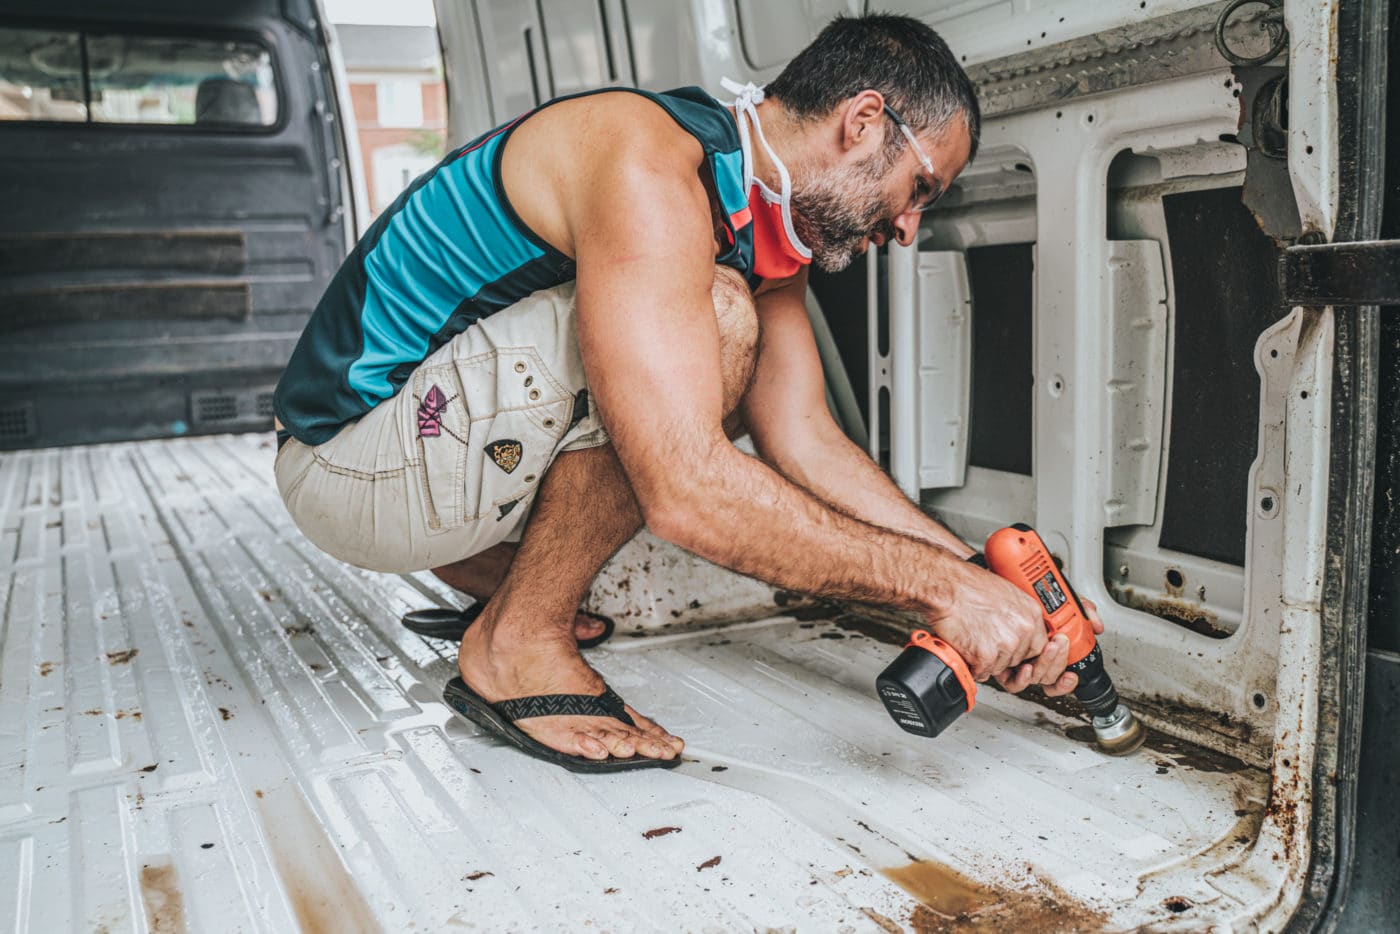
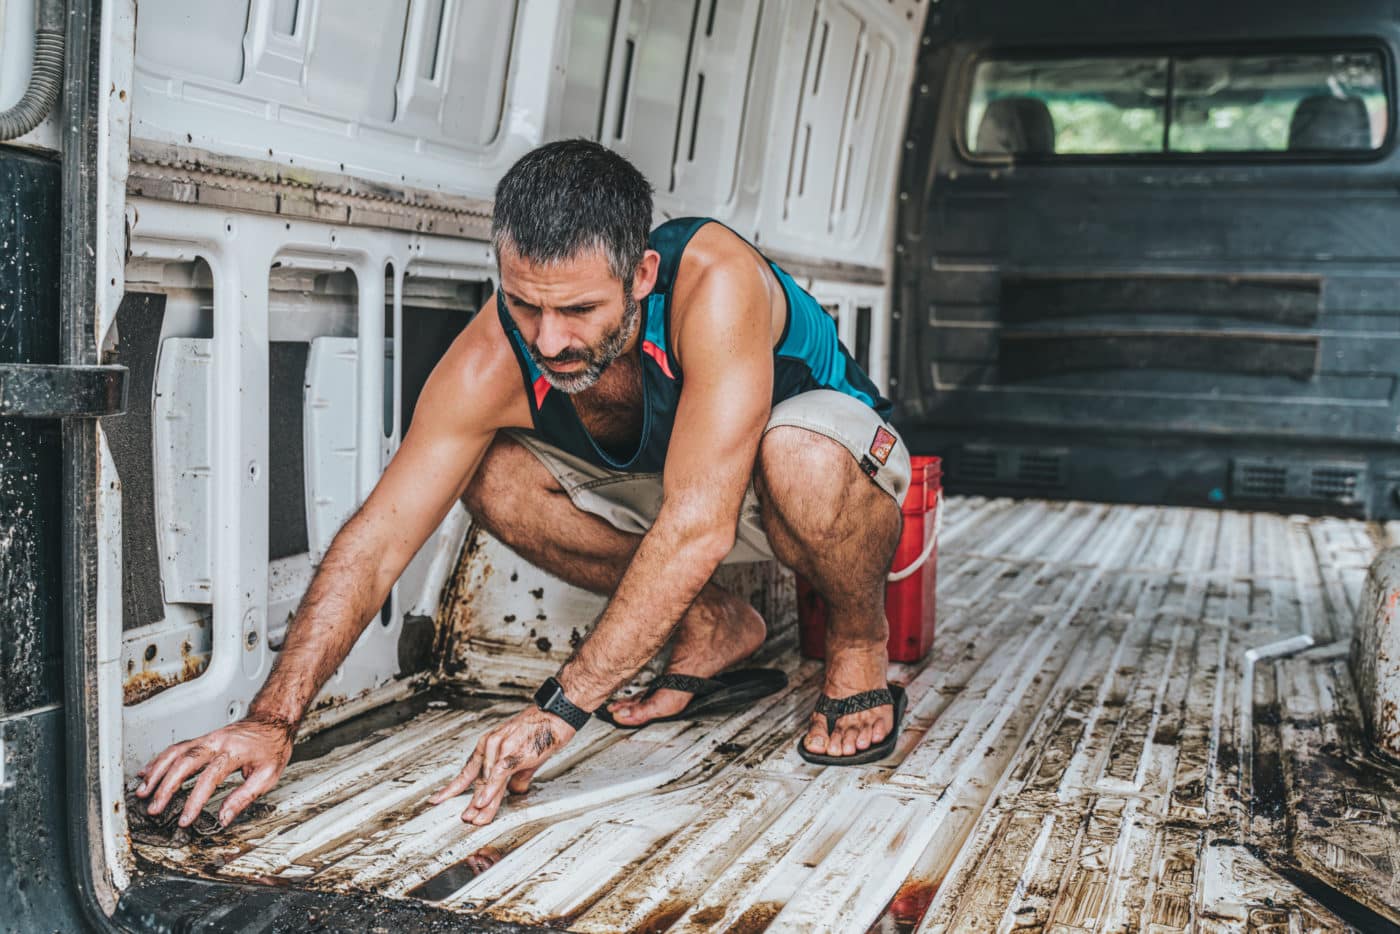
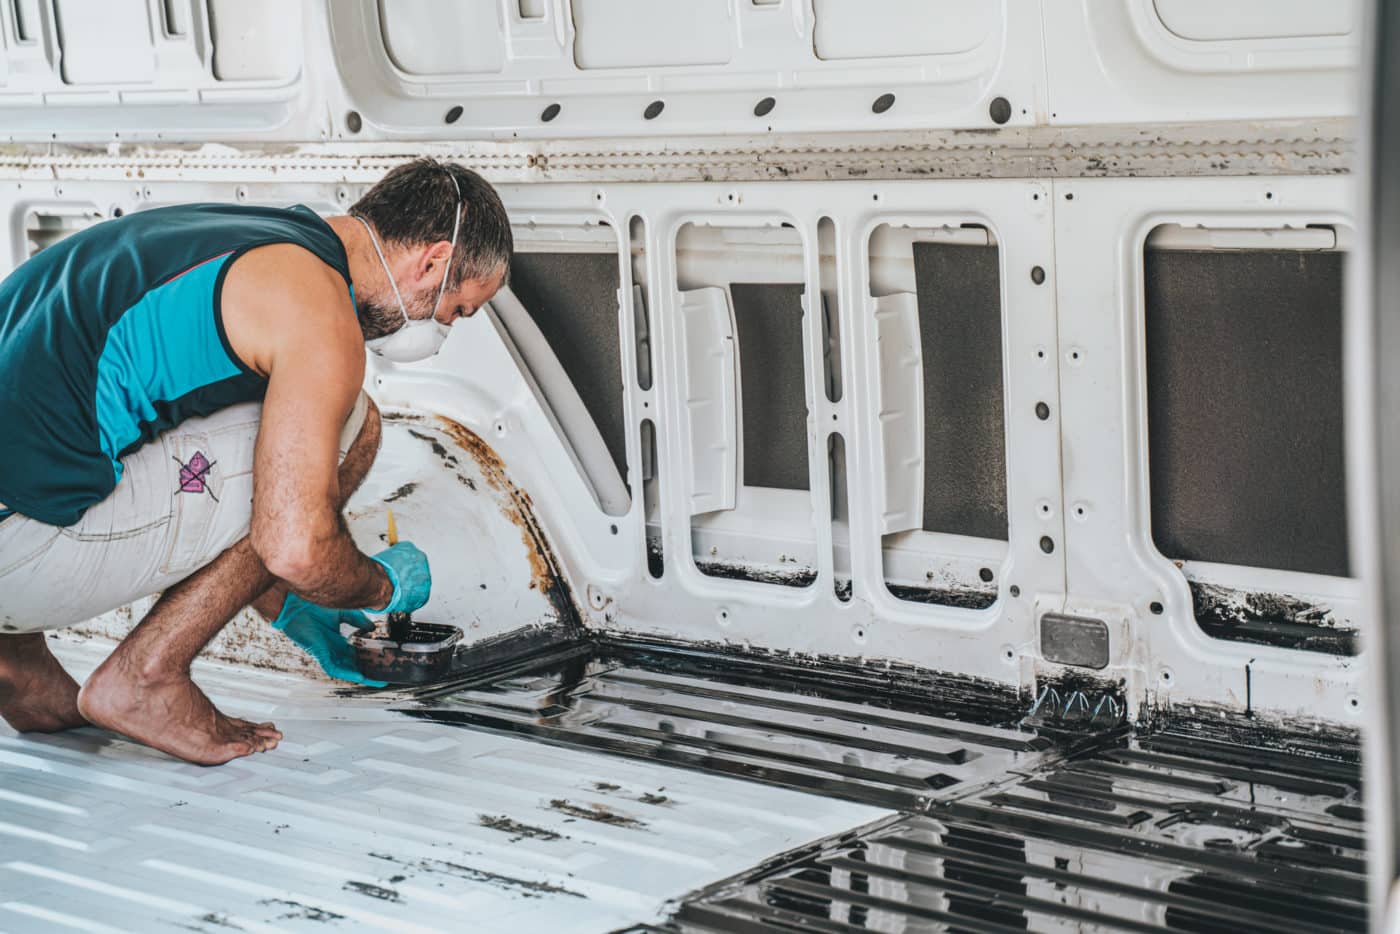
Strip & De-rust
Time Spent: 1 week
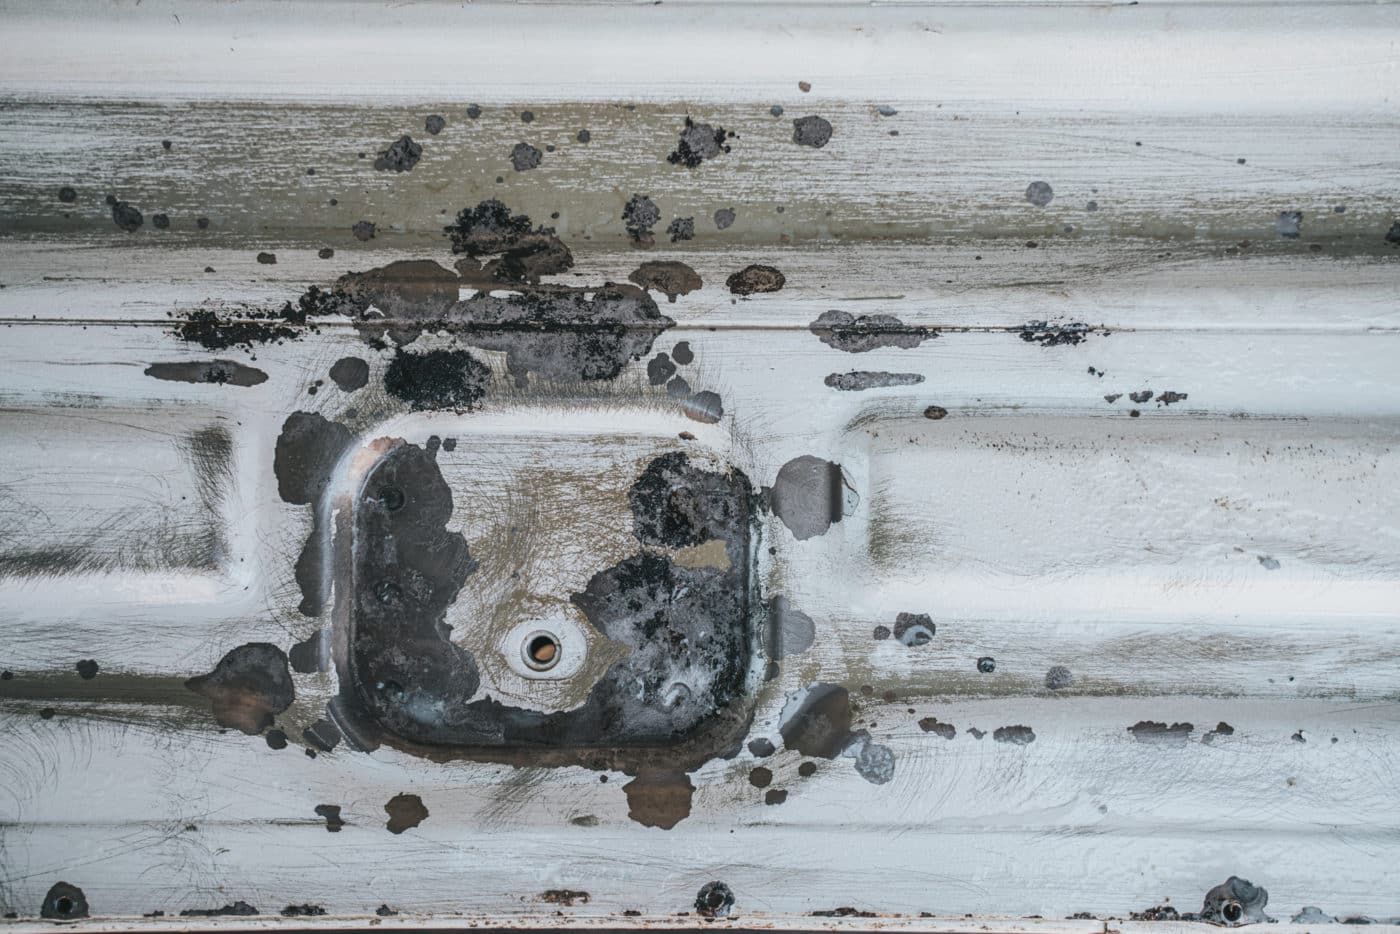
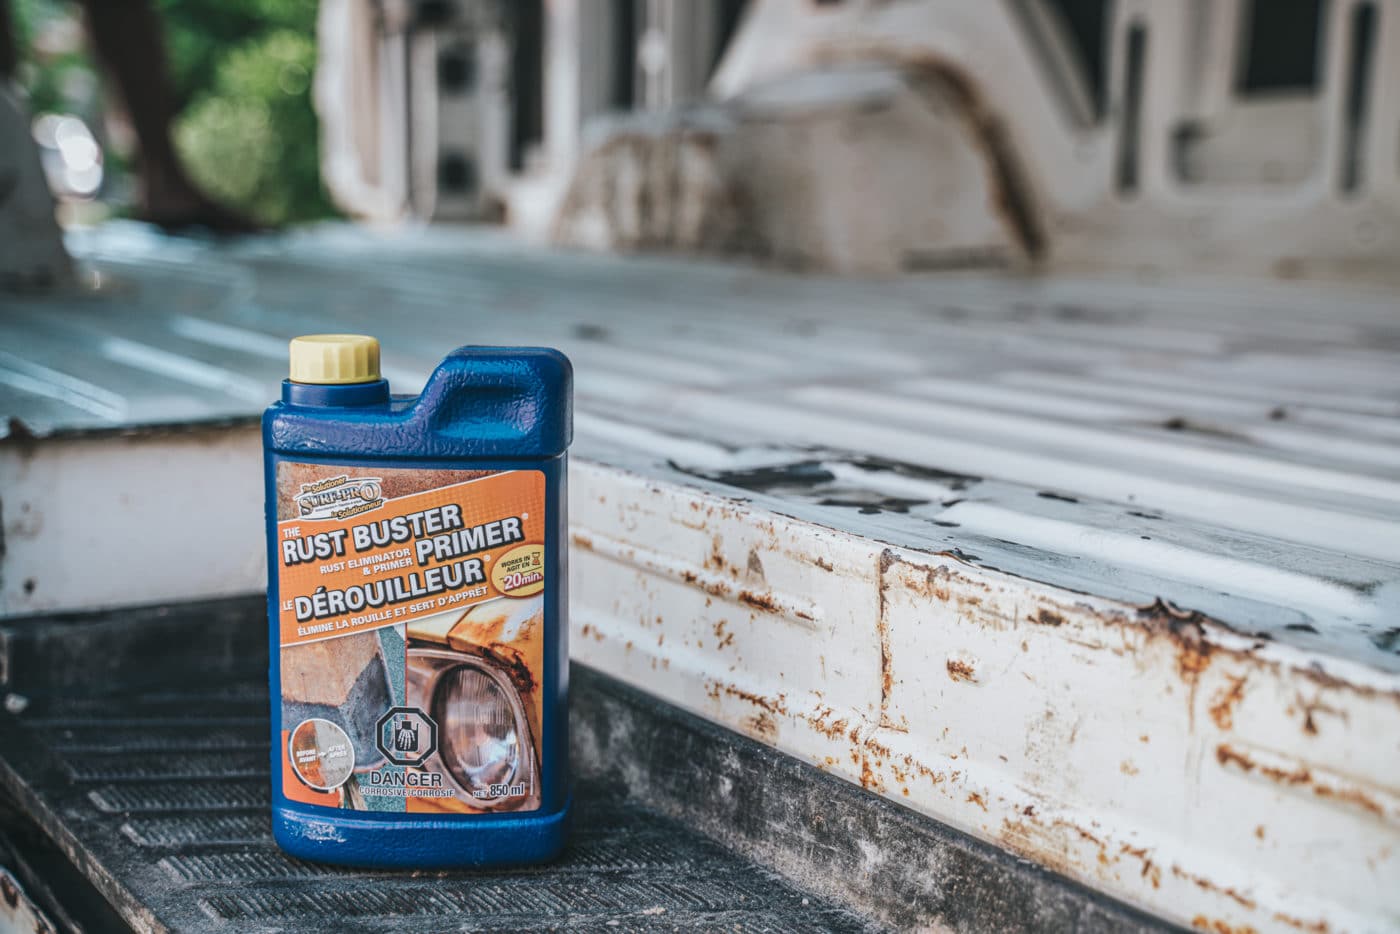
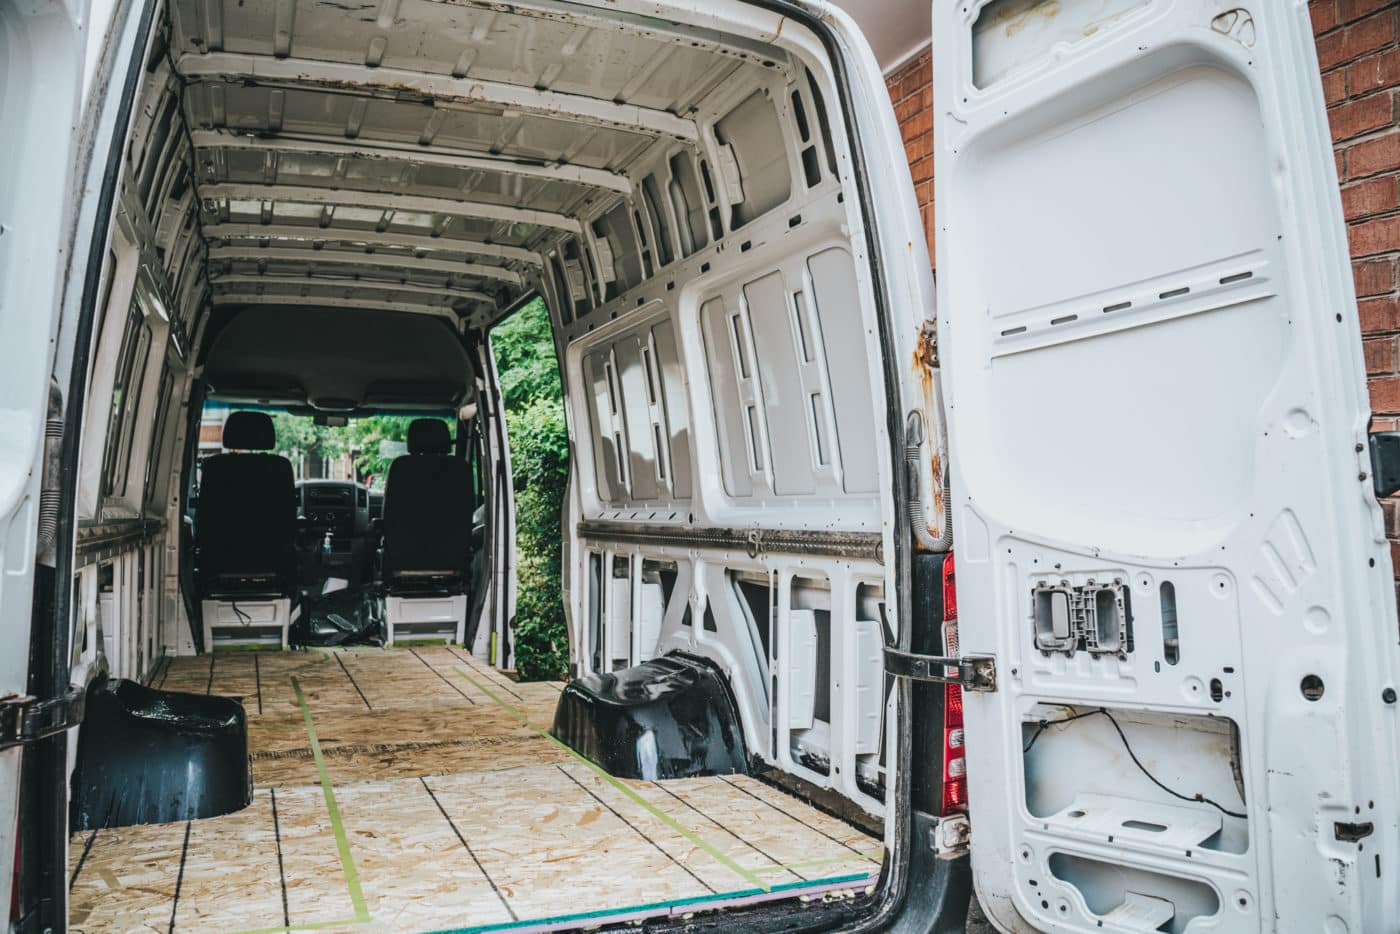
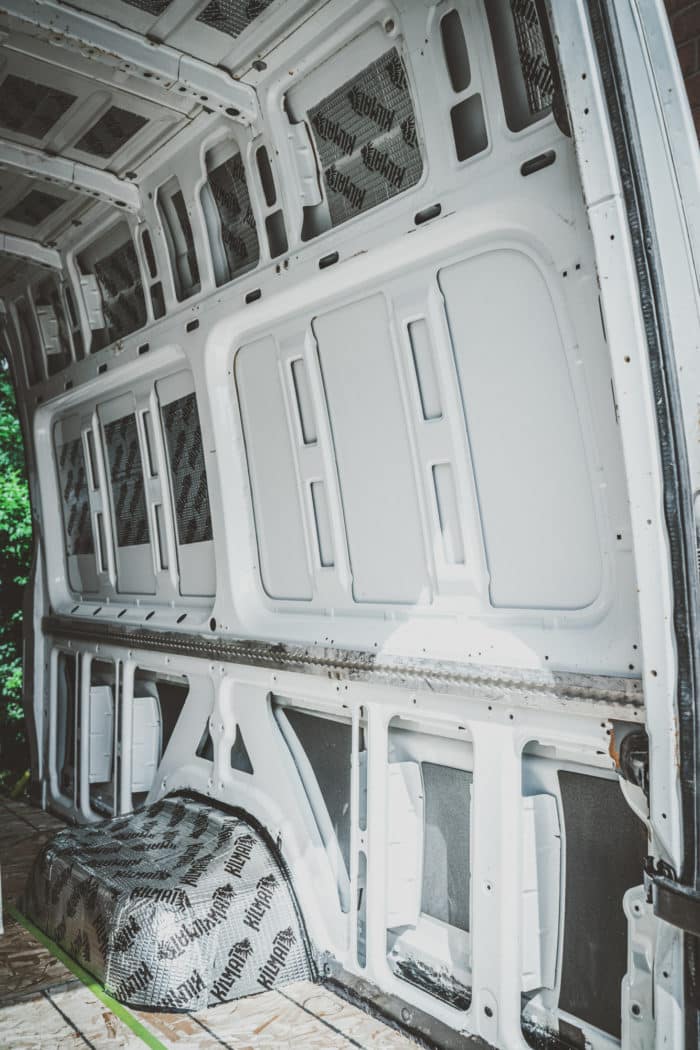
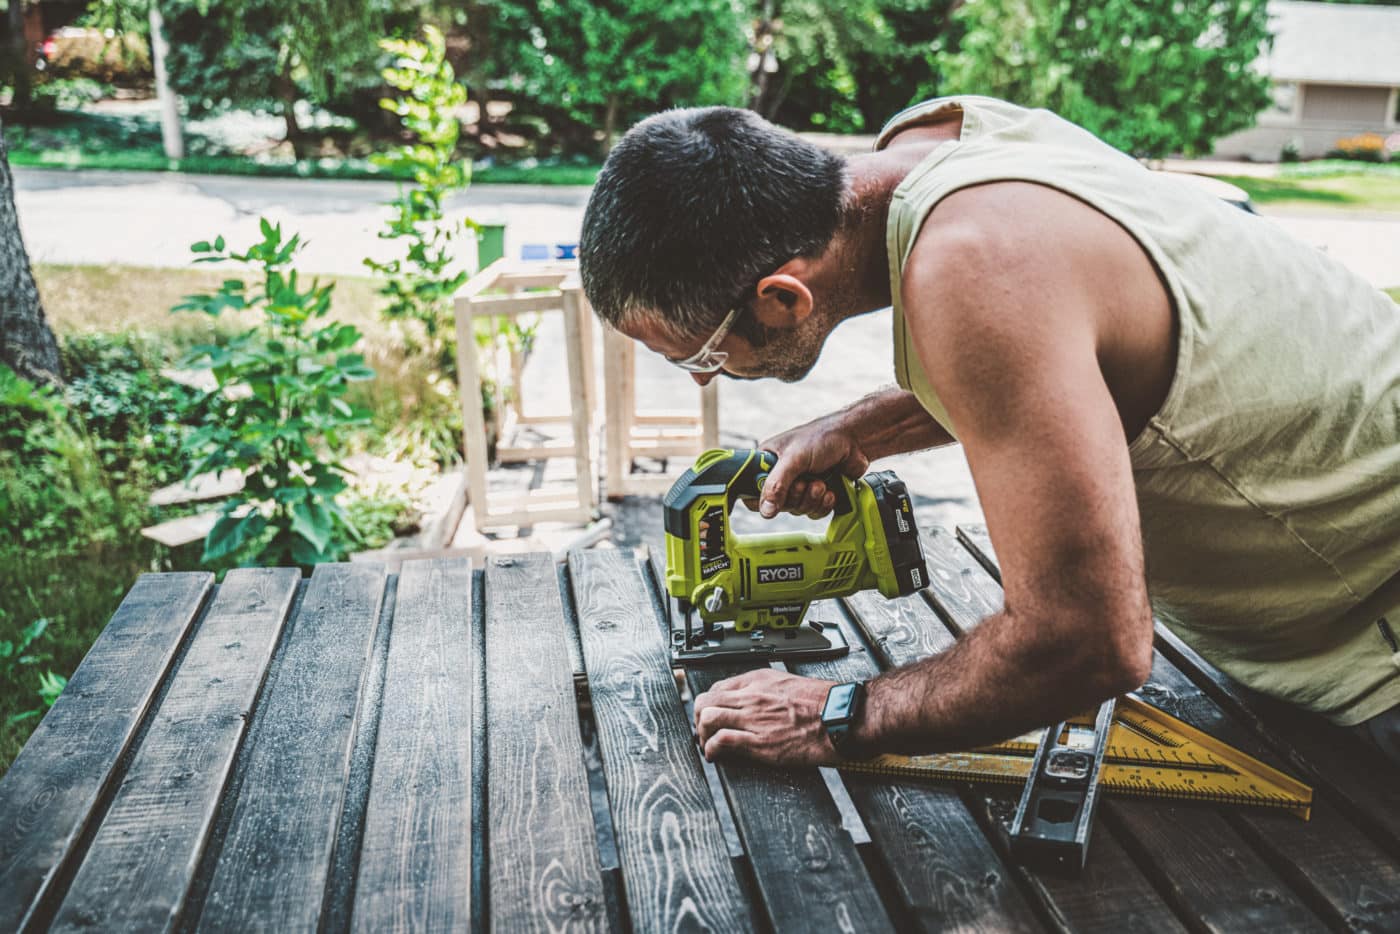
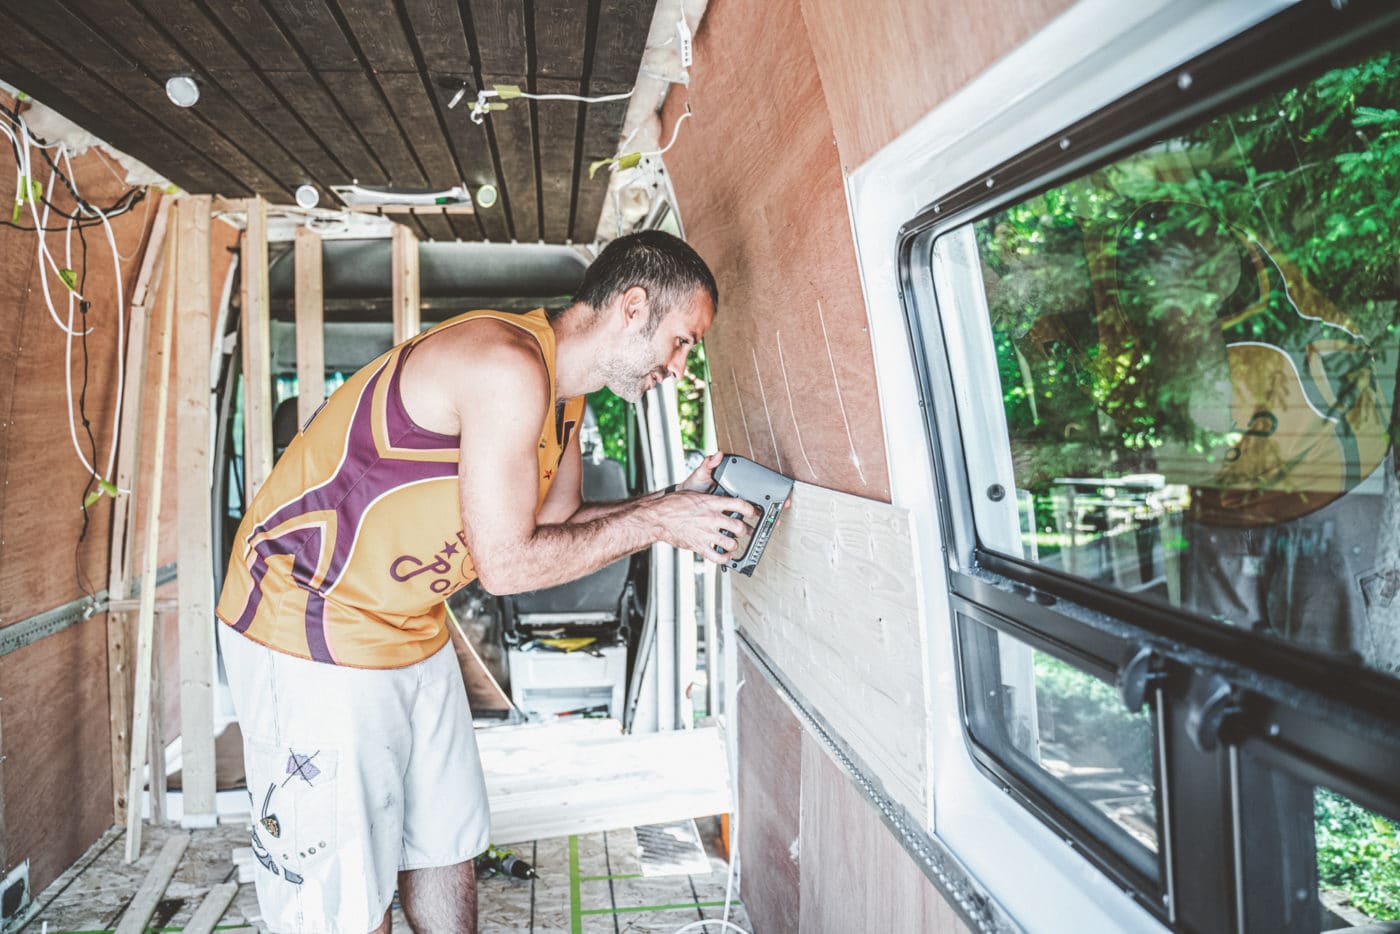
Step one of our DIY Sprinter Van conversion was to strip all the present fixtures of the van, clear and de-rust the within and out of doors of the van.
We used a drill bit to grind out rust spots and Rust Buster primer to deal with the spots to arrange the spot for anti-rust remedy. After completely washing the van, we utilized black POR 15 Rust Preventative Coating to our ground and sides of the the place a lot of the rust was discovered.
Additionally, to forestall new rust from forming, we handled and sealed with silicone and fibreglass any current holes on the within and out of doors of the van.

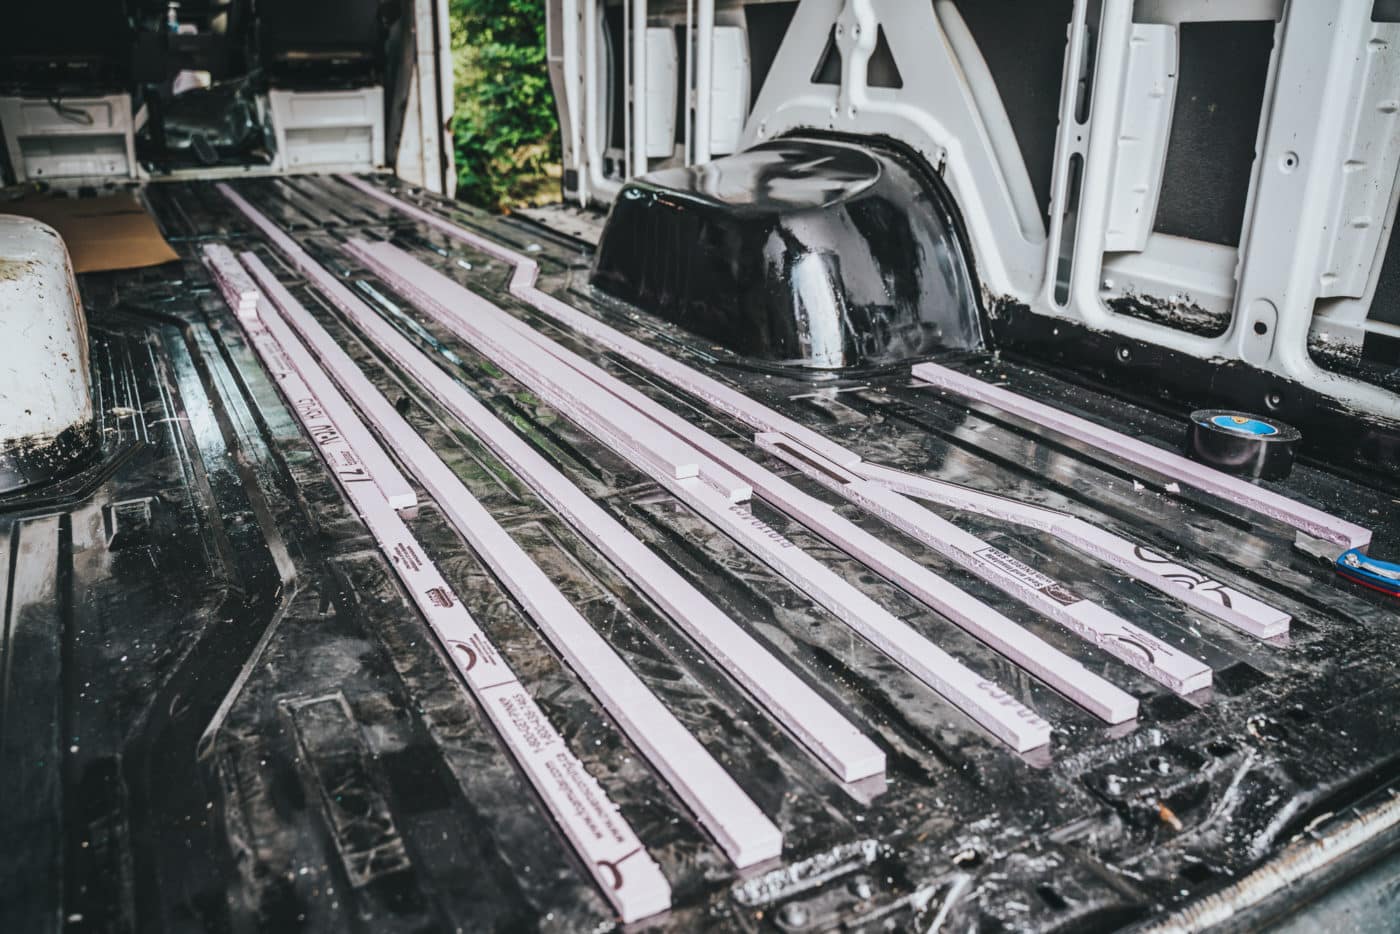
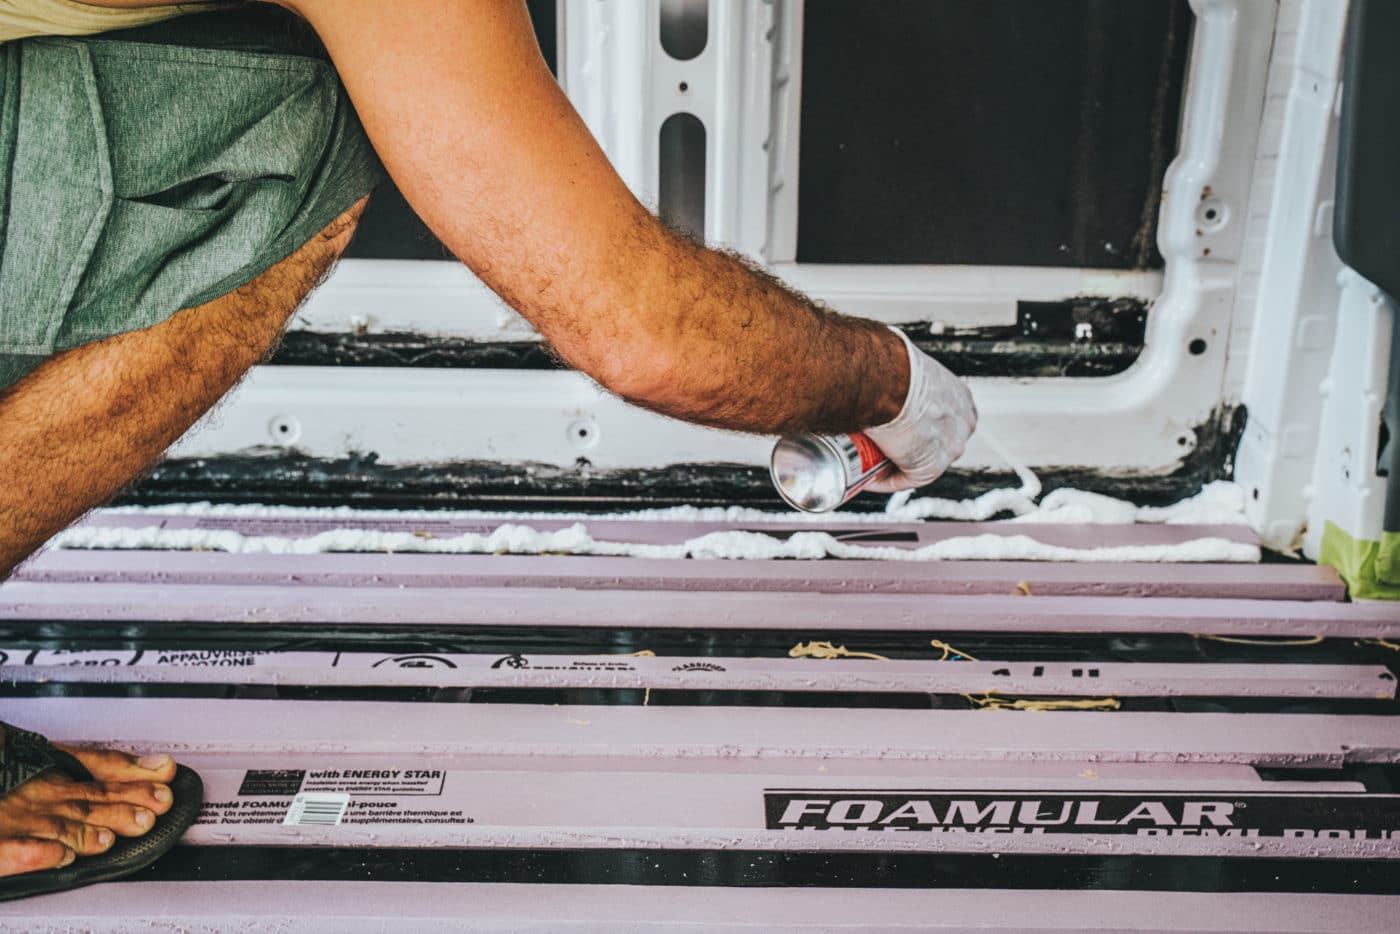
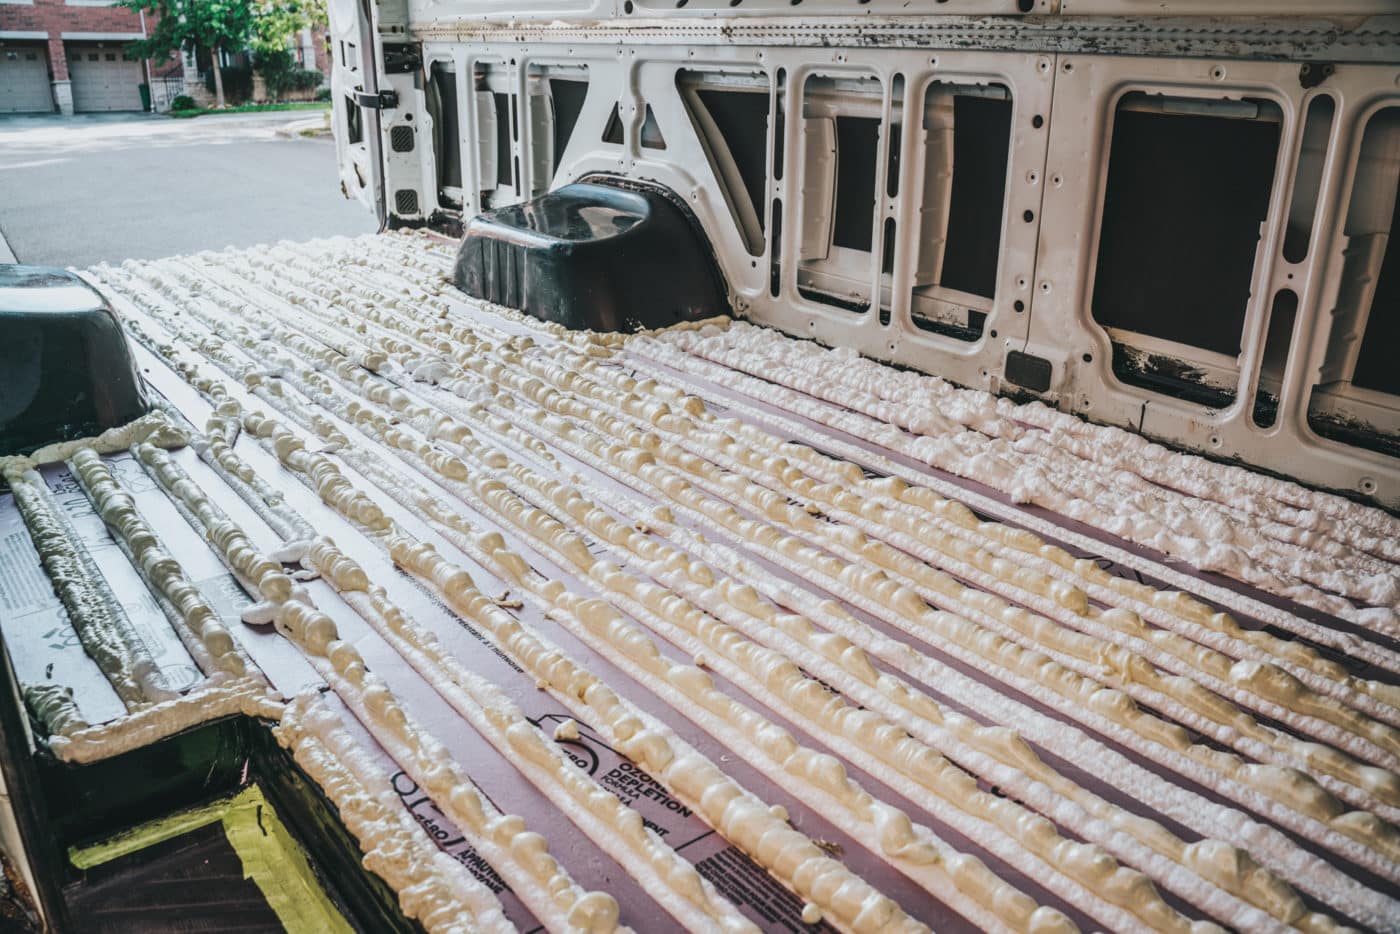
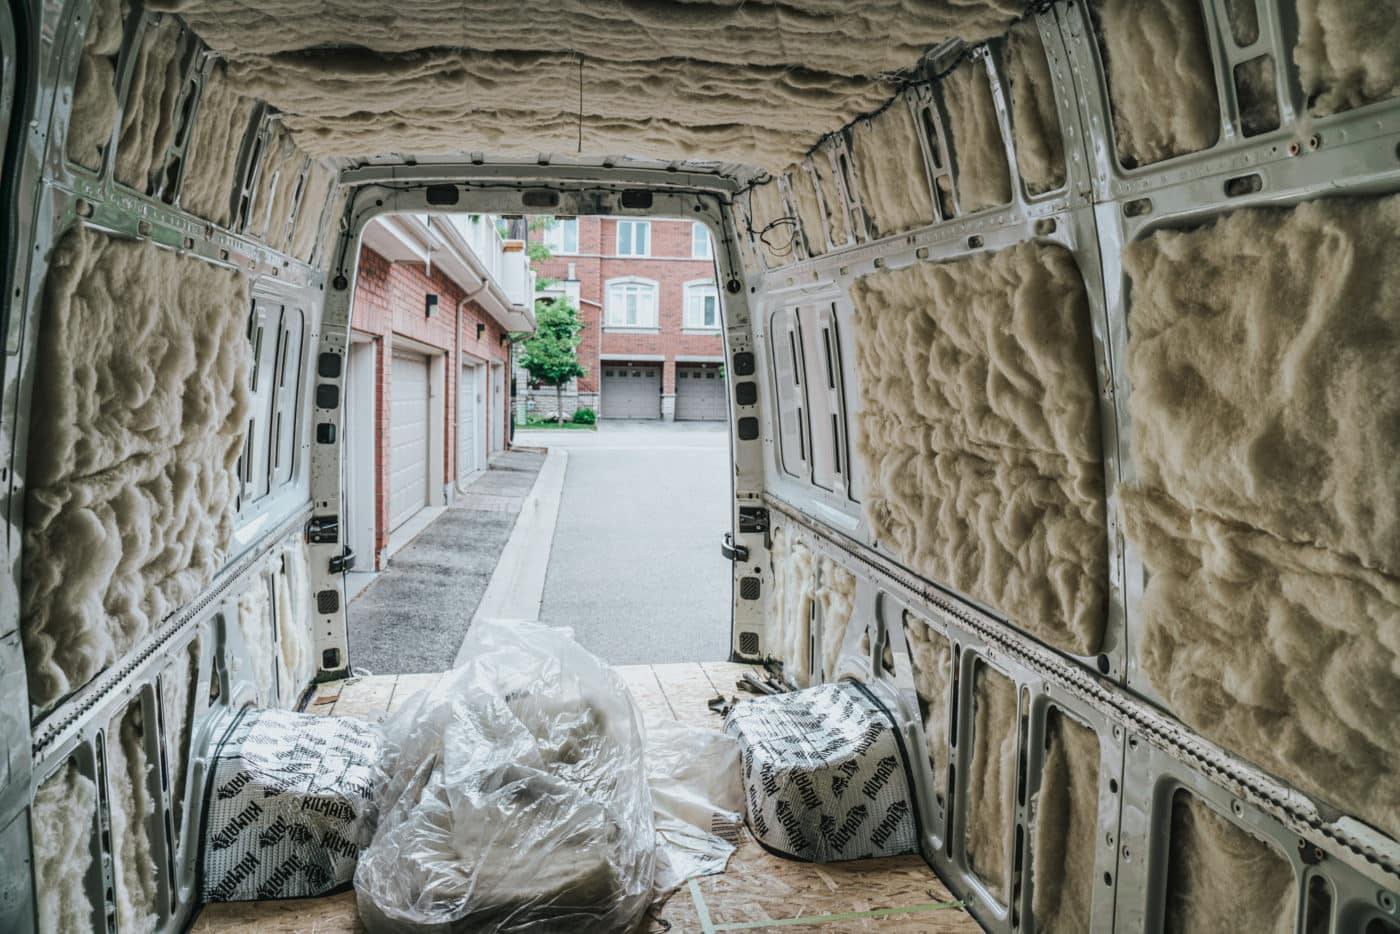
Insulation
Time Spent: 5 days
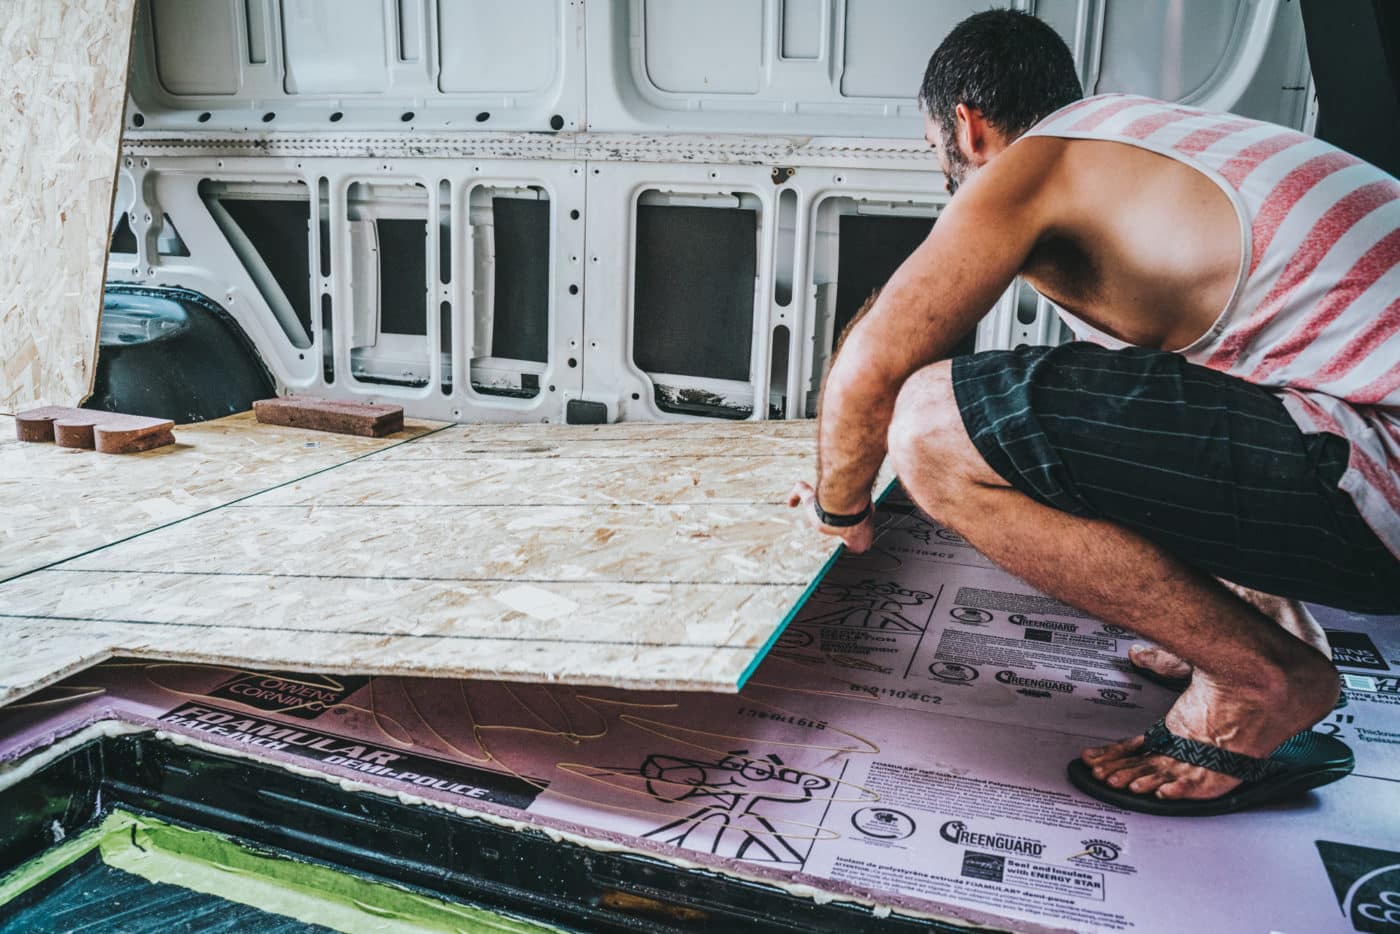
Flooring
We laid 3 layers of ground insulation that offered an total insulation score of R7, throughout our van conversion.
-
- Layer 1: ½” Inflexible Insulation to fill the ridges of the ground and Nice Stuff Spray Foam in between the inflexible insulation to cowl the complete ground.
- Layer 2: ½” Inflexible Insulation on prime of the primary layer to extend the R-value of the ground insulation.
- Layer 3: 7/16 OSB Plywood Subfloor connected to the inflexible insulation utilizing inflexible board adhesive
- Layer 4: EVP Flooring (extra on that beneath)
Partitions/Ceiling
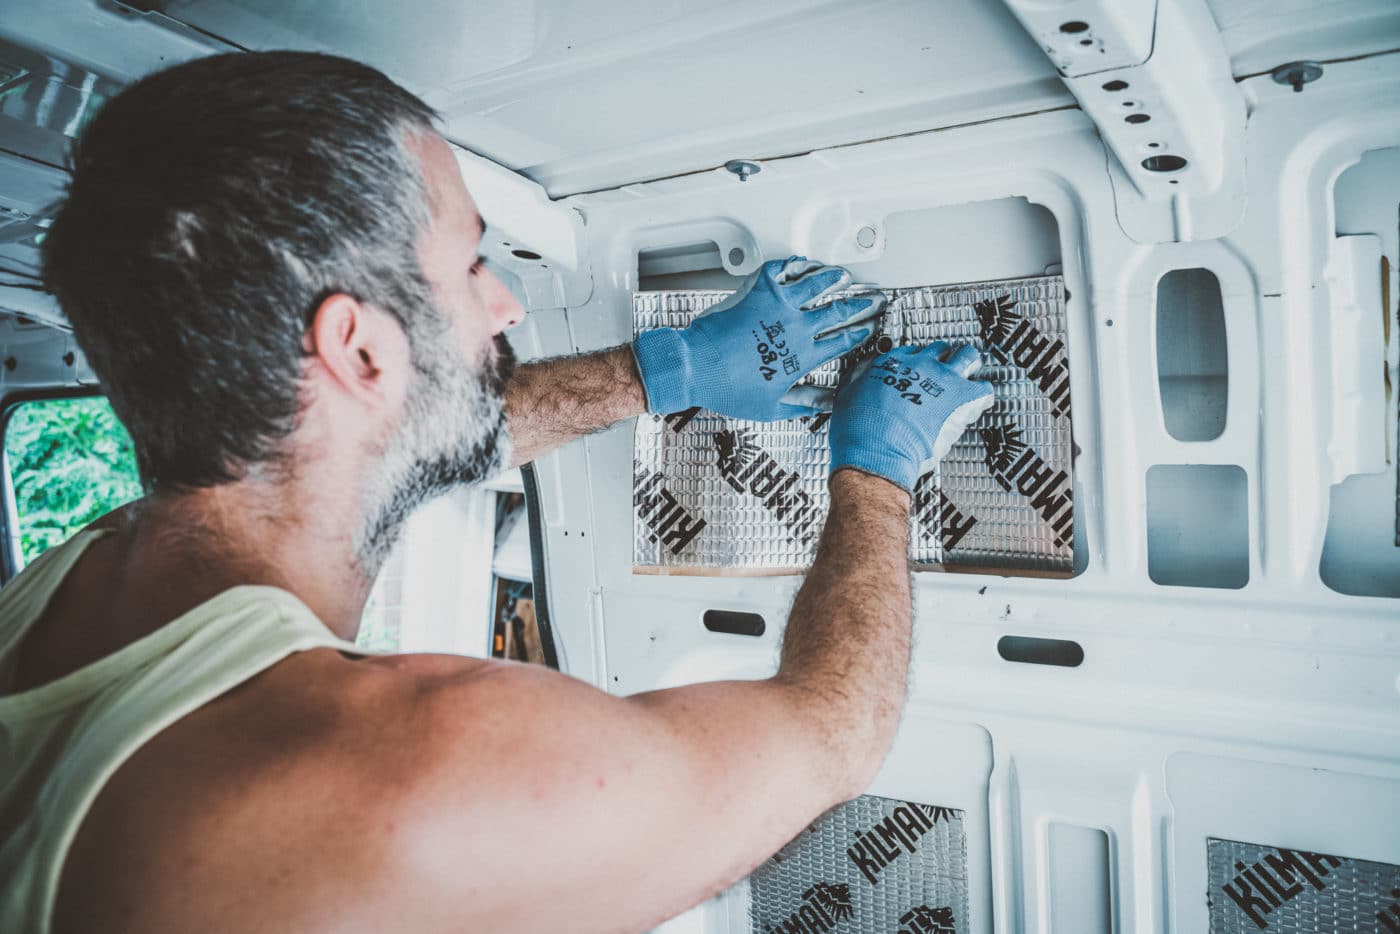
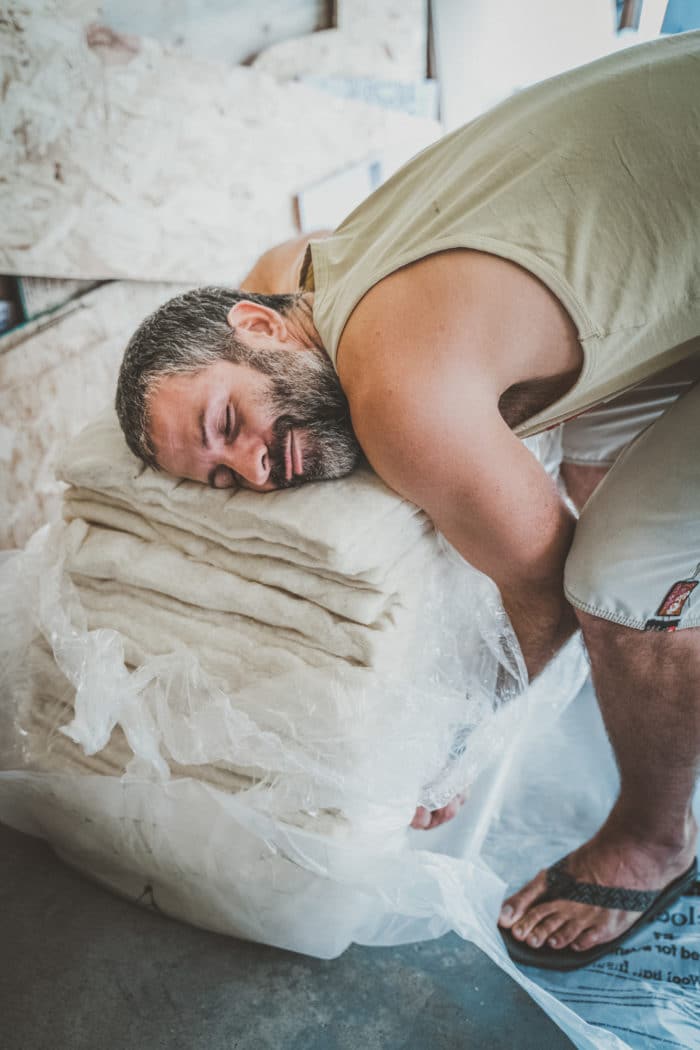
We opted to insulate the partitions and ceiling with Havelock Wool, a pure product that provided an insulation score of R7, had no off-gassing and provided anti-mould, anti-fire, sound-dampening properties.
Along with Havelock Wool, we added a layer of Killmat Sound Deadening to scale back vibrations and enhance soundproofing contained in the van.
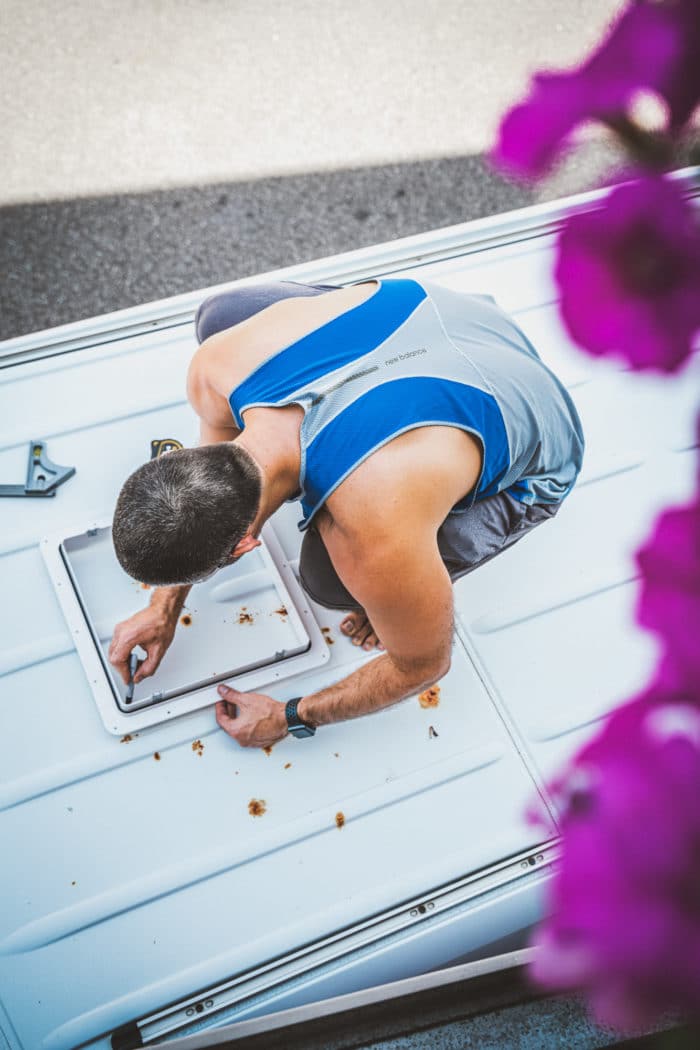
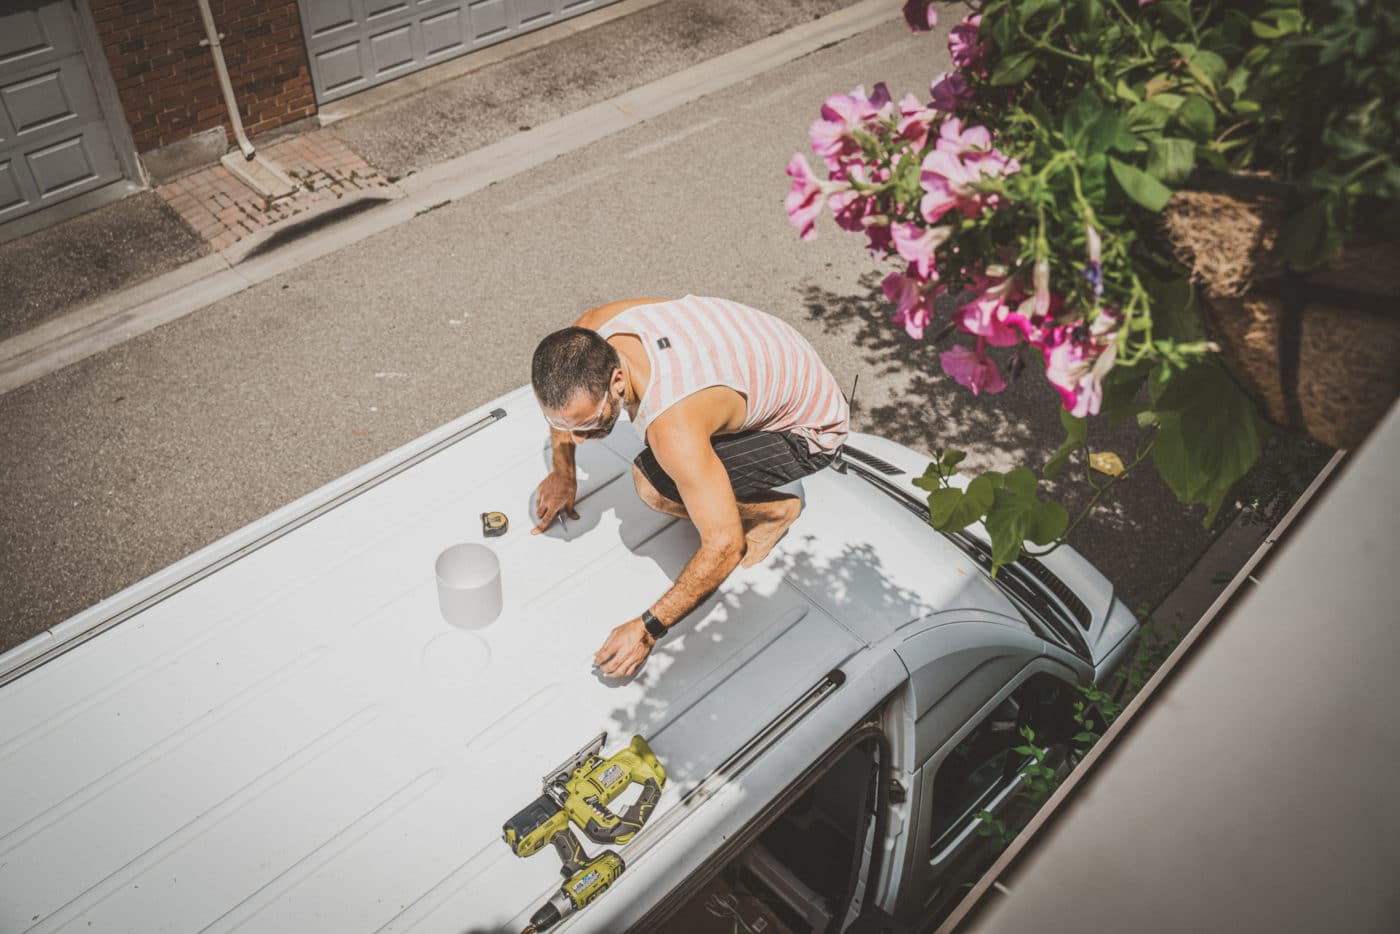
Home windows
Time Spent: 3 days
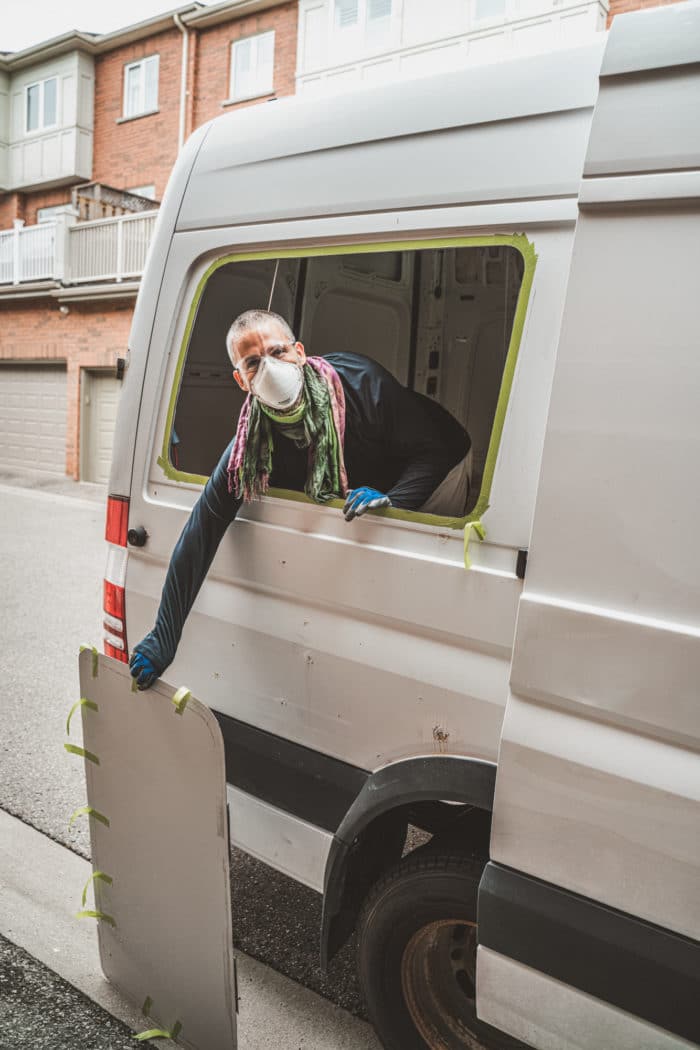
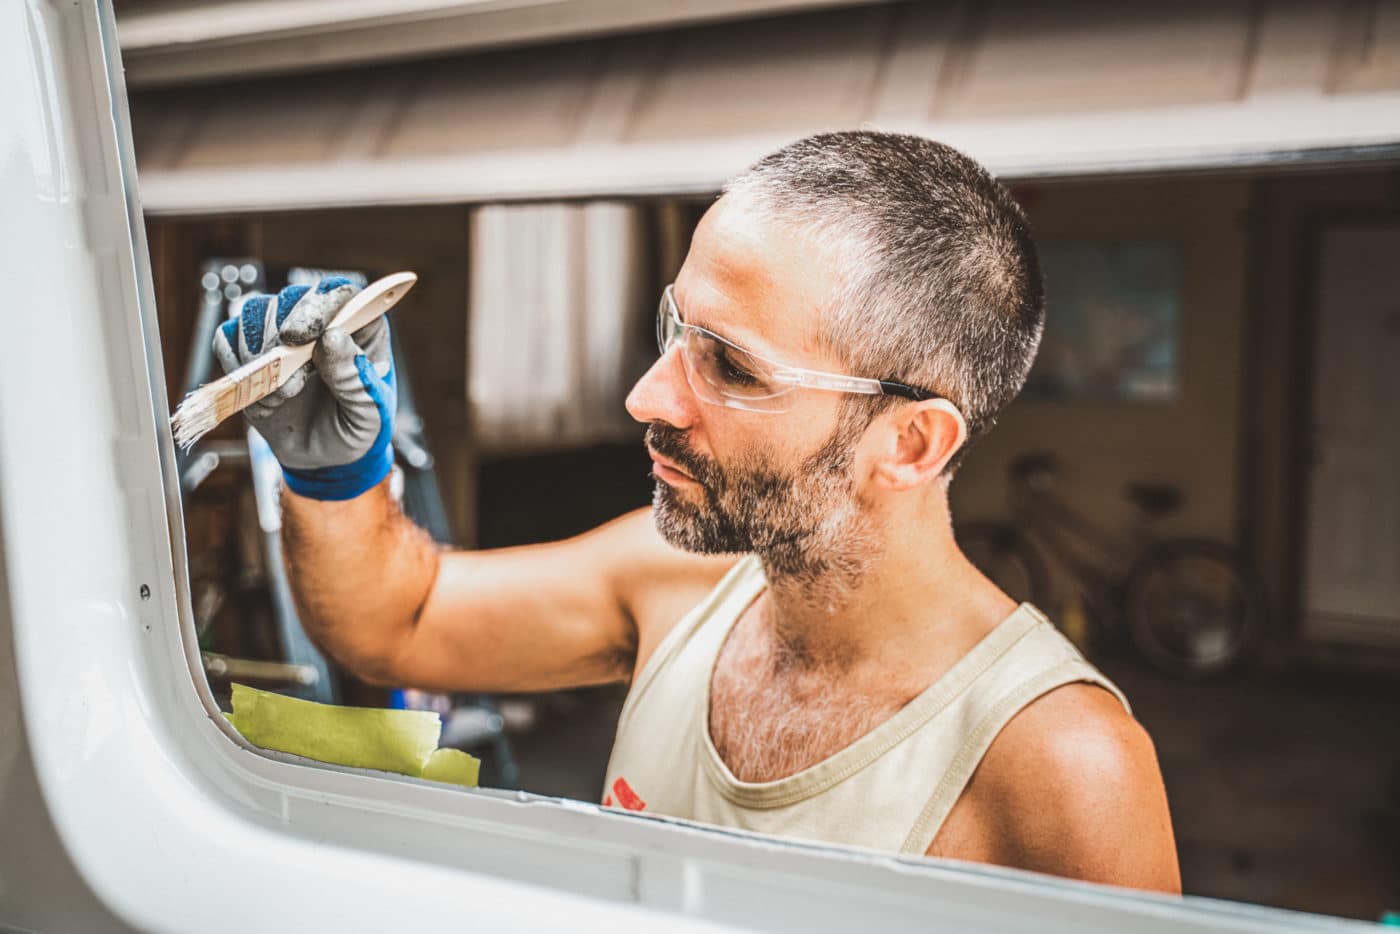
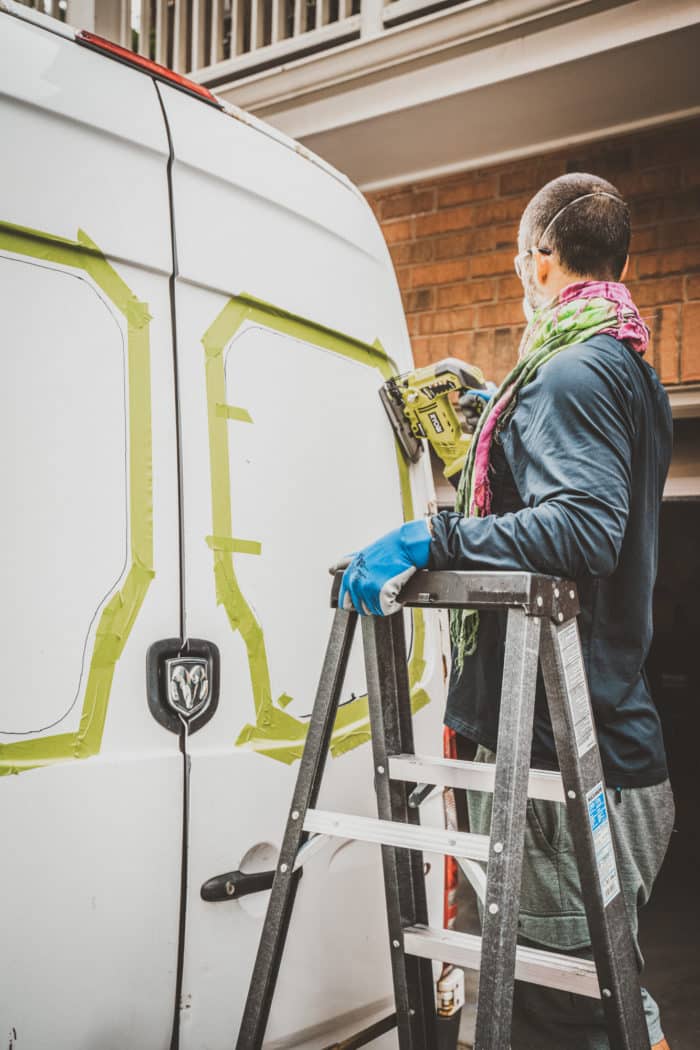
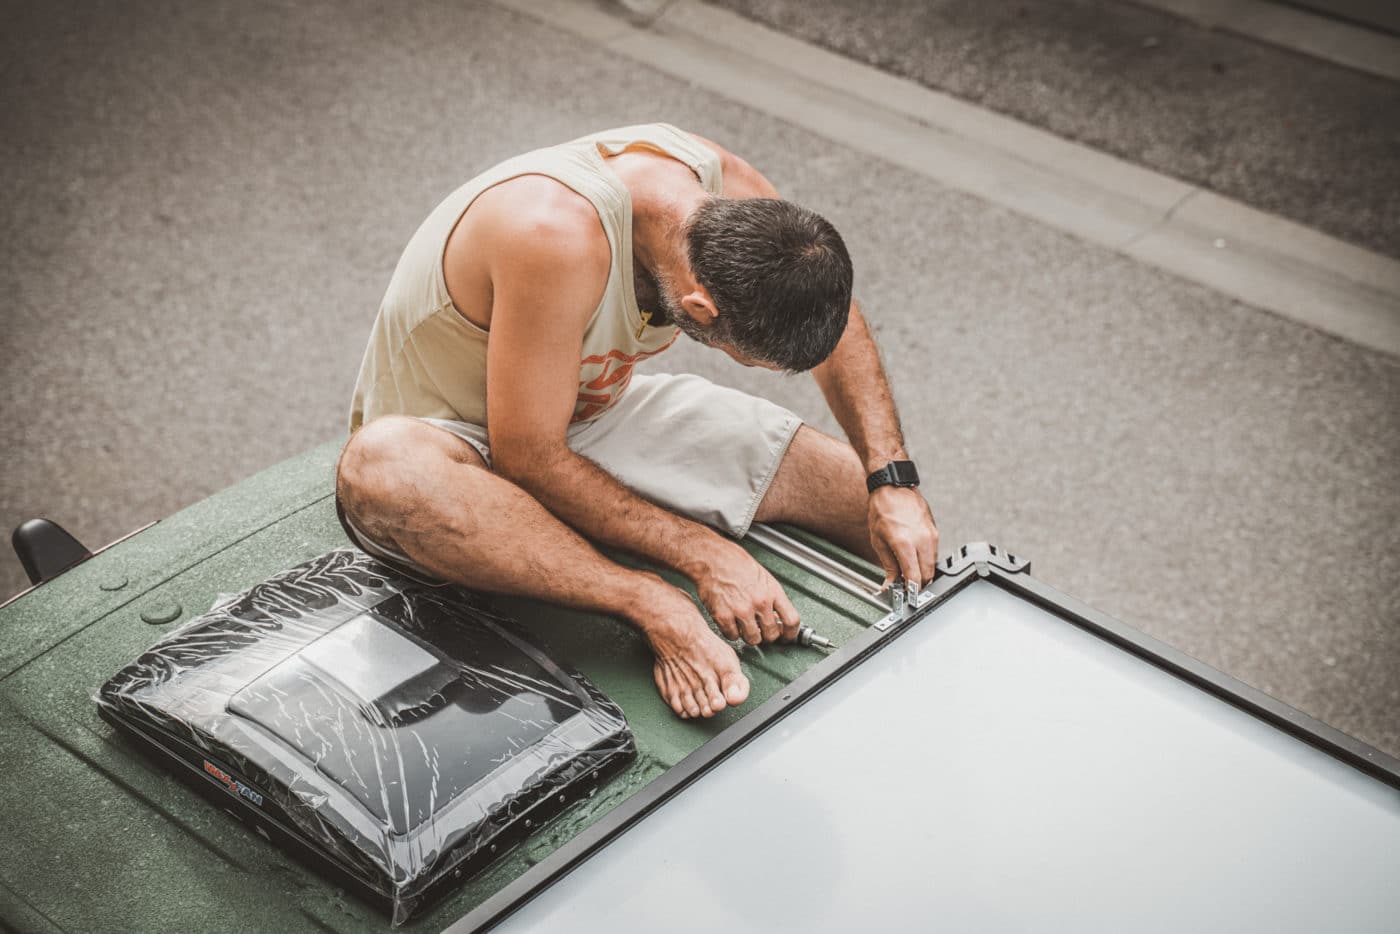
Our camper van construct didn’t include any manufacturer-installed home windows.So, we put in a number of aftermarket home windows to assist us get a 180-degree view from contained in the van.
We added:
– 2 x CR Lawrence T Vent home windows for the perimeters
- 2 x CR Lawrence Again home windows for the again


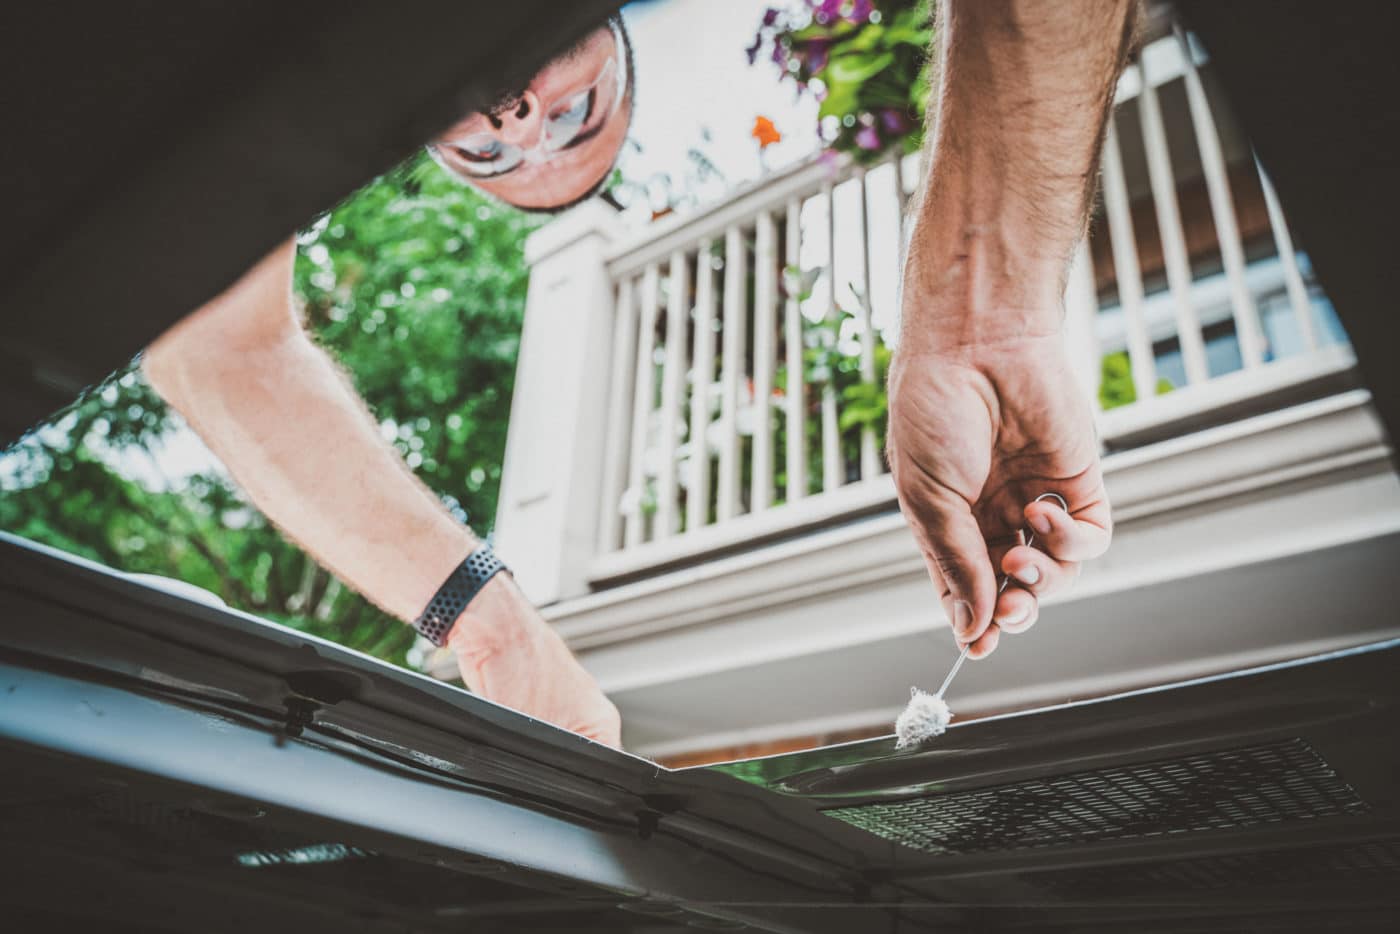
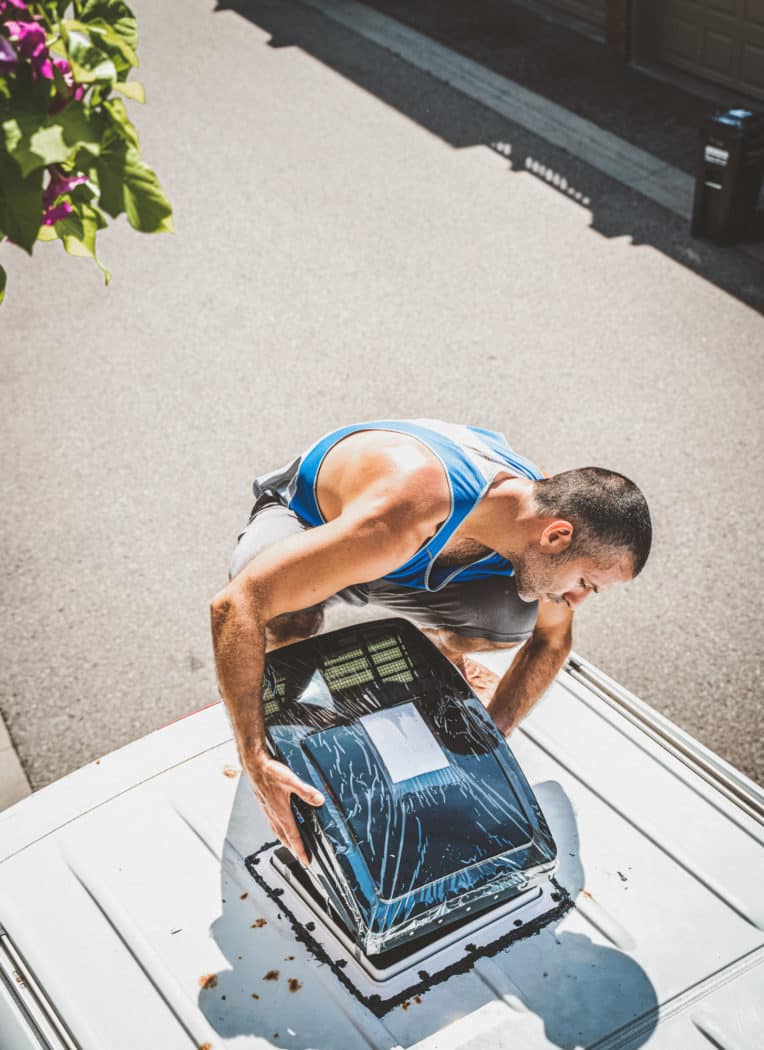
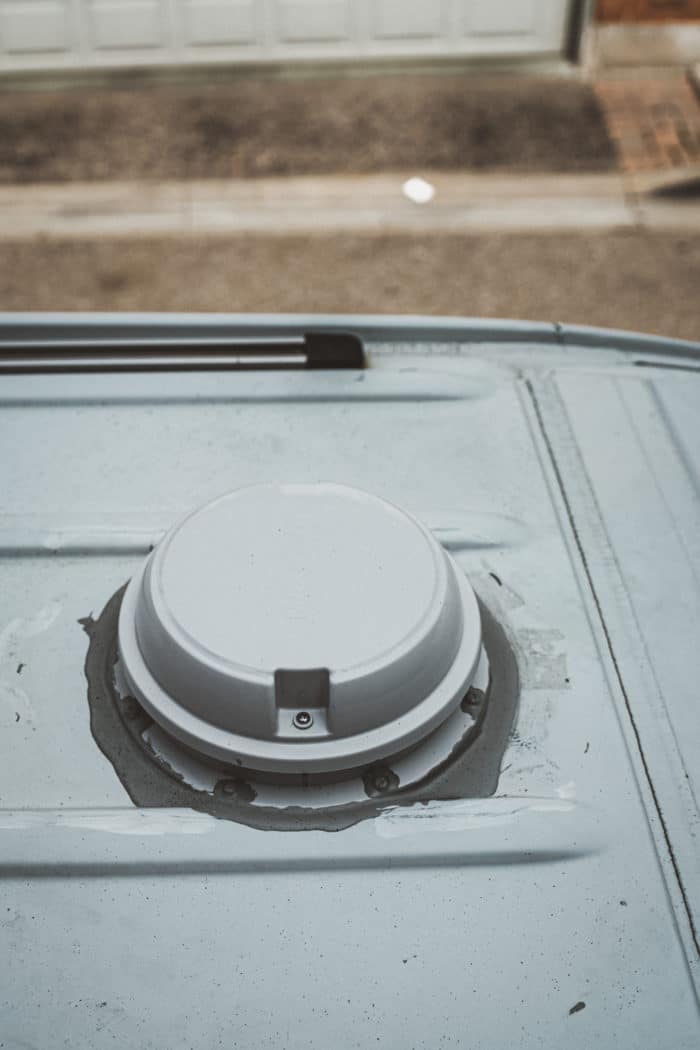
Followers
Time Spent: 1.5 days
To enhance airflow and circulation in our van, we put in 3 followers:
- 2 x Deluxe MaxxAir Followers – one within the again, above our mattress, and one within the entrance, within the kitchen space
- 1 x MaxxFan Dome Rest room Fan – so as to add an exhaust to our rest room whereas doubling as a lightweight.
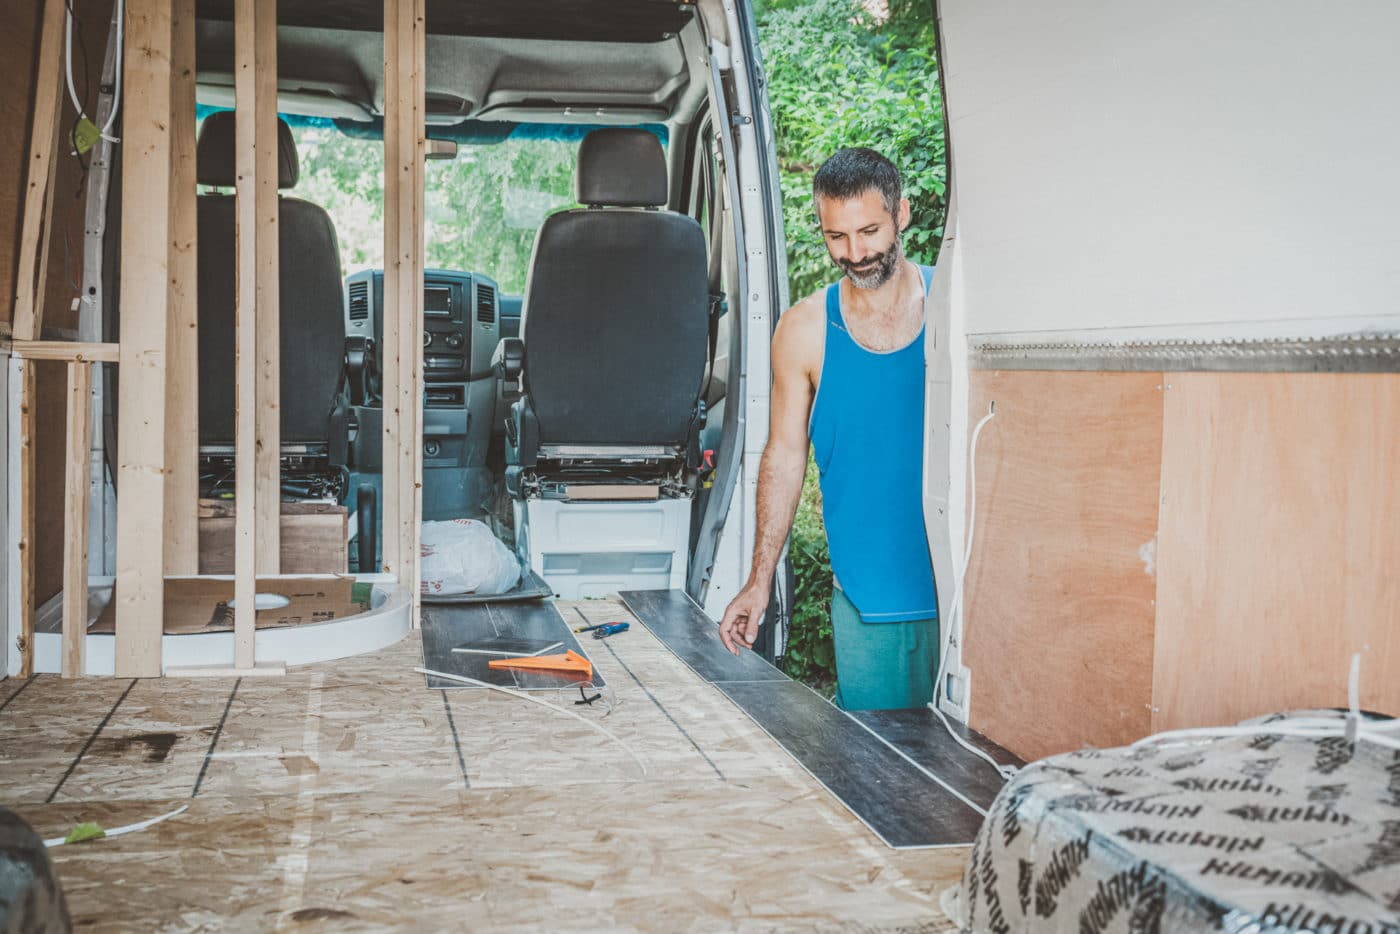
Flooring
Time Spent: 1 day
We put in EVP (Engineered Vinyl Planks) flooring in our van and have been more than happy with its sturdiness and look to this point. The tongue and groove mechanism was tremendous straightforward to put in and is very easy to handle on a day after day foundation. It’s waterproof and scratch resistant.
The one factor we don’t love about our flooring is that it does get fairly chilly within the winter, regardless of all of the insulation we put beneath it. In hindsight, we must always have thought of including heated flooring to the van, however now we made do with carrying socks or slippers.
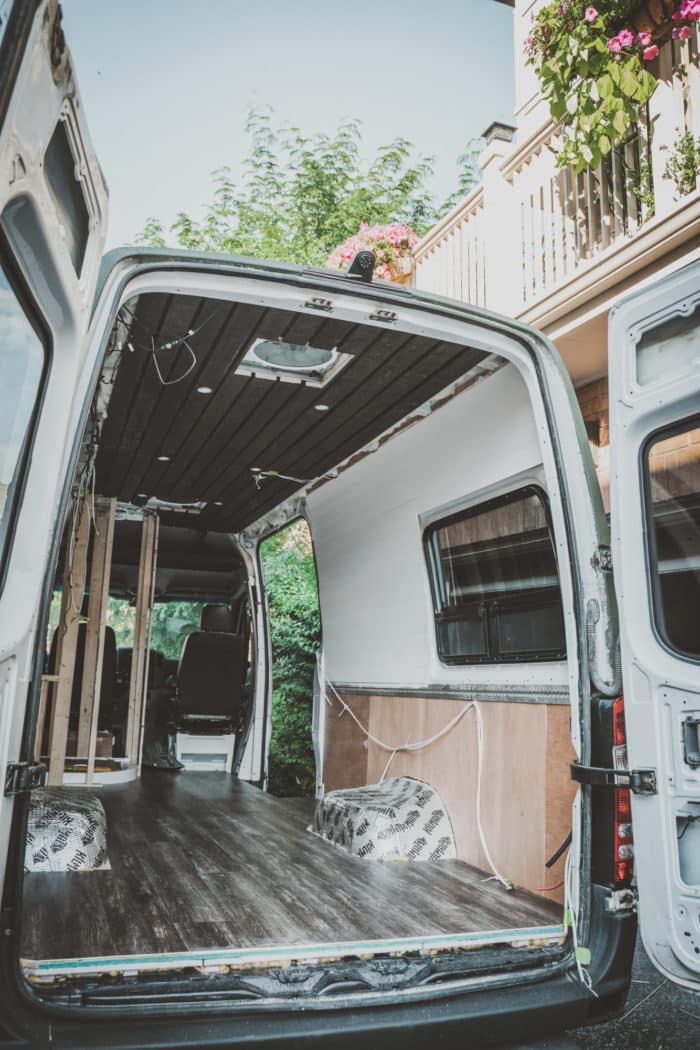
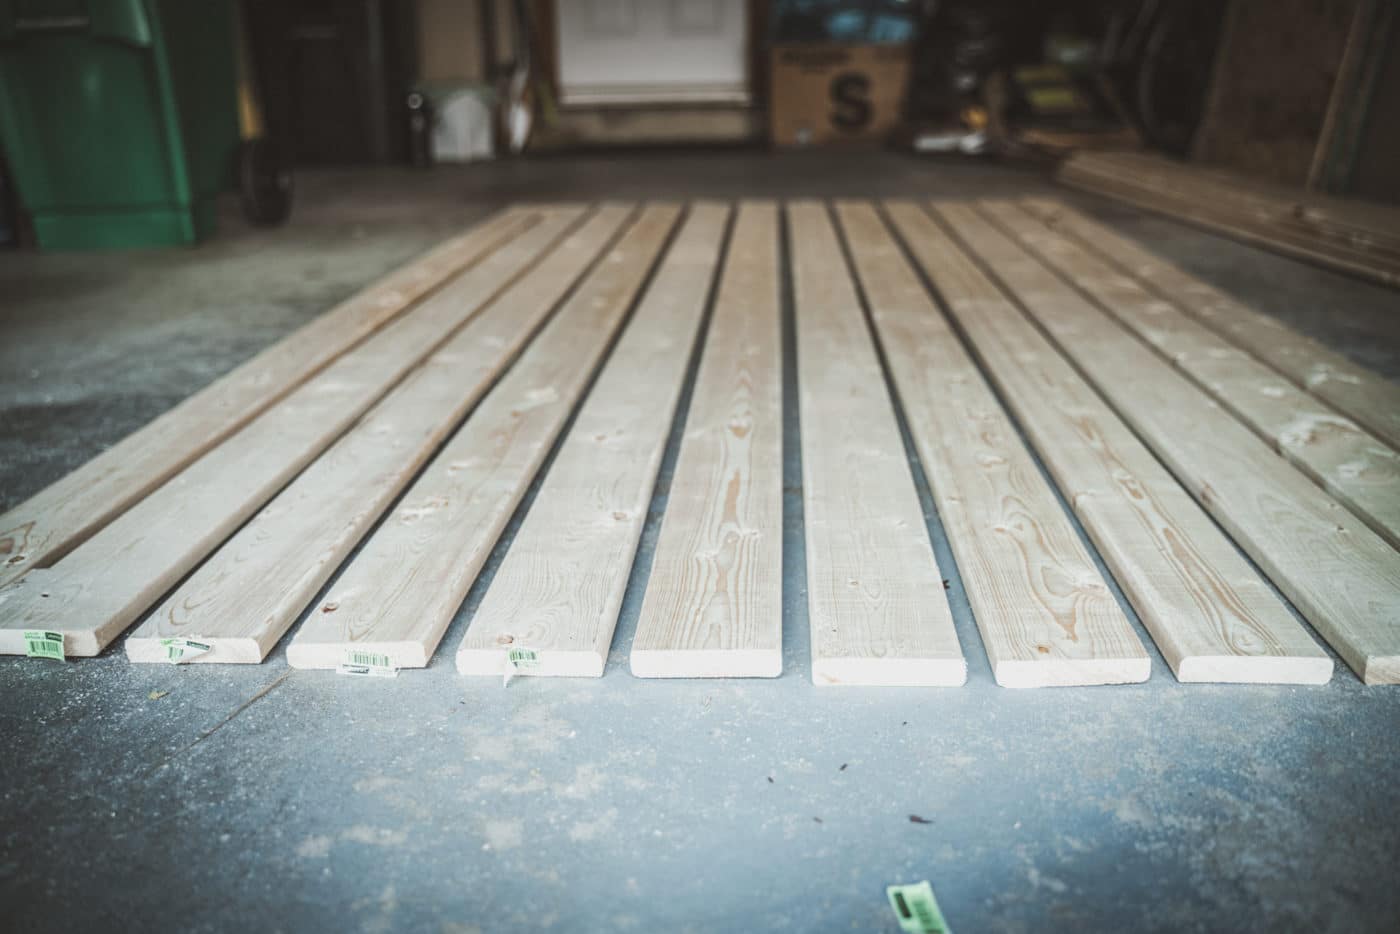
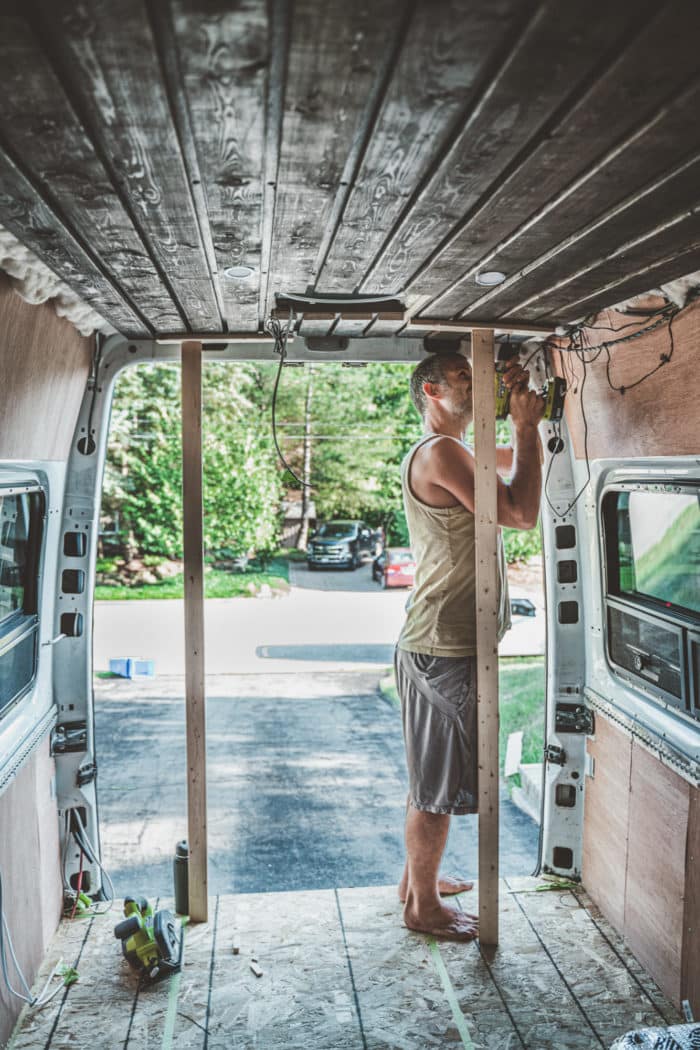
Ceiling
Time Spent: 4 days
For our ceiling, we used the design inspiration from fellow van lifers, Vanlife Sagas. We used 1” Wooden Planks stained with Wooden Stain that we connected to a chunk of stained Lauan Plywood.
Additionally, we connected the ceiling to the physique of the van utilizing self-tapping screws.
We needed to create 2 ceilings. One which was connected to the ceiling of our van and the opposite one which we connected beneath our elevator mattress. So, the identical ceiling type would proceed when our elevator mattress was up.
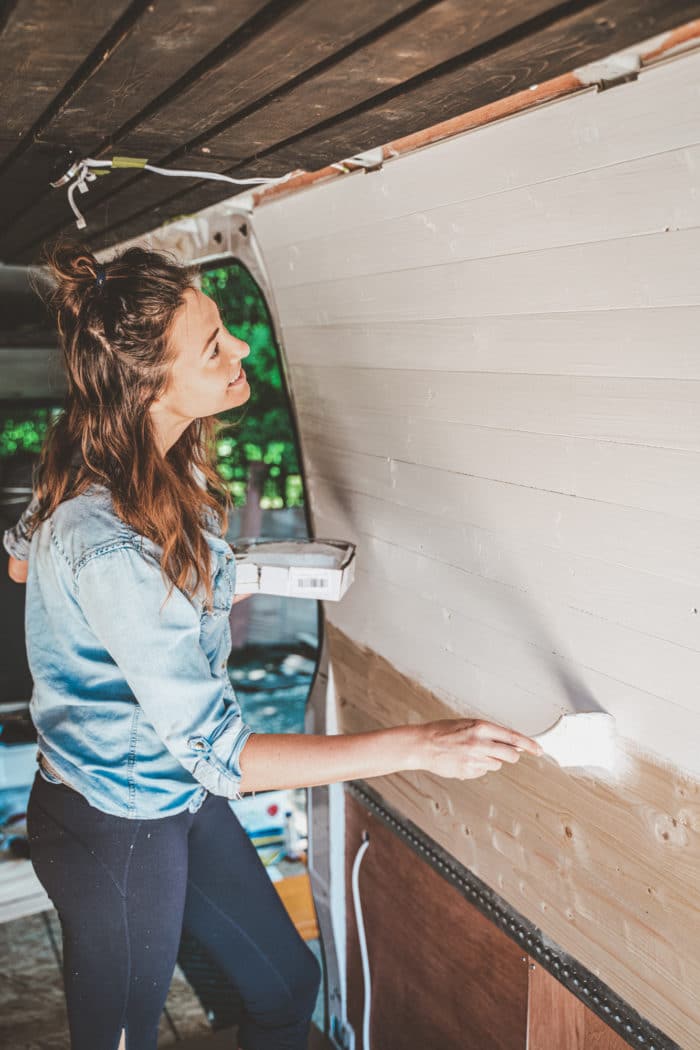
Partitions
Time Spent: 2 days
We used 7/16” Lauan Plywood to cowl the Havelock Wool insulation on the partitions and used 7/16” Tongue & Groove Shiplap Slats for the wall decor. We painted the shiplap with Flat White Exterior Paint.
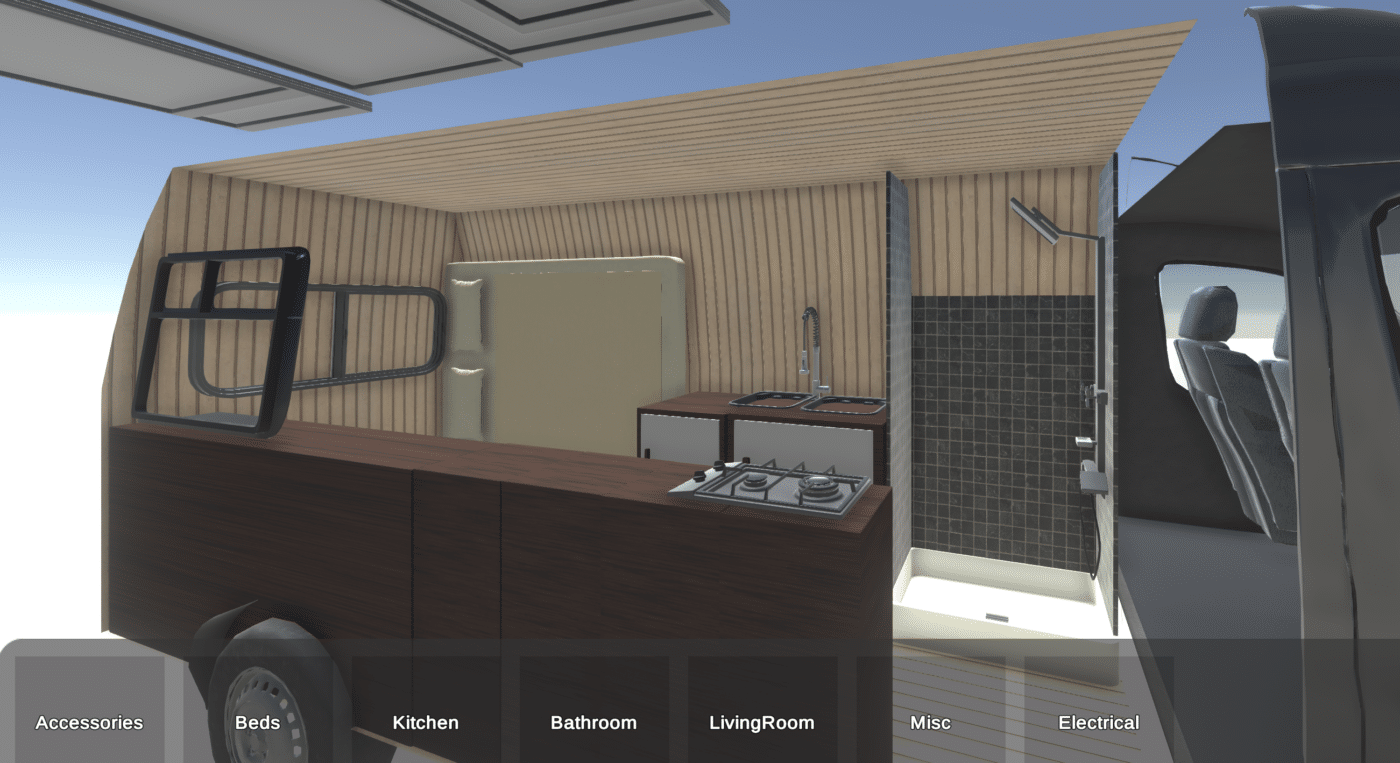
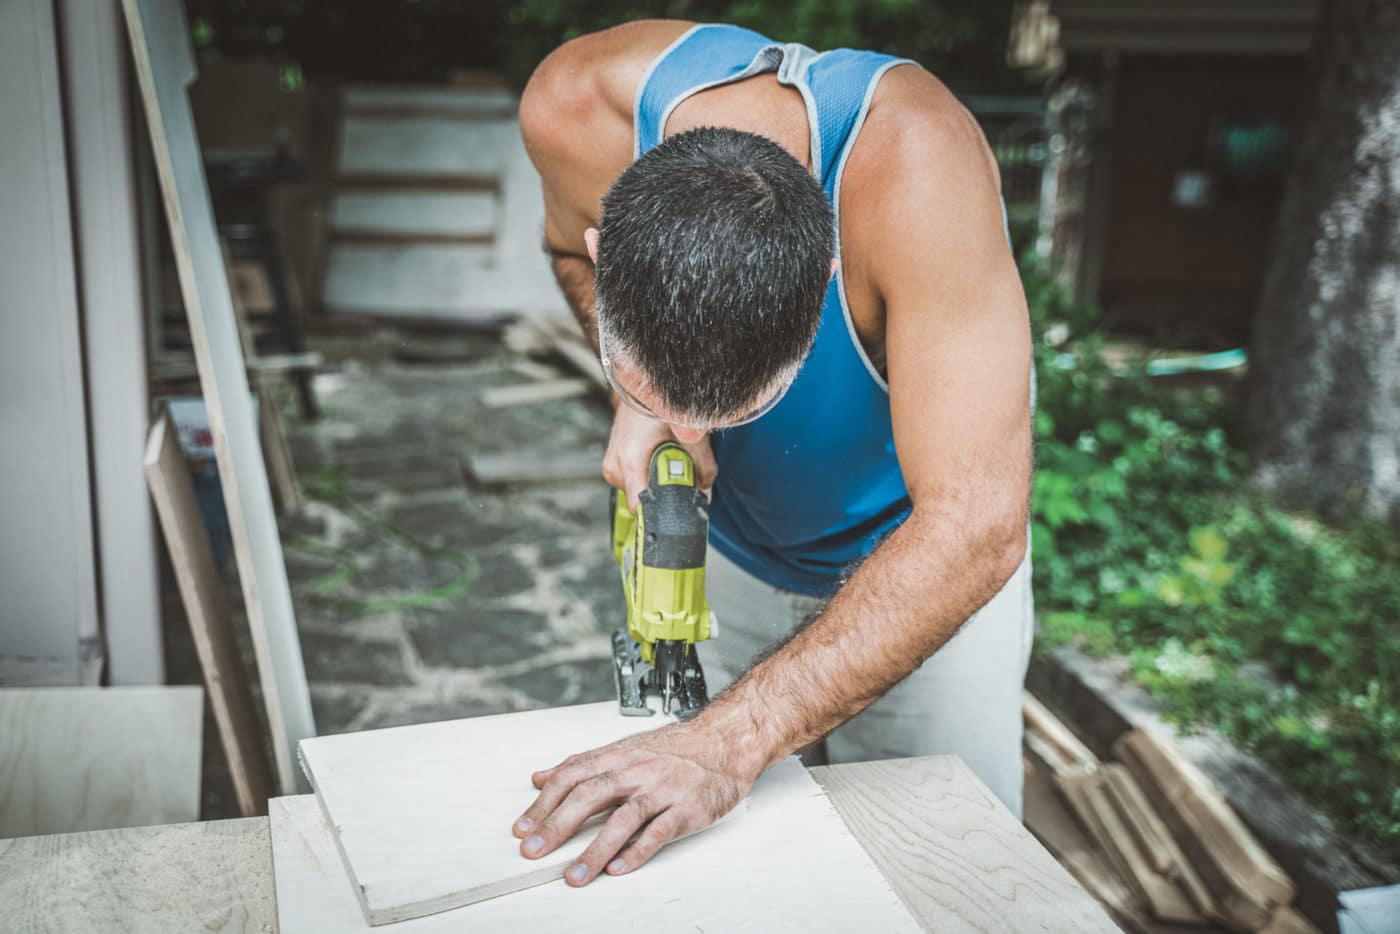
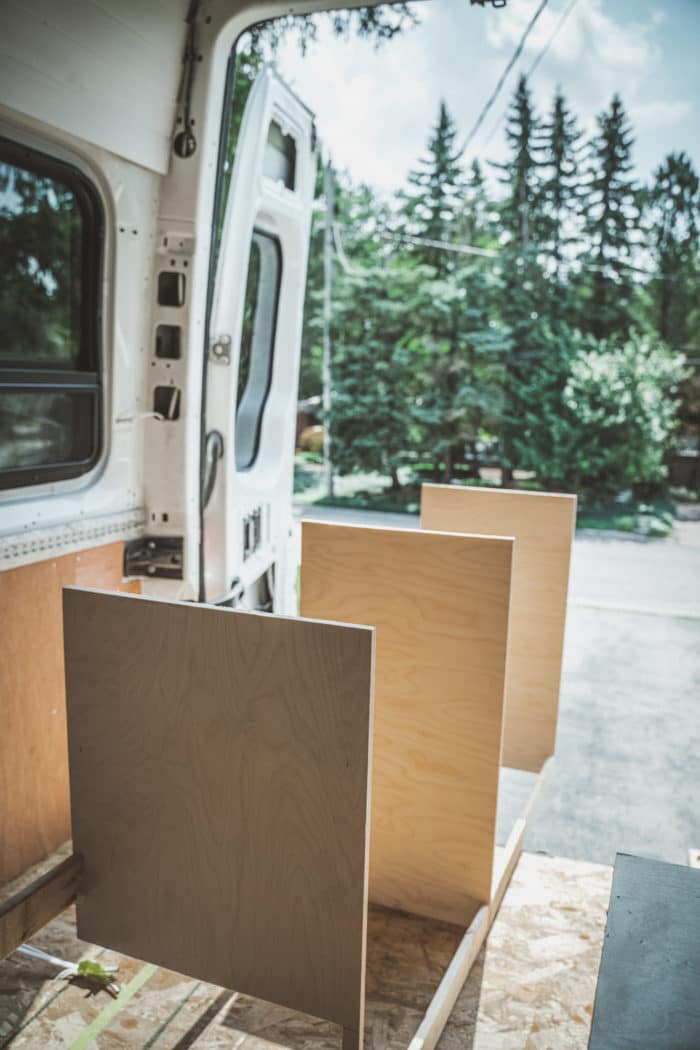
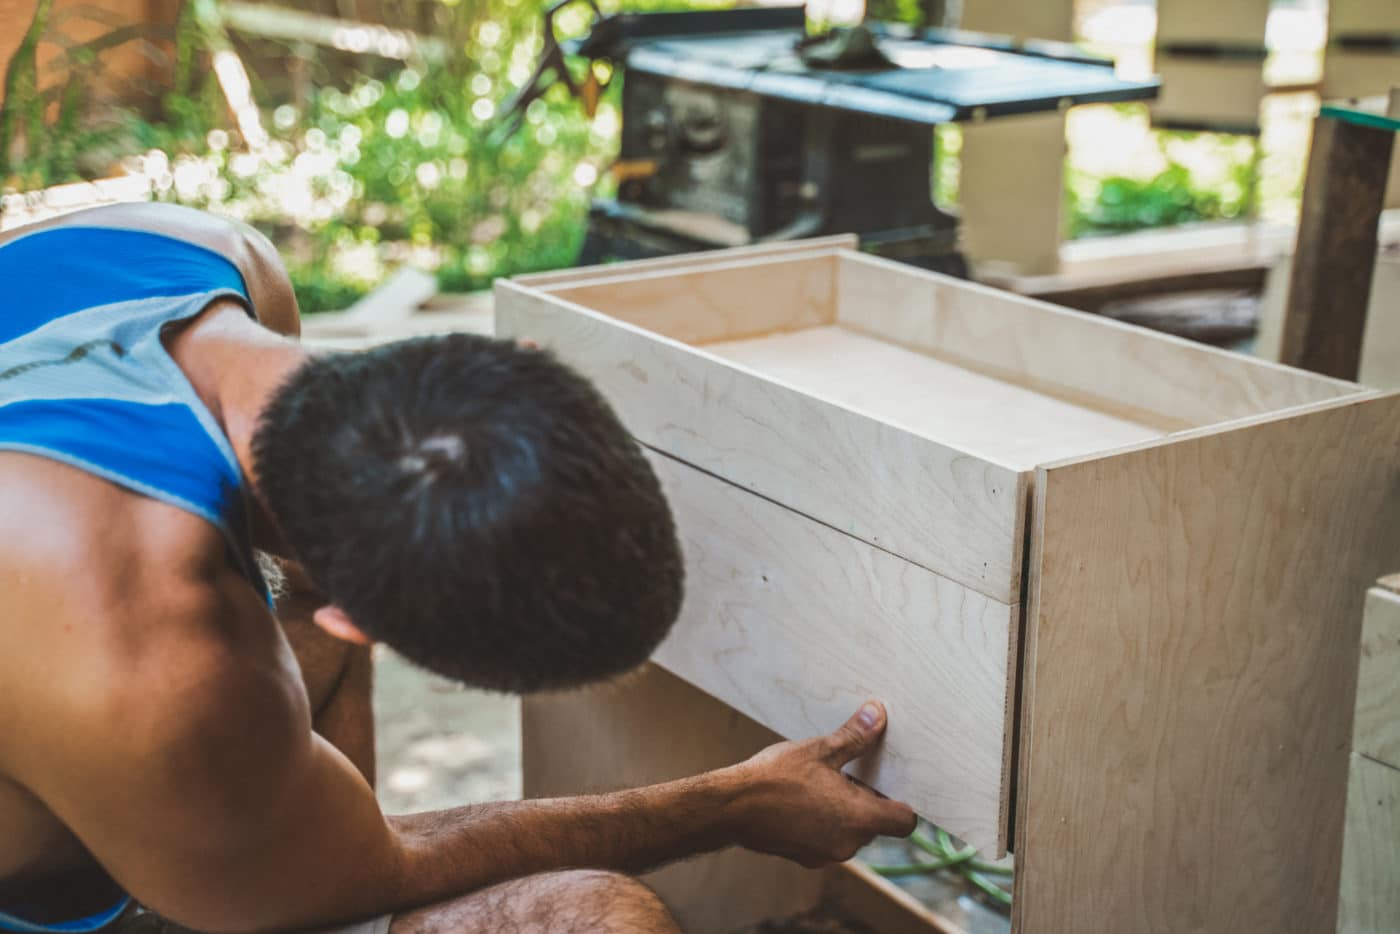
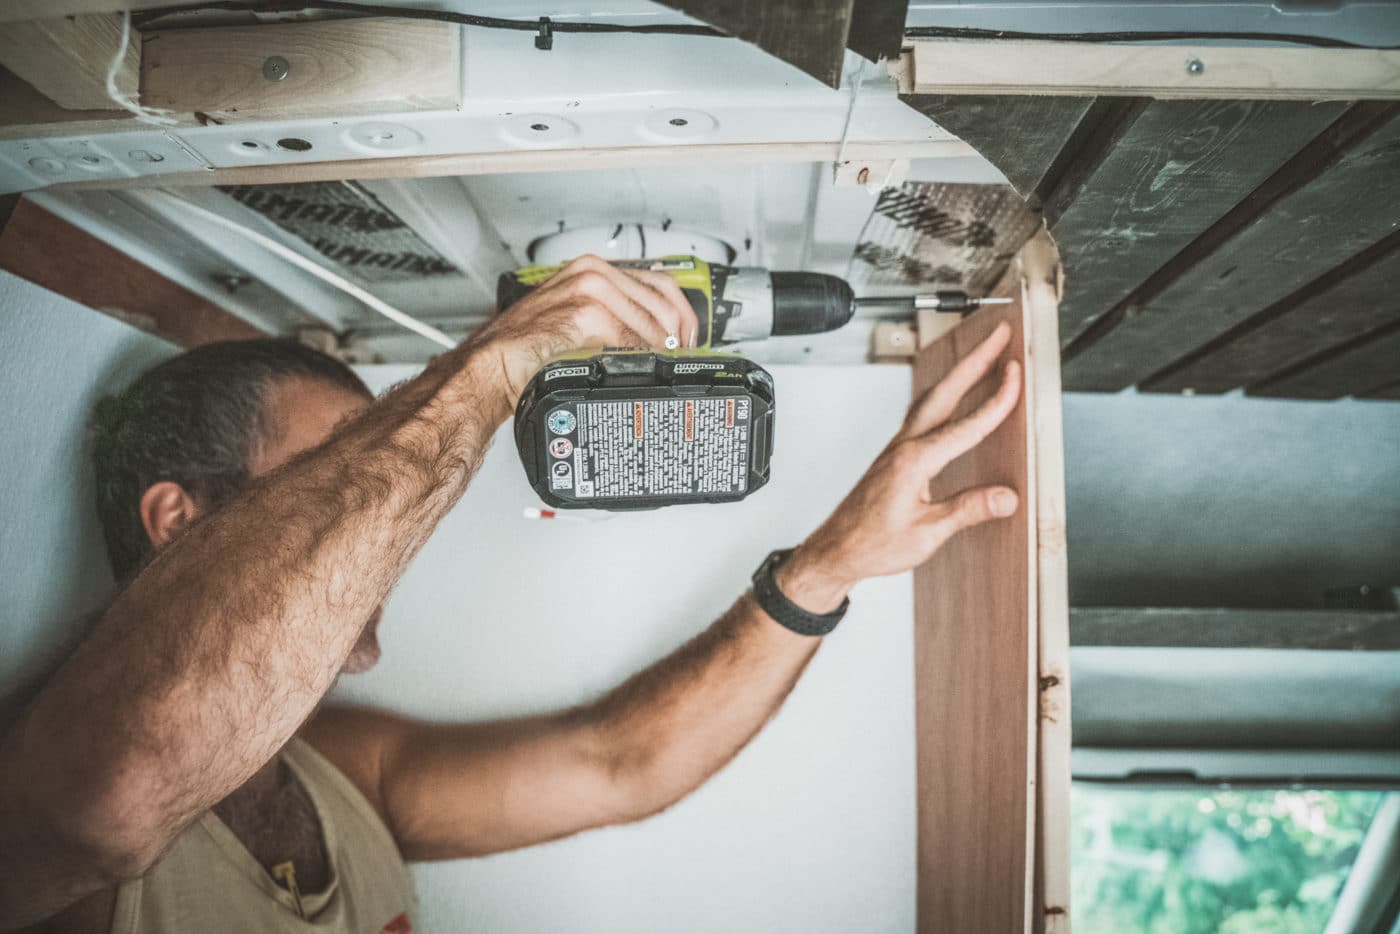
Cupboards
Time Spent: 2 weeks
We constructed 4 units of cupboards for our van.
- 52”x 16” 8-drawer dresser that lives beneath our desk and homes most of our garments and footwear,
- 60” x 16” kitchen cupboard that features 4 drawers, storage cupboards, a pull-out pantry, and a couple of devoted drawers for our electronics
- 53”x 24” kitchen cupboard that homes our fridge and sink arrange, and
- 53” x 12” overhead cupboard that’s used for our management centre, our toiletries and different storage
We constructed all cupboards from the bottom up, utilizing 3/8” Baltic Birch plywood, glue and pocket screws. The preliminary construct took only some days, however the ending touches took endlessly.
In hindsight, we must always have constructed the cupboards utilizing ½ “ plywood as an alternative of ⅜” plywood, as we weren’t capable of finding ⅜” wooden screws to match the plywood and dealing with longer screws proved to be tougher.
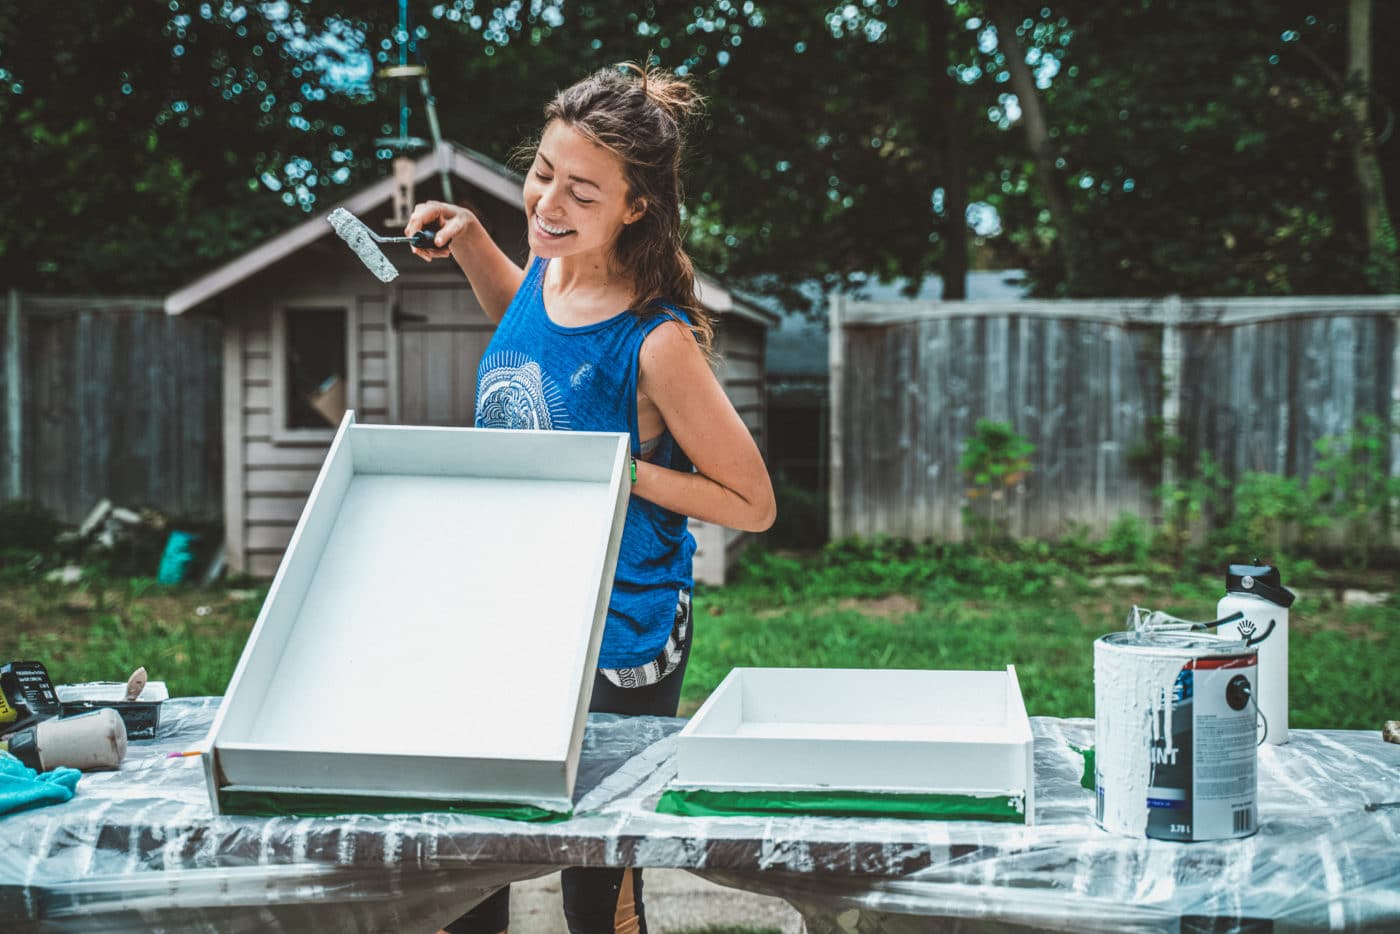
As soon as the body was constructed, Max constructed 10 particular person drawers that will slide into the body. Additionally, he constructed 2 cabinets that will sit inside among the cupboards and reduce the fronts for the cupboard doorways. I then sanded and painted the body, the doorways, and every particular person drawer with Acrylic Semi Gloss White Cupboards Paint. It took 3 coats and some days of labor to get that shiny good white end we wished.
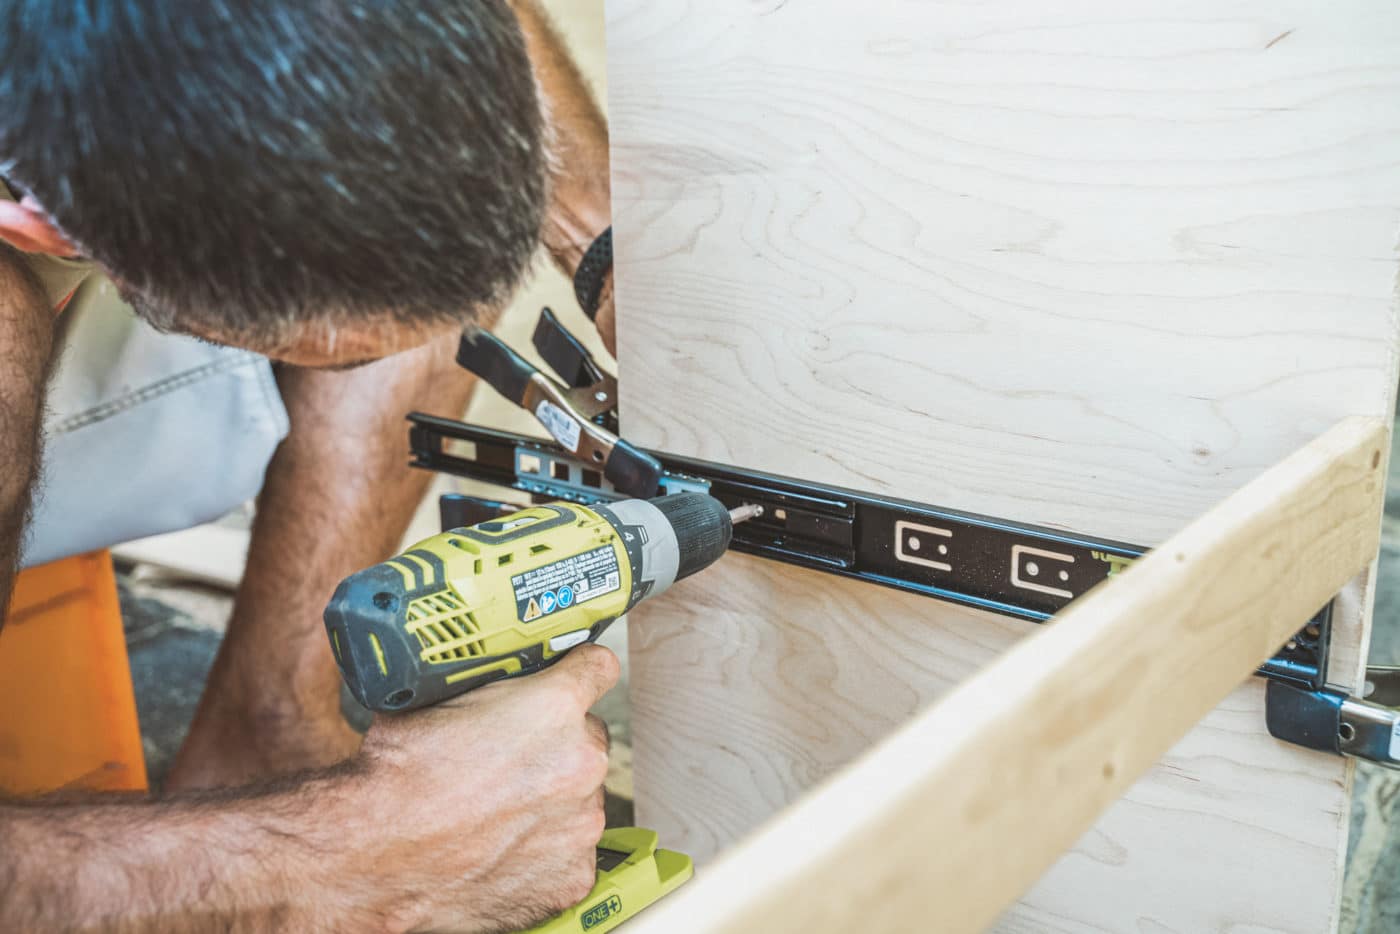
The largest problem with our cupboards was with the slides for the drawers. We initially wished to have push-to-open slides that will change the necessity for magnets and/or different latches. However after a number of days of attempting to suit them in, we realized that these slides have been merely not appropriate for drawers inside a van.
We ended up changing all of the push-to-open slides with common slides and set up cupboard door magnets and latches to assist cease the drawers from opening whereas driving.
We used delicate shut hinges to connect doorways to the cupboards and added 3-3/4″ (96mm) Easy Chamfered Kitchen handles to all drawers and doorways.
Additionally, we put in a headliner shelf above the cab to offer us a bit extra space for storing within the entrance of the van. We used ½” Pine Plywood and the Vancillary DIY Sprinter Van Headliner Shelf Package to suit the shelf into the cab. It was one of many simpler steps in our van build-out.
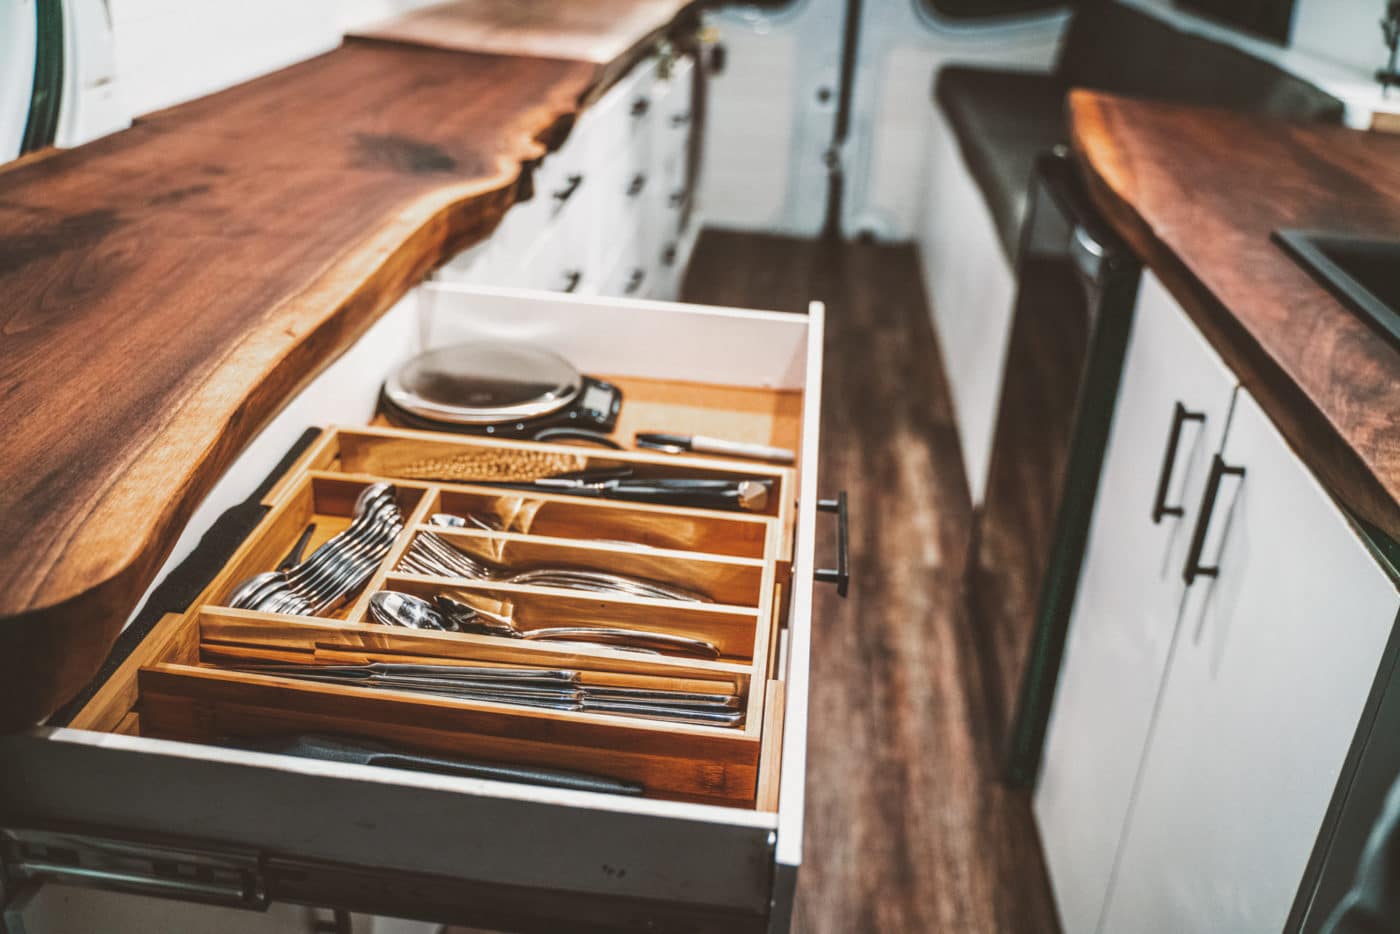
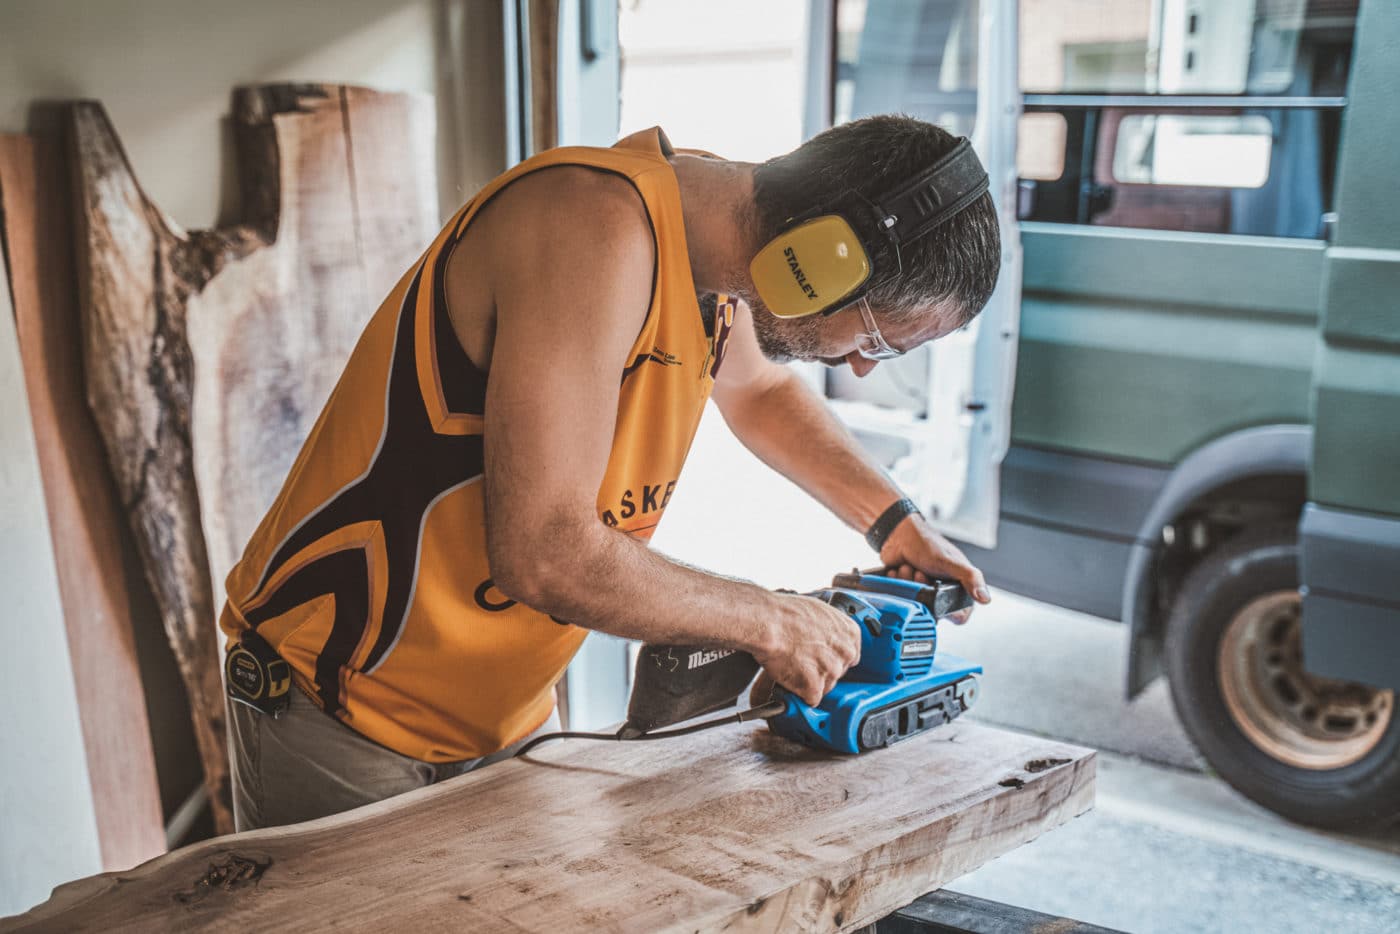
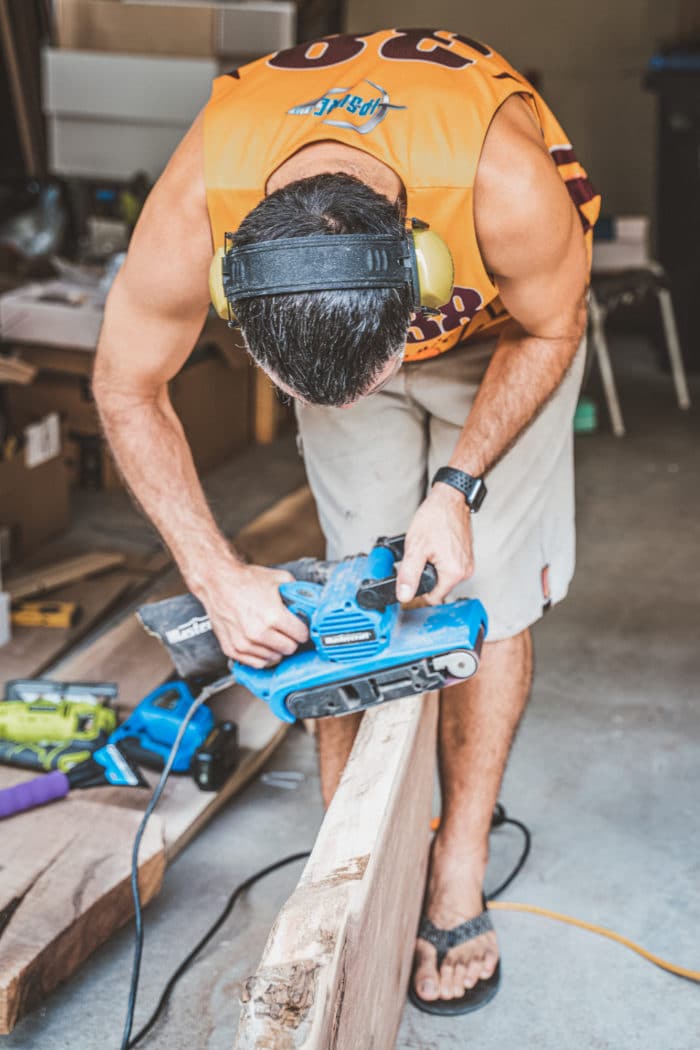
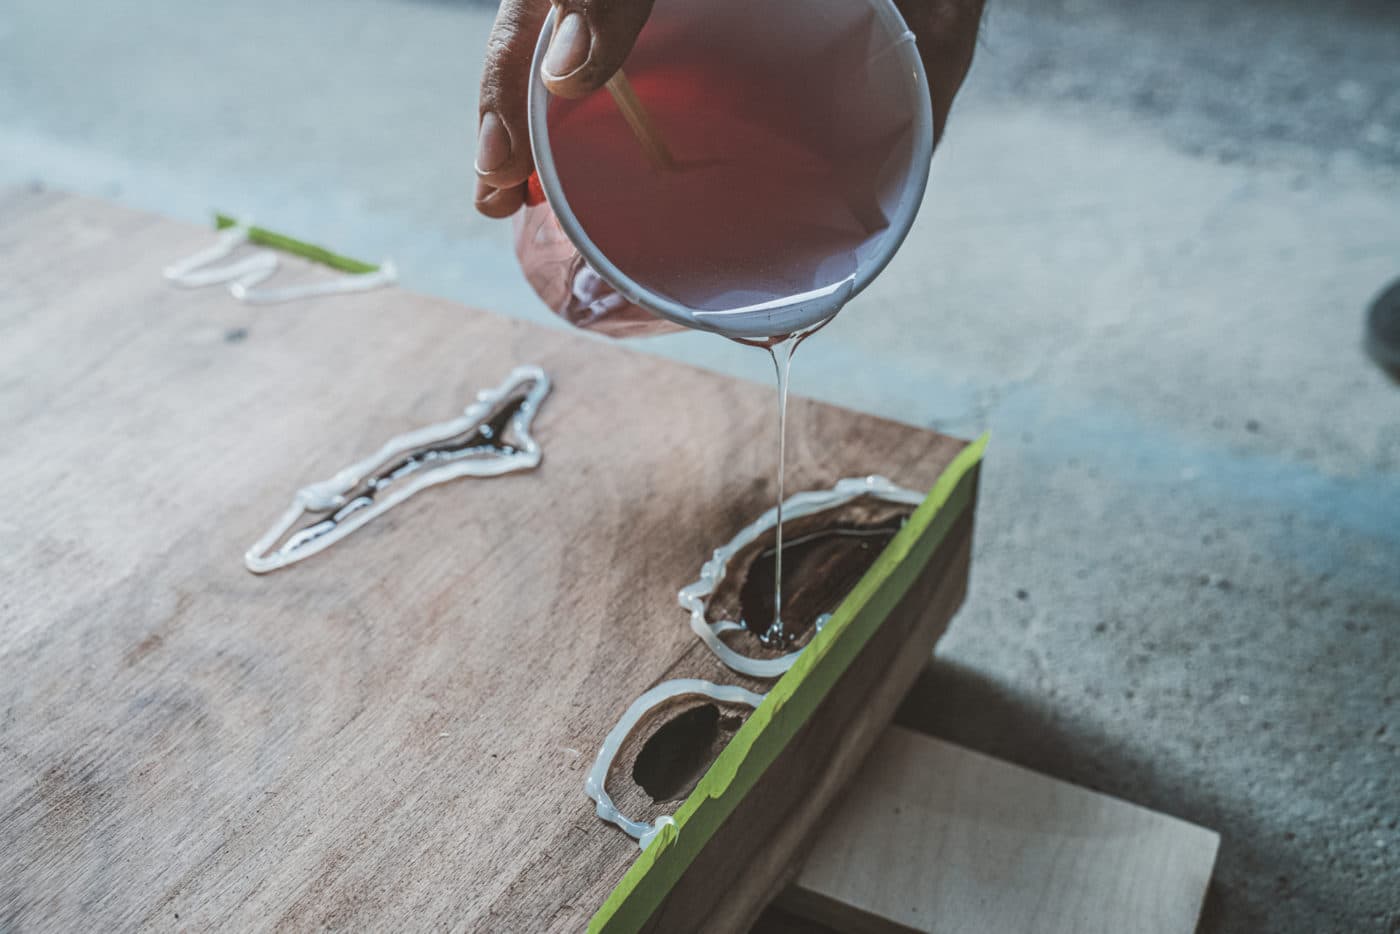
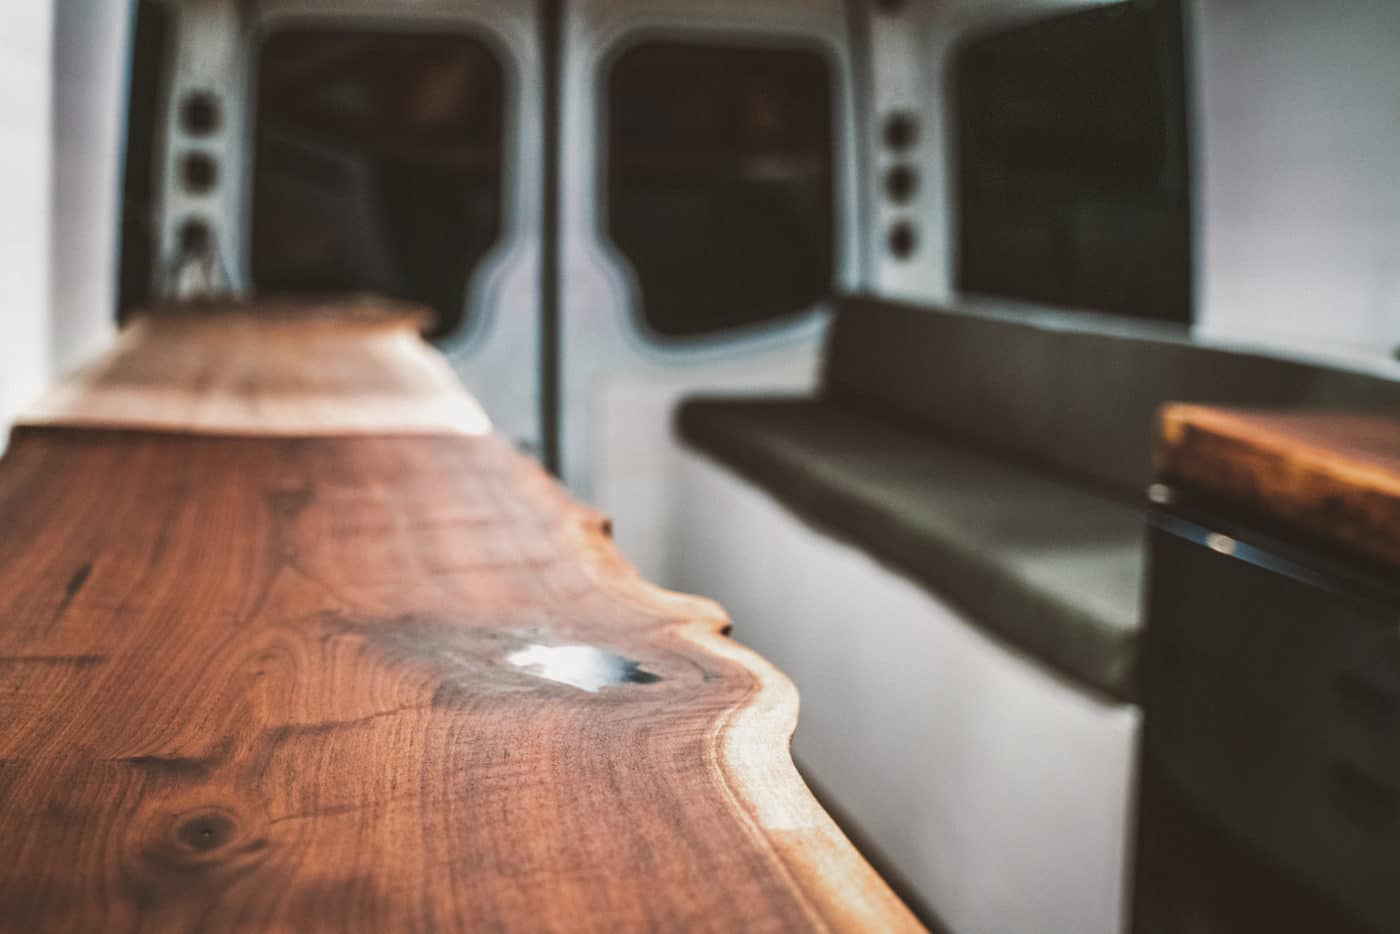
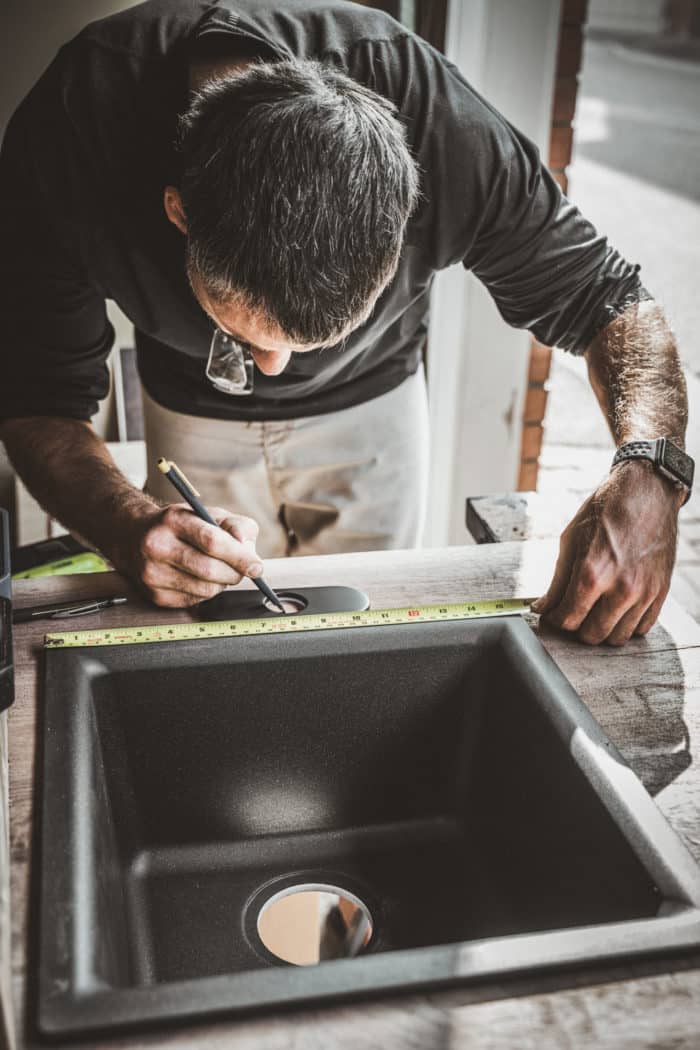
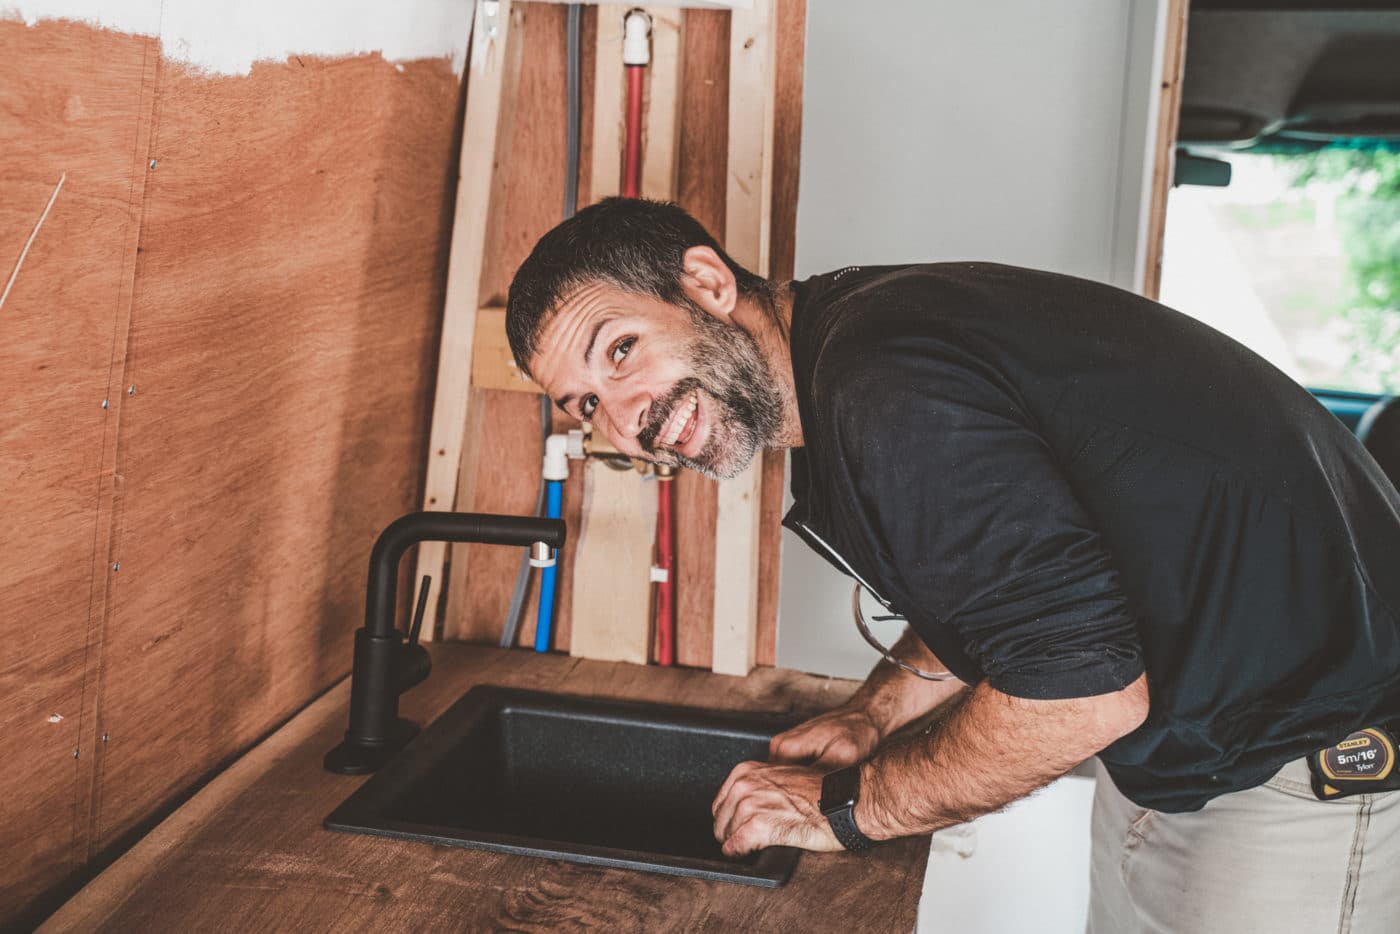
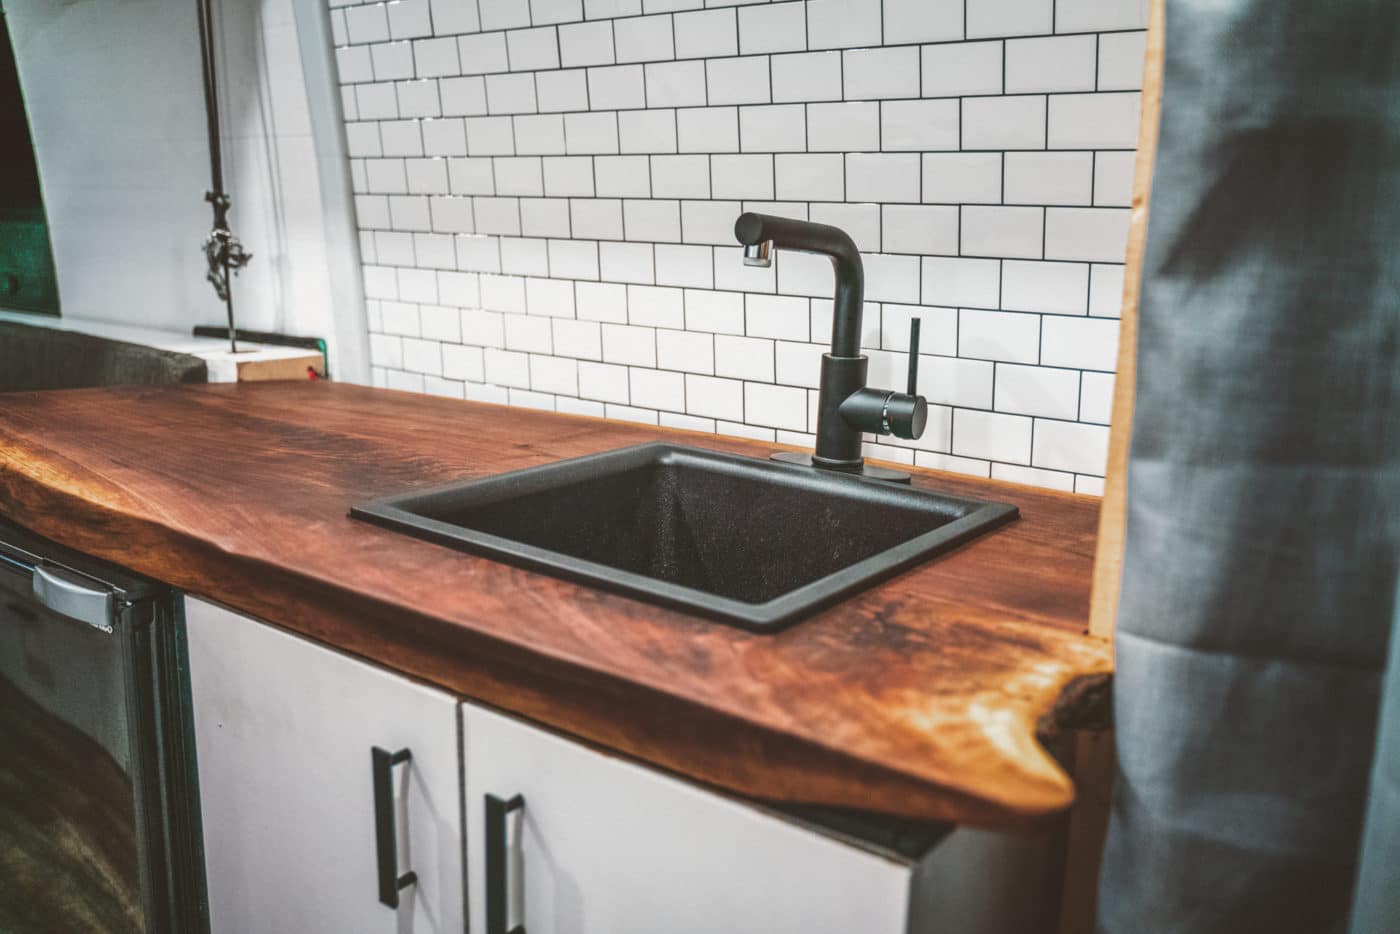
Counter tops
Time Spent: 5 days
For our counter tops, we used dwell edge black walnut wooden that Max picked up at a neighborhood lumber yard. There have been 3 slabs that we sanded down, reduce and formed into the suitable dimension and form to suit our counters.
We then used clear epoxy resin to fill any gaps, cracks, and tiny holes within the wooden. After letting the epoxy harden for 48 hours, we sanded it down and sealed the counter tops with Rubio Monocoat Wooden Stain Oil. This offered the counter tops with wonderful safety and waterproofing.
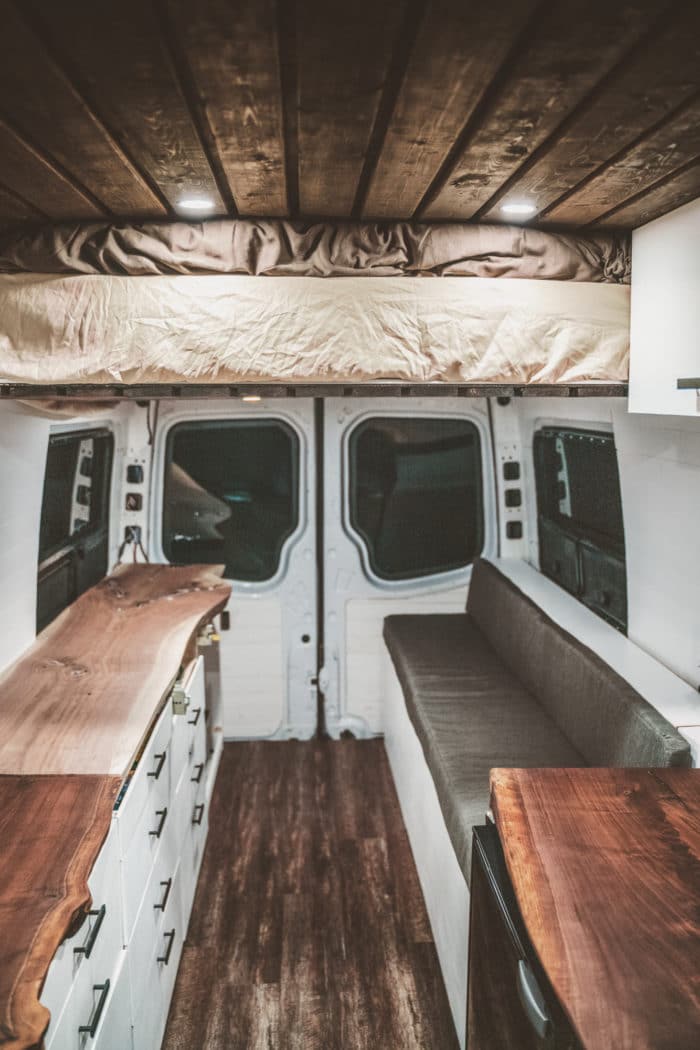
Sofa
Time Spent: 2 days
A giant sofa was one in every of our camper van construct must-haves. We opted for a spacious 80”x24” sofa, which we constructed utilizing the identical 3/8” Baltic Birch plywood that we used for the cupboards.
The sofa was constructed to go proper overtop of the wheel properly and consisted of two sections. Moreover, we constructed a 6”x13” backrest that added a little bit bit of additional space for storing.
For cushions, we reduce up a 4” Zinus Reminiscence Foam Mattress (it was cheaper than shopping for common foam) and gray out of doors upholstery material from a neighborhood retailer referred to as, FabricLand. Oksana’s mother then helped us sew the material right into a cushion cowl, for each the underside of the seat and for the backrest. We used velcro tape to maintain the cushions from sliding off the sofa.
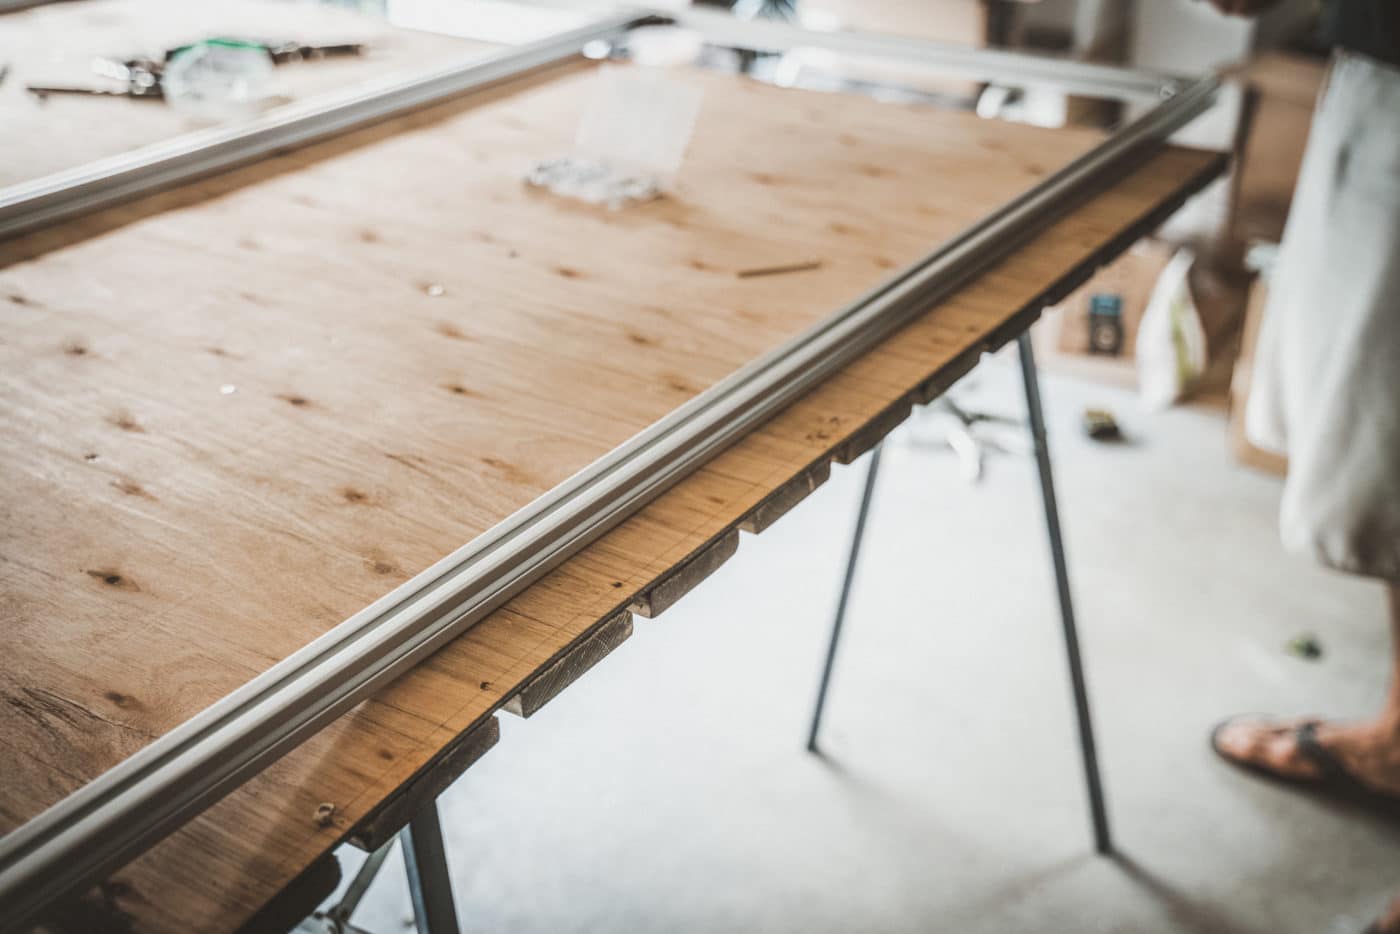
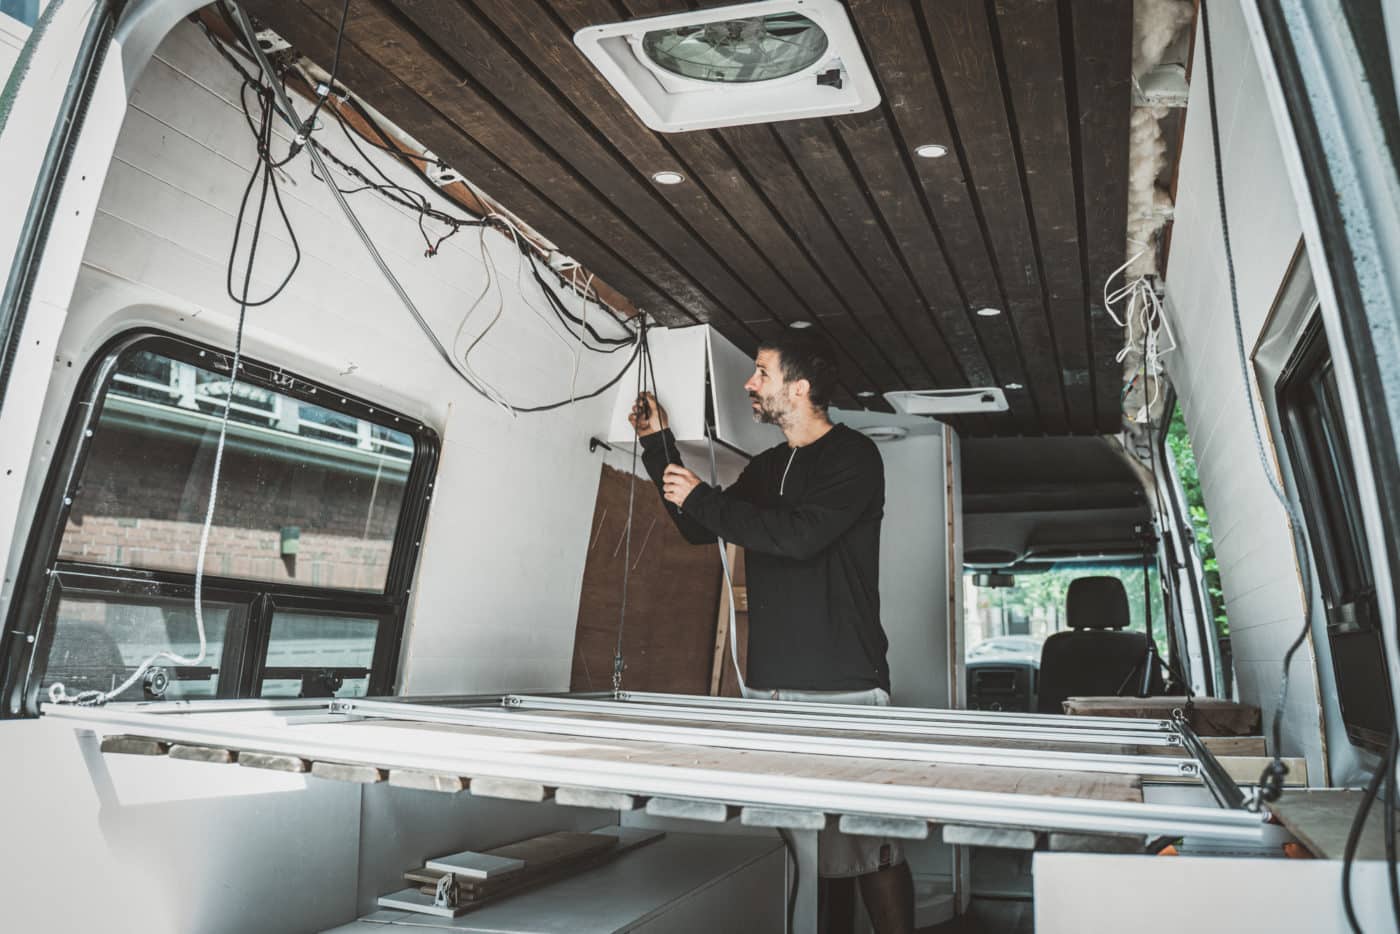
Elevator Mattress
Time Spent: 5 days
Our elevator mattress might be probably the most distinctive merchandise in our self transformed Sprinter van. We cherished the thought of not having to make our mattress each night time and each morning. So, Max labored laborious to provide you with a novel mattress design that will permit us to do exactly that.
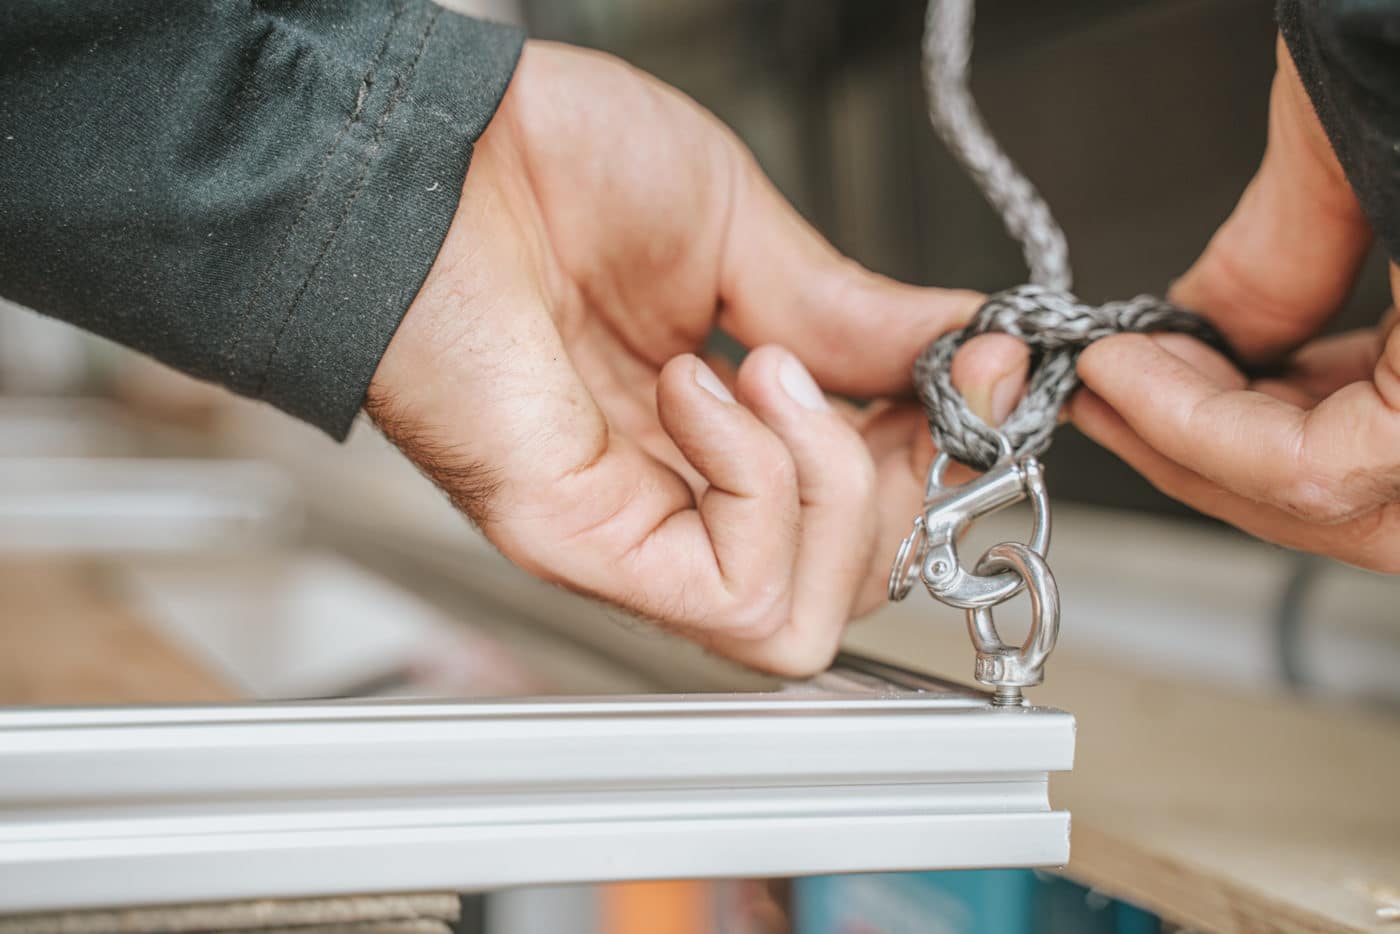
Our elevator mattress is constructed utilizing a chunk of ⅜” lauan plywood and 1” Wooden Planks stained with Wooden Stain. The underside of the mattress is designed precisely like our ceiling. We connected the plywood and the wooden planks to an 80/20 aluminum extrusion body, put a chunk of pegboard on prime for good air circulation and laid our 4” Zinus Inexperienced Tea Reminiscence Foam Mattress and 100% Pure Latex Mattress Topper on prime.
The mattress is held up by an ATV winch with artificial winch rope. The rope is threaded by marine-grade pulleys which are bolted to the ceiling of the van. Through the day, the mattress hangs just under the ceiling and is held in place by the ATV winch and a couple of security ropes with carabiners.
At night time, we decrease the mattress and have it resting on our counter and the sofa backrest.
Swivel Seat
To get probably the most of our area and structure, we additionally put in a Scopema Swivel Seat on the passenger facet. The Swivel Seat rotates the passenger seat and permits the seat to face the within. of the van … aka our residing area when the van is just not in movement. Putting in a Scopema Swivel Seat in our Sprinter was a GAME CHANGER, because it allowed us to create further seating area contained in the van when our elevator mattress was down. We bought a passenger-side Scopema swivel seat designed particularly for our 2008 Sprinter from The Swivel Store. Getting the suitable swivel for our van made for tremendous straightforward set up and ease of use.
![]()
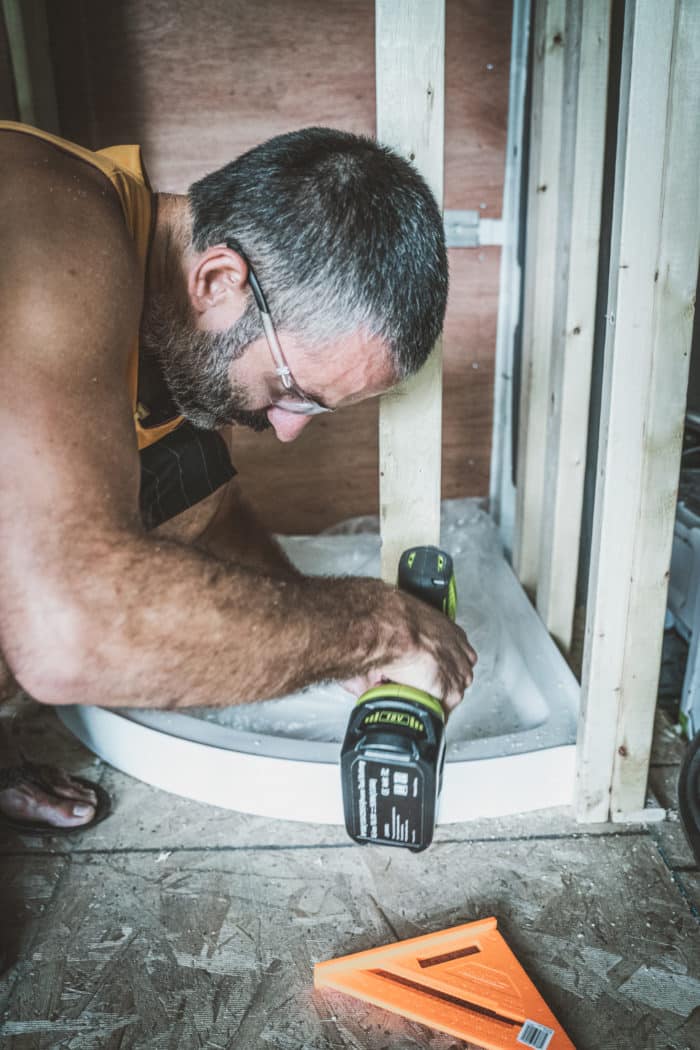
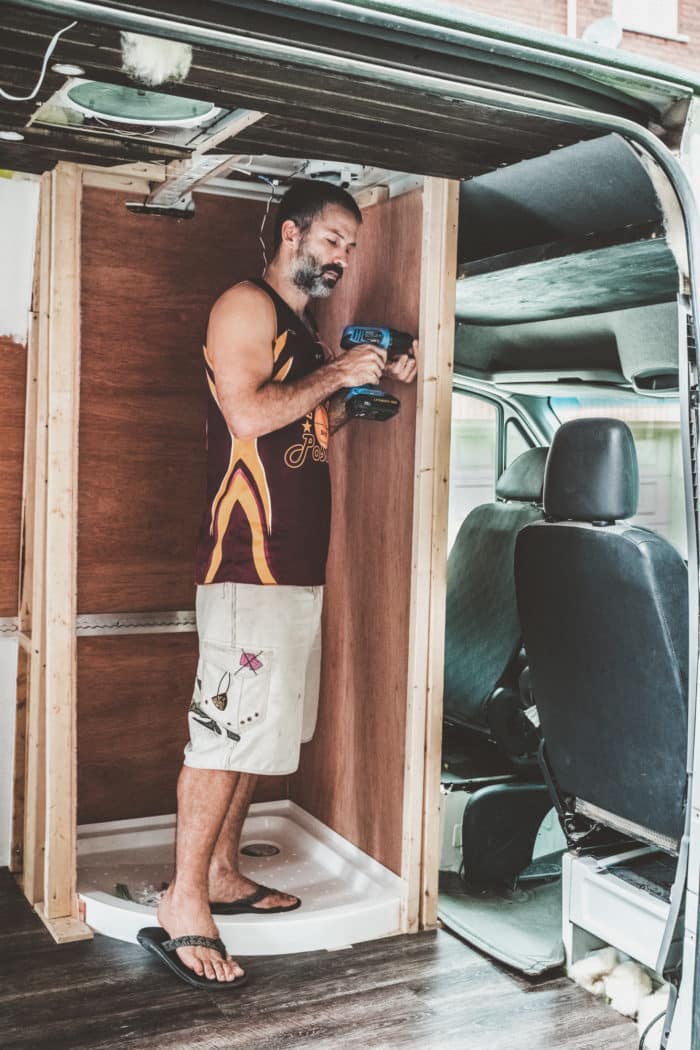
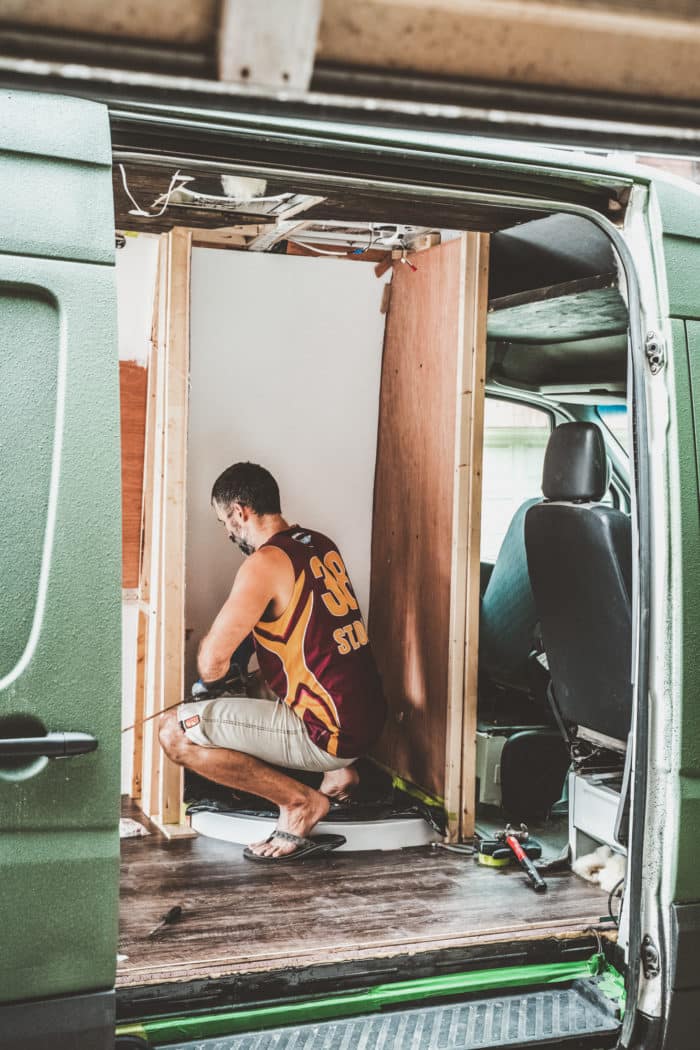
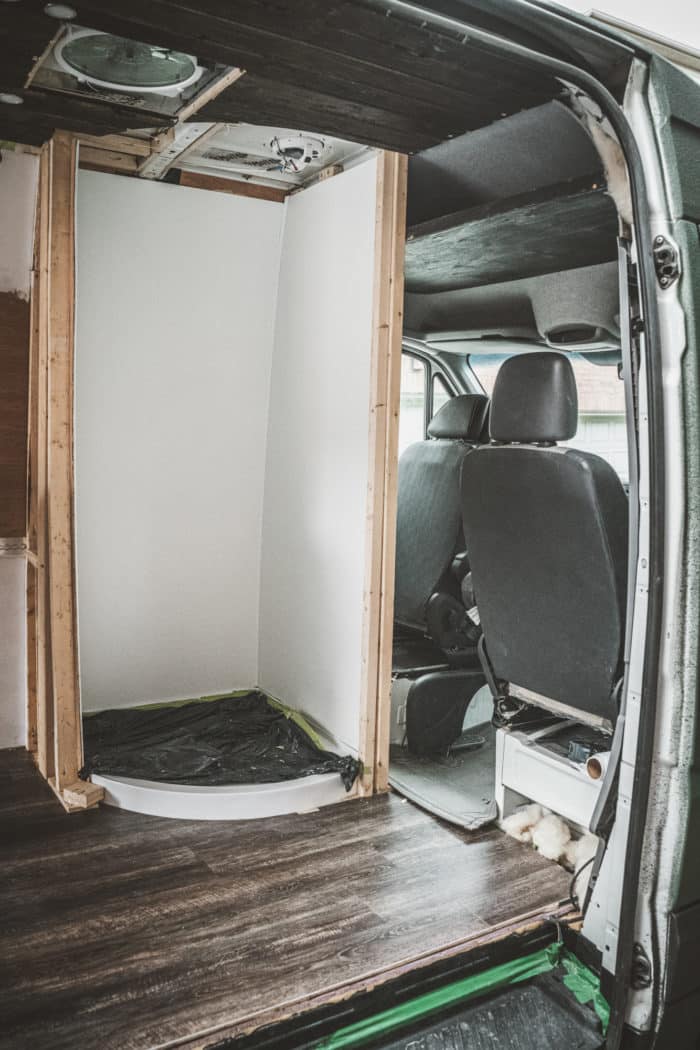
Bathe/Rest room
Time Spent: 3-4 days
We wished to have all of the comforts of dwelling in our tiny dwelling of wheels. So, putting in a full rest room and bathe in our DIY camper van construct was a should.
We opted for a novel 31”x31” spherical nook bathe design to maximise the dimensions of our bathe and its structure contained in the van. Moreover, we bought the bathe pan at a neighborhood rest room store and constructed the bathe body utilizing 2 x4 framing wooden. We then connected ⅜” lauan plywood to the framing wooden and connected waterproof FRP Boards from House Depot on all sides utilizing Titebond FPR adhesive.
We lined the sides and corners with white PVC Moulding and sealed the cracks utilizing waterproof Kitchen & Tub Silicone.
As a substitute of a bathe door, we put in a versatile bathe curtain observe and hung a 2-layer waterproof bathe curtain.
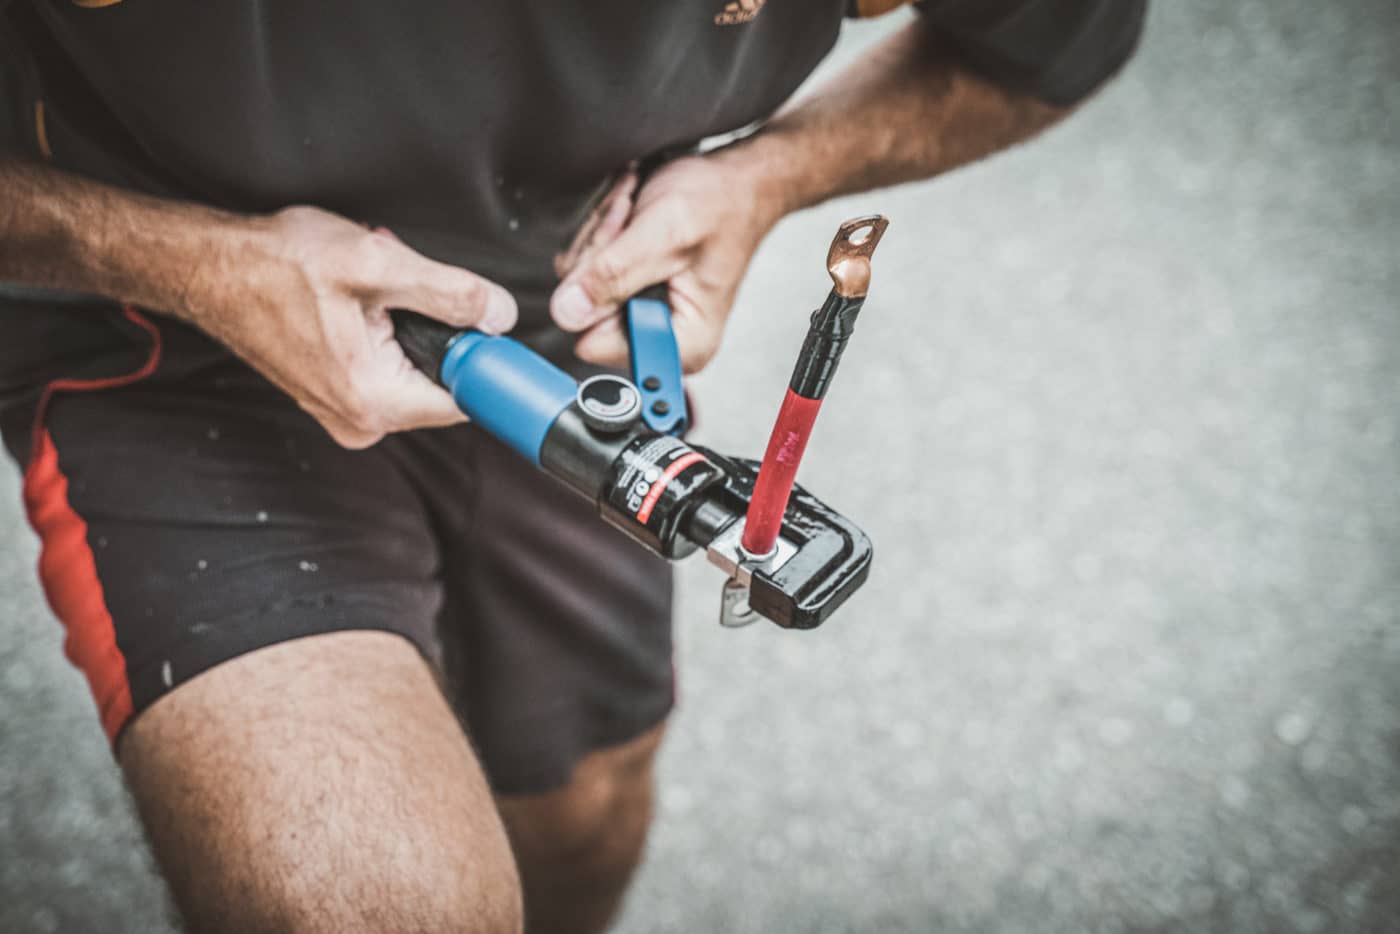
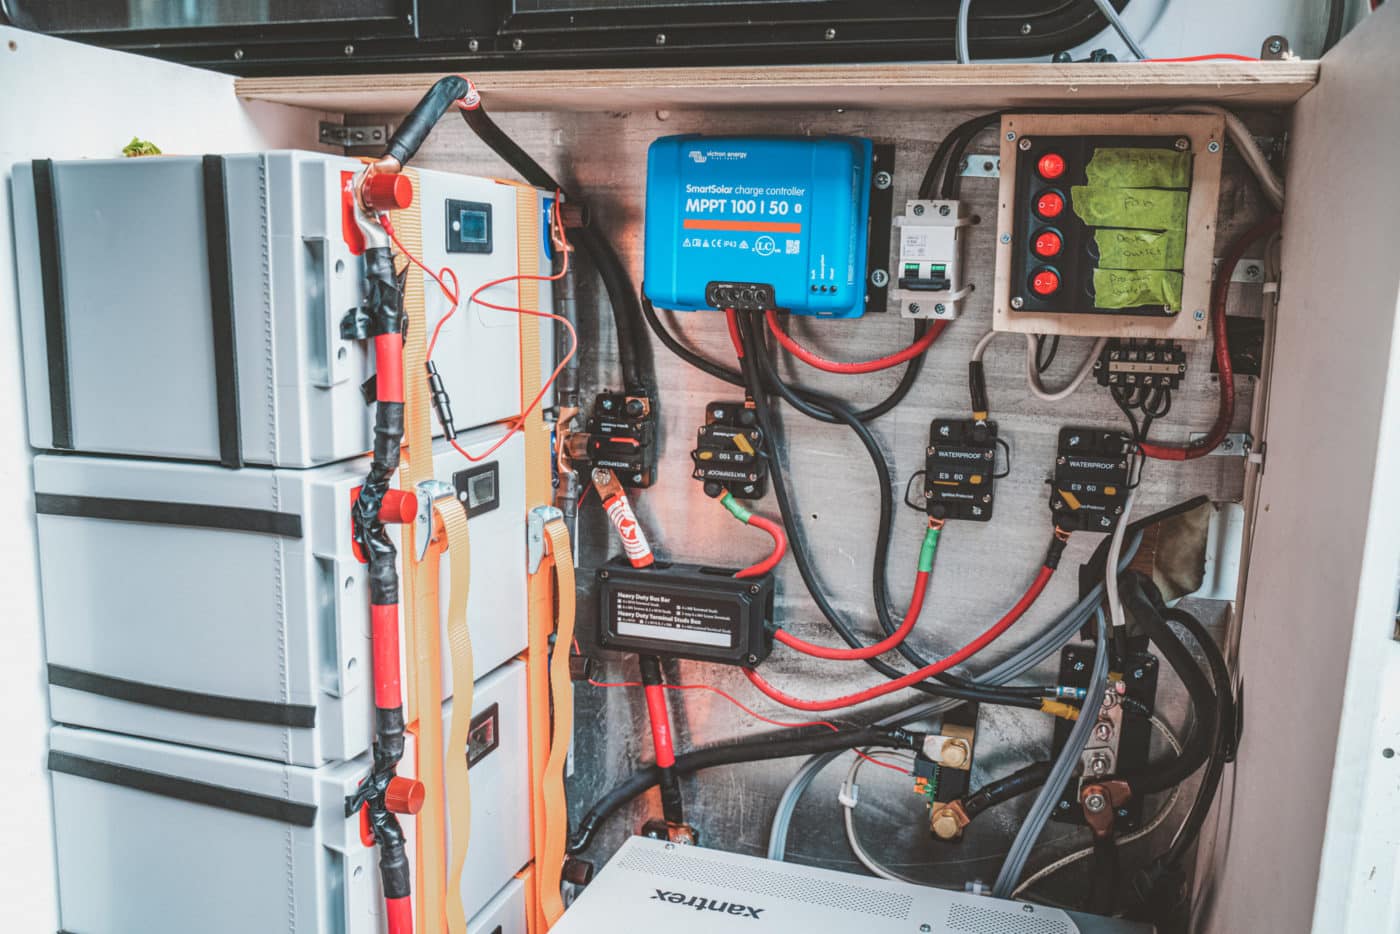
Electrical Set Up
Time Spent: 1 week
This was by far probably the most difficult a part of changing a van to a campervan. We had no earlier expertise or information of operating electrical or had any understanding of easy methods to set this up for our camper van construct.
Energy Audit
We began by doing a energy audit, utilizing this useful resource from Nate at Explorist. We talked by all the home equipment we’ll wish to run within the van and mentioned our total wants for the system. Since we determined early on that we didn’t wish to use any propane in our van, we knew that our energy wants have been going to be greater than the extra widespread Sprinter Van conversion plans.
By way of the audit, we recognized that we would wish a 400 Amp Hour – 600 Watt Camper Van Photo voltaic Package to fulfill all of our energy wants within the van.
We then used data on this submit and to create our personal electrical diagram. As soon as the diagram is full, we booked a Wiring Diagram Assessment name with Nate to ensure that our arrange was appropriate. Since we’re removed from specialists, we felt that it was necessary to get an skilled to take a look at work.
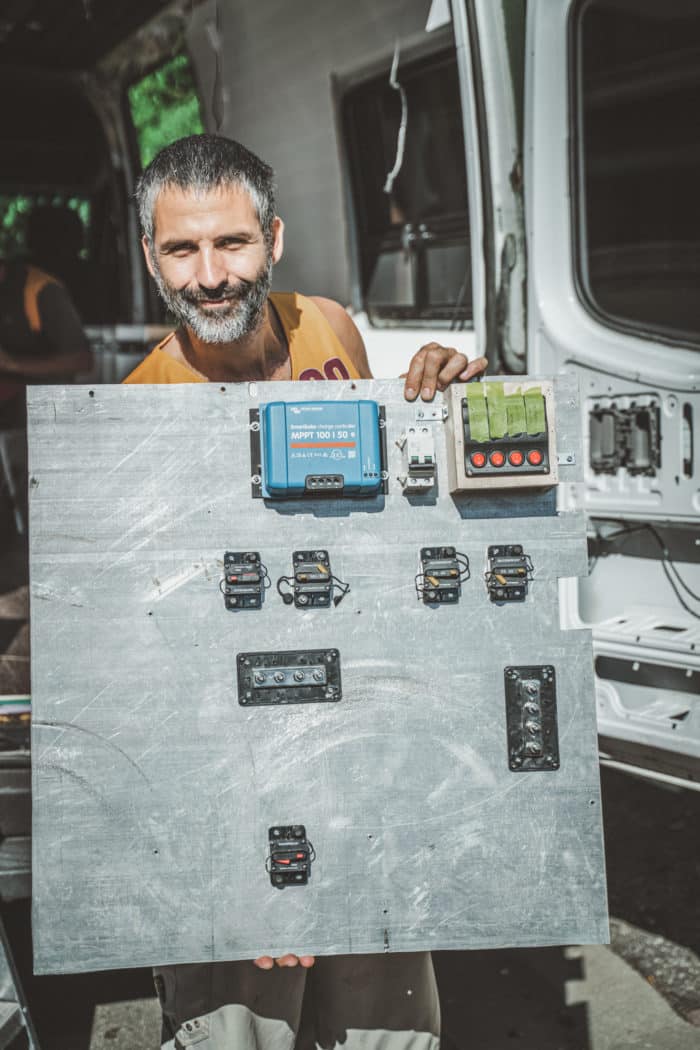
Our Electrical Diagram
Beneath you’ll discover our last electrical diagram, which we then adopted to put in all the weather of {the electrical} system in our DIY van camper.
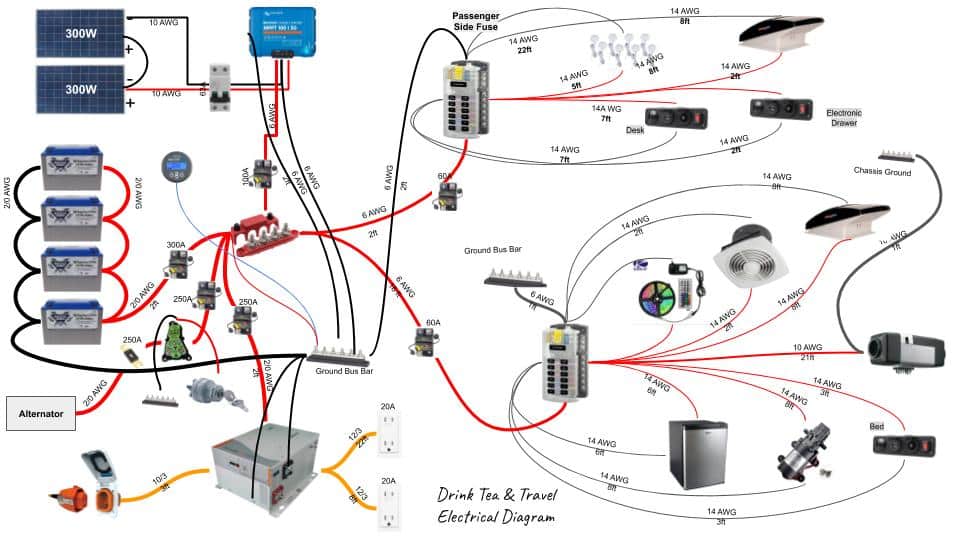
Our arrange consists of the next:
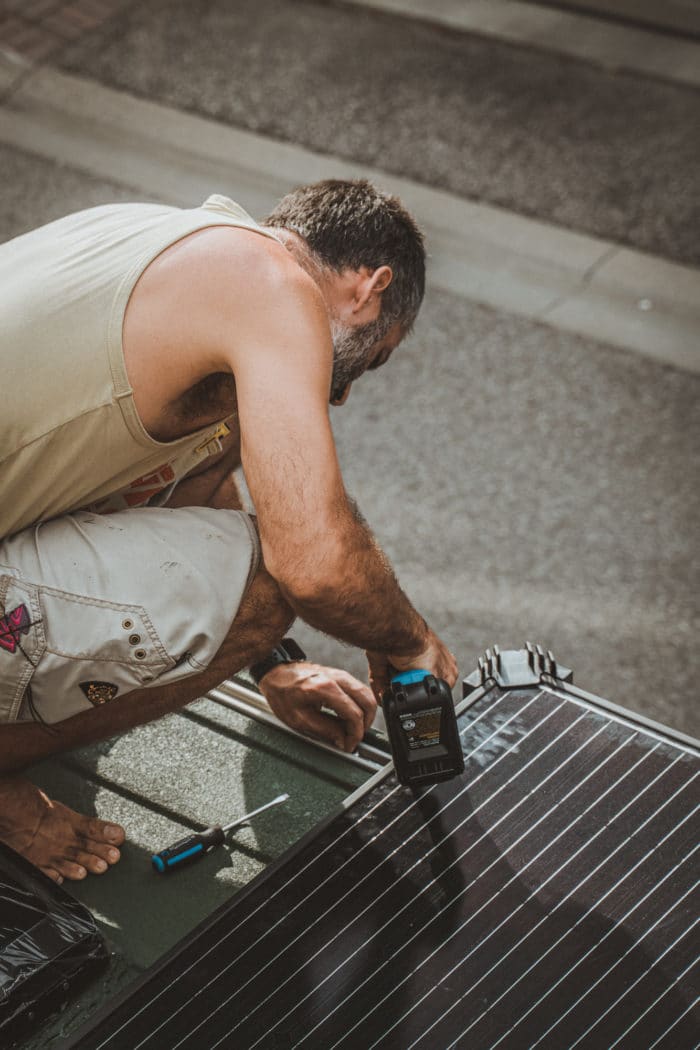
- 2 x 300W photo voltaic panels
- The photo voltaic panels are positioned sideways on our roof and connected to the roof slide utilizing aluminum nook brackets, bolts and washers.
- MPPT 100/50 Photo voltaic Cost Controller by Victron
- This charger gathers vitality from our photo voltaic panels and shops it in our batteries. It’s mentioned to maximise the energy-harvest and obtain full cost within the shortest doable time. It really works nice. So, we gained’t dive into any extra element on that.
- 4 x Lithium LiFePO4 Battery 100Ah 12V
- These are Deep Cycle Lithium Iron Phosphate batteries that retailer all of our energy, no matter whether or not it’s generated by photo voltaic, by an alternator charger, or an out of doors 15amp plug.
- Xantrex Freedom XC 2000 Inverter Charger
- This inverter/charger permits us to cost our batteries from our alternator, utilizing the Lithium Battery Isolation Supervisor, in addition to to cost from an out of doors energy supply, together with a typical family plug discovered in any respect campgrounds.
- This inverter permits us to run quite a lot of home equipment (as much as 1800W) on the similar, together with our InstaPot, induction Cooktop, Toaster Oven, De’Longhi Nespresso Machine or Bosch Electrical Water Heater
- 2000W 12V Pure Sine Wave Battery Converter
- Sure, you learn that proper. Now we have 2 inverters in our van. This was not intentional, however sadly one thing we needed to do. Our Xantrex inverter/charger was broken in the course of the construct and doesn’t operate as meant. It nonetheless inverts and permits us to make use of 110W home equipment once we are plugged into an outlet. It additionally prices our batteries, but it surely doesn’t permit us to make use of home equipment whereas operating off of batteries.
- 2 x Fuse Panels
-
- Since we have now loads of electronics and home equipment, we cut up our wiring into 2 major fuse centres. One is positioned behind the van and one other one, in our management centre above the sink. This allowed us to simplify our wiring and permit for a cleaner and simpler setup.
-
Having now lived in our DIY Sprinter Conversion Van for a number of months, we will confidently say that our electrical setup is unbelievable. On common, we use about 20% of our batteries energy every day. It successfully permits us to be stationary and off-grid for five days in a row. However since we’re all the time on the transfer (and thus charging our batteries), or are often parked up at campgrounds with energy hookups, we have now by no means run out of energy or had our battery banks decline to beneath 40%.

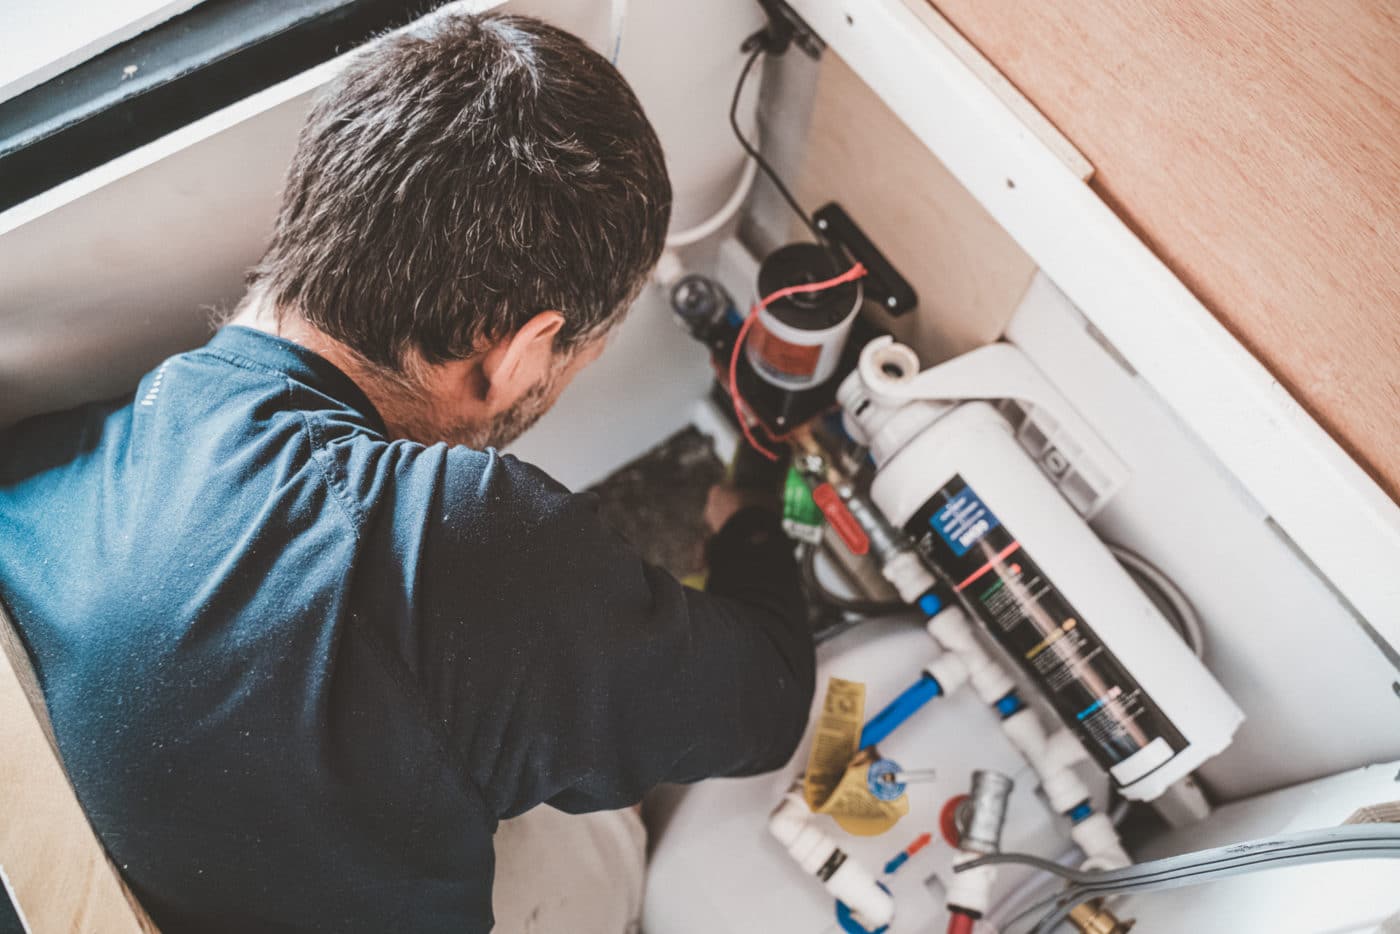
Plumbing
Time Spent: 3-4 days
Our plumbing system is fairly straight ahead for our camper van construct. Though, the set up included loads of tinkering to suit all the pieces in such a small area whereas avoiding any leaks.
Now we have:
- Recent Water Tank (25 gallon), saved beneath our sofa
- Gray Water Tank (25 gallon), connected beneath the chassis of our van. Now we have put in a heater pad on the tank to guard the gray water from freezing in beneath zero temperatures.
- SAILFLO 12 Volt Water Pump, mounted beneath our sink
- Below Sink Water Filter System, that purifies all of the water popping out of our faucet
- Bosch Electrical Water Heater, that heats up water for our bathe and faucet
We ran PEX tubes from our contemporary water tank to our pump, and onwards to our water heater and faucet/bathe. Additionally, used fast connects and valves for all connections.
We constructed our bathe proper subsequent to the sink, to simplify the cold and hot water plumbing techniques.
Apart from a number of leaks in the course of the set up course of, and our minor gray water tank freezing incident within the Rockies (when the in a single day temp went all the way down to -15°C), we have now not encountered any points with our plumbing. Now we have discovered that our water heater makes use of fairly a little bit of energy (20% of our battery reserve). So, we don’t use it every day. Solely once we wish to take a bathe or have a giant load of dishes to wash up.

Lighting
Time Spent: 1 day
When changing a van to a camper, we selected a 2 piece lighting answer. Now we have put in overhead 12V Dimmable LED Puck Lights on the ceiling of our van and beneath our mattress (which acts as a ceiling in the course of the day). The lights are managed with a distant. Now we have one mounted on the entrance within the entrance. Then, one other one behind the van for straightforward entry at night time.
Along with the puck lights, we additionally ran an LED Mild Strip across the perimeter of the van. Additionally, beneath the overhead cupboards. The strip mild offers us further mild over the sink/kitchen space. It offers us extra lighting once we are working but in addition serves as nice temper lighting for night hangouts. It’s programmable through an app to activate and off at sure instances of the day. Moreover, it will also be managed through a distant, which we hold close to our management panel.
Heating
Time Spent: 1 day
Due to all of the insulation, our camper van construct stays heat and comfortable in temps all the way down to +10°C. We put in a Diesel Air Heater to maintain us heat on days when the temp dips beneath that. The heater faucets into our current van diesel tank and is put in beneath the passenger seat in our van.
You may management the heater through a management panel positioned beside the heater or through a distant. It may be programmed to activate and off at particular instances and is tremendous straightforward to function.
With the heater on, we will heat up our van to any temperature we would like. We’ve sometimes by chance let it go above 25°C and made a sauna out of our van. In winter climate, we’ve been conserving the heater on all day however more often than not. Then, flip it off at night time.
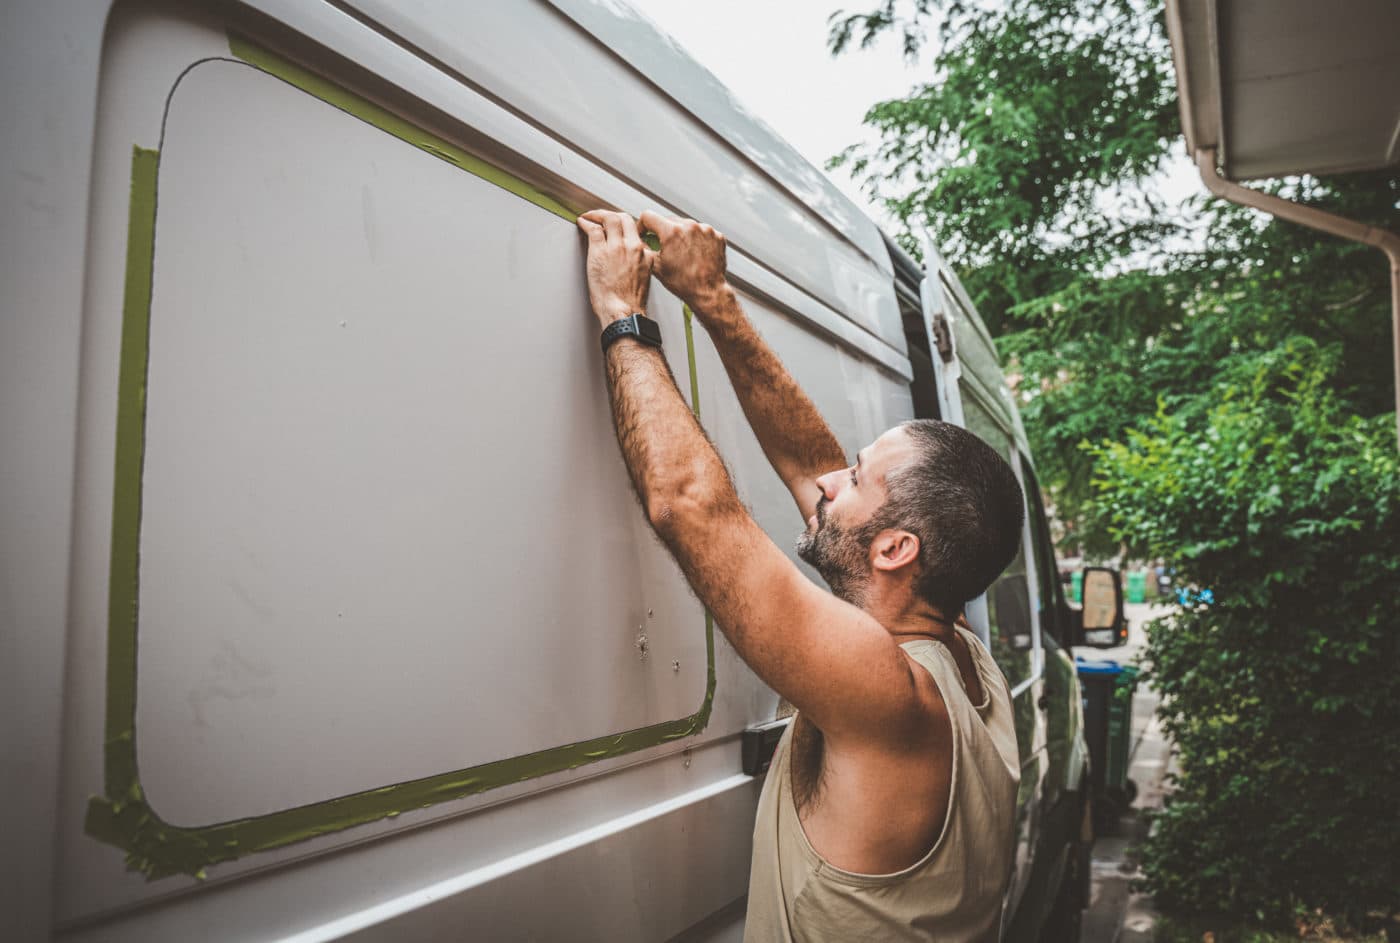
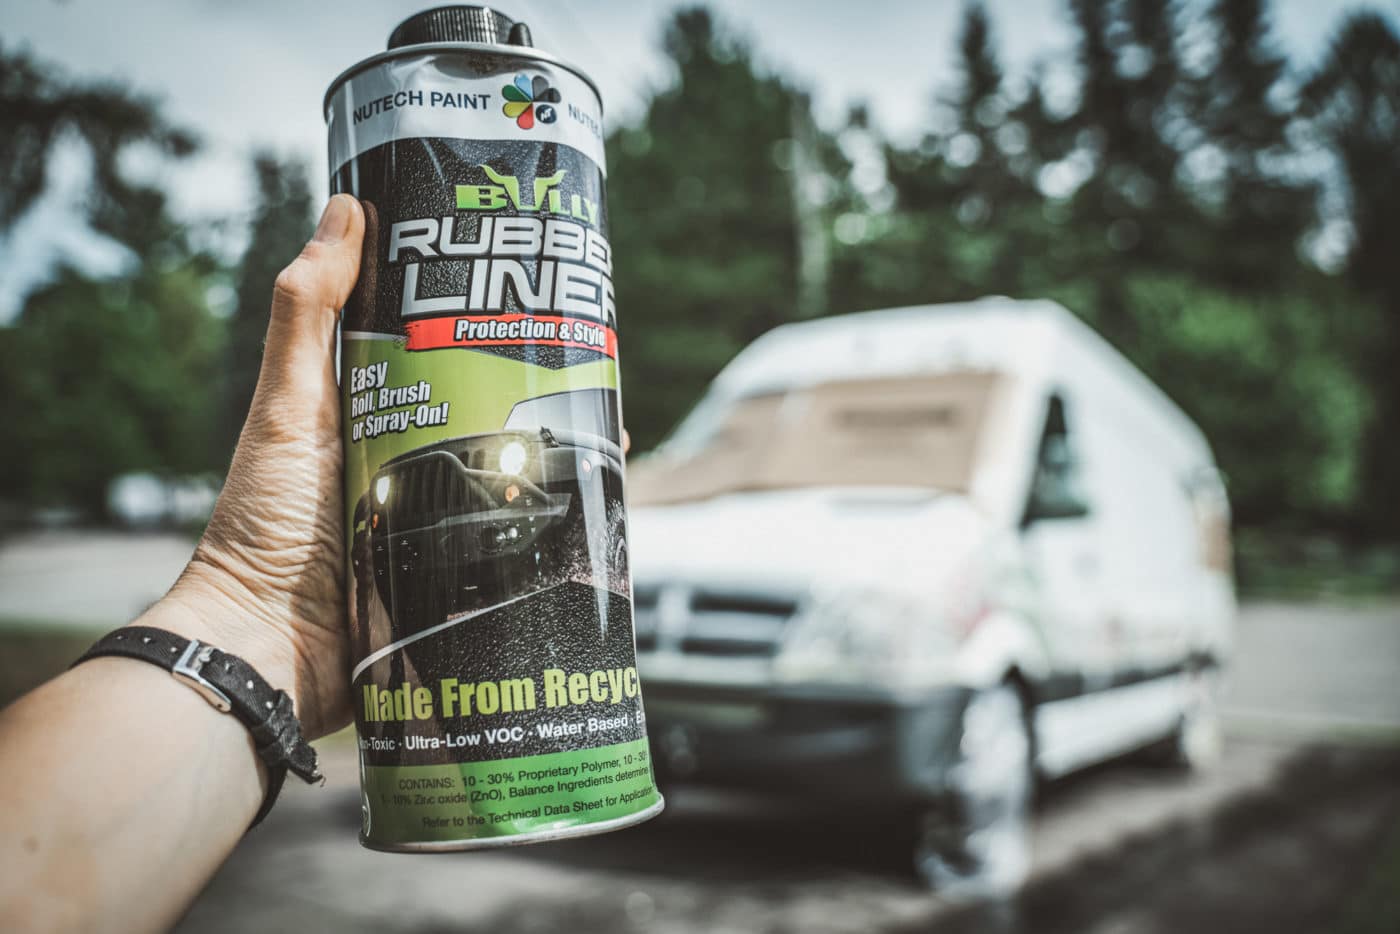
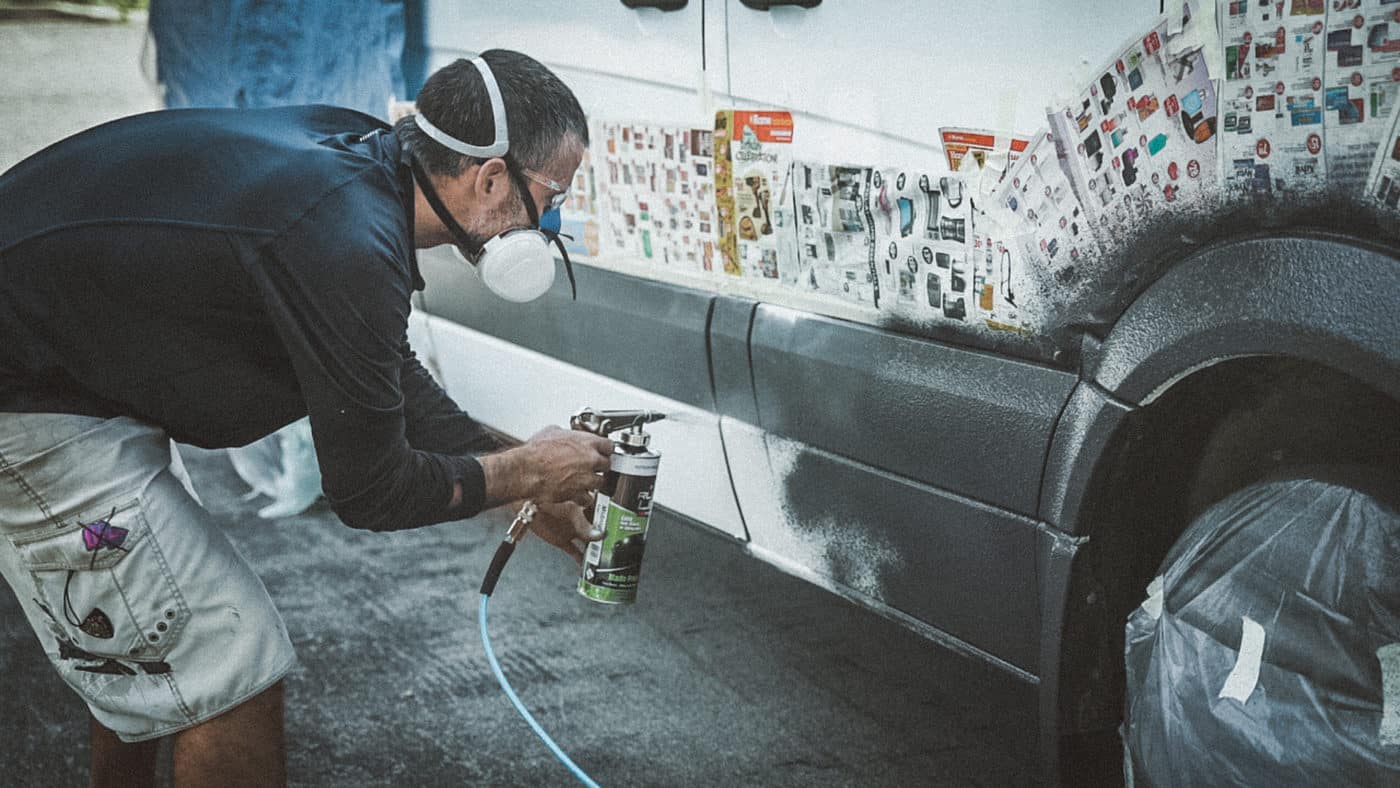
Paint Job
Time Spent: 4-5 days
One of many first issues individuals ask about our diy campervan conversion is our stunning paint job. Since we bought a barely older mannequin (2008), our van had fairly a little bit of floor rust. That made it look a bit outdated and unappealing. So, to be able to spruce him up and shield him from additional potential rust, we select to color the van with inexperienced and black Bully Liner Paint (hyperlink to comparable product). We painted the highest of the van inexperienced, and the underside – black. Bully Liner model, particularly, provides paint made out of recycled tires, making it a low VOC, environmentally pleasant possibility.
The paint job provided a lot of advantages:
- abrasion and stain resistance
- safety towards rust, corrosion, salt, and damp & excessive temperatures
- waterproofness and extra sound deadening
We utilized the paint with a twig gun, utilizing a 90PSI Air compressor that we borrowed from a neighbour.

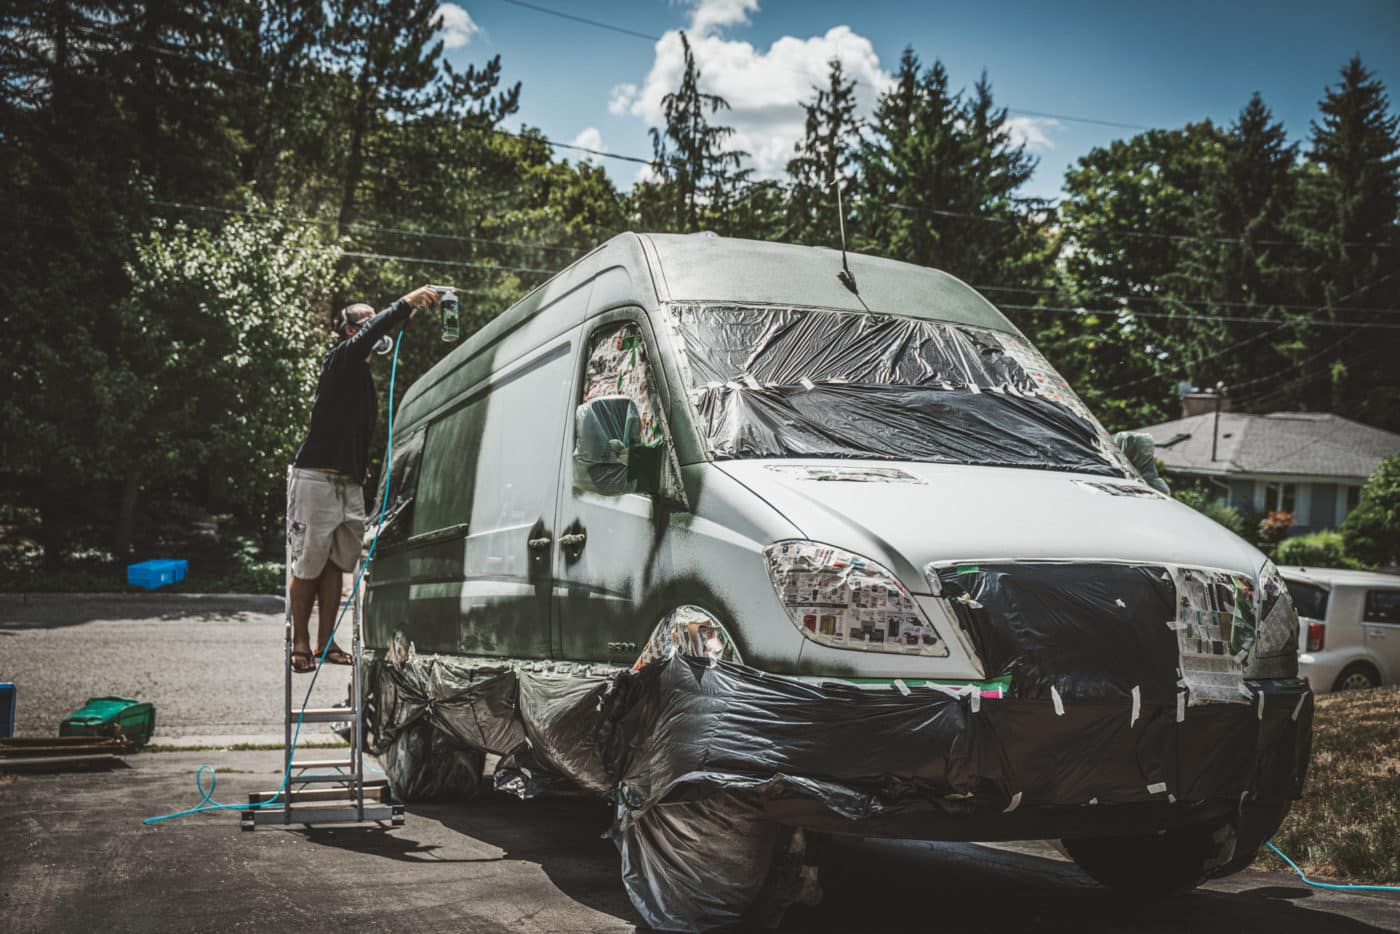
The Mural Design
And since portray the van inexperienced wasn’t sufficient, we took it to a different stage. Oksana’s brother, a proficient artist, created a really cool mural of mountains, forest and wildlife. We utilized these on the van utilizing black mattress liner paint.
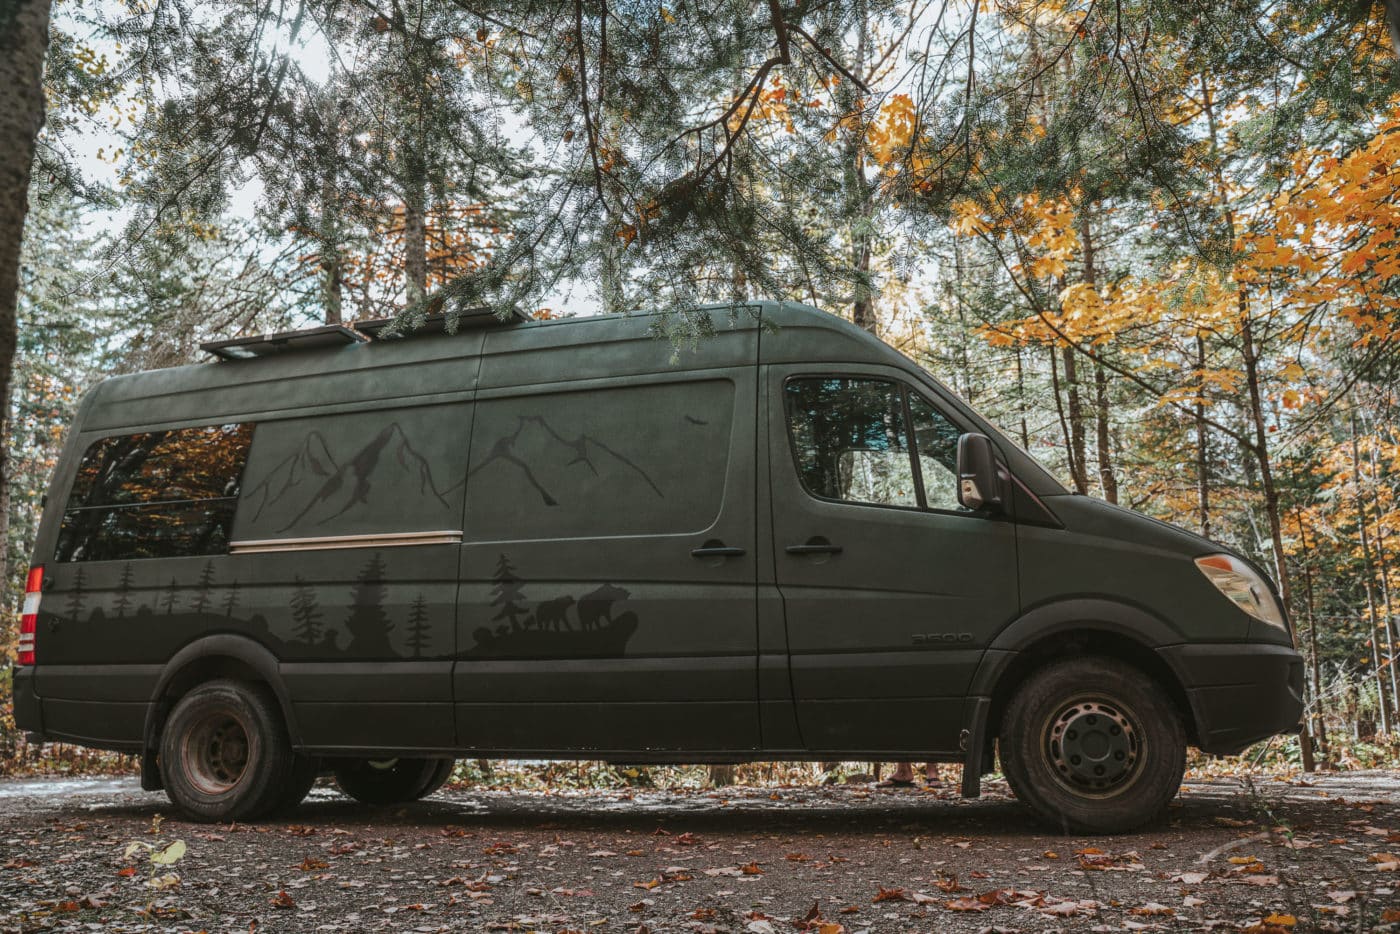 Our campervan, Benji, on the Cyprus Lake Campground in Bruce Peninsula Nationwide Park
Ending Touches
The ending touches we added in the previous few weeks of our camper van construct. These helped us take it to the subsequent stage and make it really feel like dwelling. These embody:
- Tiles – as an alternative of tiling our kitchen with actual tiles, we use this nice White Subway Tiles Peel as a backsplash behind our sink counter.
- Sink/Faucet – we put in a Black quartz sink and a pull-out sink faucet in our kitchen to offer our kitchen a contemporary look.
- Spice Rack – we added a metallic sheet beneath the overhead cupboards and connected 12 magnet spice containers to the sheet. The magnets on these weren’t very robust, so we added an additional uncommon earth magnet to every container to maintain it in place even throughout bumpy rides.
- Tea Shelf – we added these floating storage cabinets to the kitchen wall and used them to retailer our tea assortment. We purchased the tins at IKEA.
- Vegetation – we put in these stunning indoor planters with contemporary herbs inside, including a little bit of life and greenery into the van.
- Baskets & Different Storage – we additionally purchased quite a lot of baskets to maintain our van organized. We bought most of them from IKEA. We use them to retailer our toiletries/Oksana’s make up, in addition to some electronics, some meals, towels, and many others. As well as, we have now this 3 Drawer Mini Desktop Unit beneath our sink that we use as our drugs cupboard, junk drawer and toiletries storage.
- Jars & Different Containers – a lot of the dry meals and pantry gadgets in our van are stored in our pull out pantry and storage cupboards and are organized utilizing glass jars and bottles. As we purpose to dwell a low waste life-style, we want to buy at bulk grocers like Bulk Barn. It permit us to deliver our personal containers and scale back our use of plastic baggage. Sadly, this has been more durable to do in the course of the pandemic. Nevertheless, storing dry items in jars continues to be a lot better than conserving them in disorganized plastic/paper baggage. I used a label maker to label all of the jars. It makes it straightforward to maintain issues organized contained in the van.
- Hooks – surprisingly, we solely have a few hooks within the van. Just a few for our massive winter jackets within the entrance cab, a number of for our kitchen and face towels. And, one other massive one inside our bathe for our massive towels.
- Mirror – we have now a small mirror on the entrance into the van. It’s not full dimension, but it surely’s sufficient.
- Bedding – we have now a bamboo bedding set which we completely love, a heat down cover that we picked up on Kijiji, and 4 down pillows. Additionally, we have now this cozy Herringbone Blanket in gray that we use for lounging on our mattress.
- Moreover, we have now a set of small down pillows on our sofa. We picked it up at Worth Village and a wonderful sustainably woven 100% cotton throw from our buddies at Harlow Henry
Take a look at the photograph gallery to get the texture for the ultimate product of our personal camper van construct!
What do you consider our DIY campervan conversion? In case you have any questions on our van construct, depart them within the feedback part beneath!