
Discovering the very best format for a camper van bed room might be robust. On one hand, beds that run lengthwise offer you numerous area for sleeping however take up greater than 50% of your residing space. Alternatively, horizontal beds gained’t match with out flares to achieve further width within the partitions.
Residing tiny requires artistic concepts to maximise your space for storing and residing space. We knew we wished a non-permanent mattress that didn’t should be set-up day by day.
Our resolution? An elevator mattress.
Why Select an Elevator Mattress for a Van or Tiny Home
Elevator beds are an excellent space-saving resolution for a camper van or tiny home. They mean you can double up on area and have a lounge and bed room in the identical space. Not like a loft mattress, you may change the place of the elevator mattress as you want it. You’re not dedicated to 1 format since you may raise your mattress out of the way in which when it’s not wanted.
Having no everlasting mattress means you’ve gotten extra room for storage and extra flexibility in how you utilize your area. Plus, you don’t have to fret about making up the mattress day by day. When you’ve ever lived tiny, you understand that it is a main perk!
Elevator Mattress vs Murphy Mattress
A standard resolution to the everlasting mattress conundrum is a wall mattress, referred to as a Murphy mattress. Whereas these are a good way to have periodic entry to the mattress, the design might be difficult. Most individuals’s plans embody a Murphy mattress equipment to deliver the concept to life.
Murphy beds for vans create a ton of open flooring area after they’re up. However, you gained’t be capable of have a everlasting sofa or desk in that space. They’re good for transporting gear round however finally, they’re in all probability higher suited to a tiny dwelling.
On the flipside, elevator beds for campervans liberate residing area whereas permitting you to have a sofa or desk completely on-site. Elevator mattress {hardware} is comparatively simple to search out and doesn’t require particular kits like an RV overhead mattress equipment. The one downside is sacrificing the ceiling top that you simply lose when the mattress is raised. So this won’t work for a minivan mattress platform, however it works nice in a Sprinter van.
Why We Selected an Elevator Mattress for our Tiny Residence on Wheels
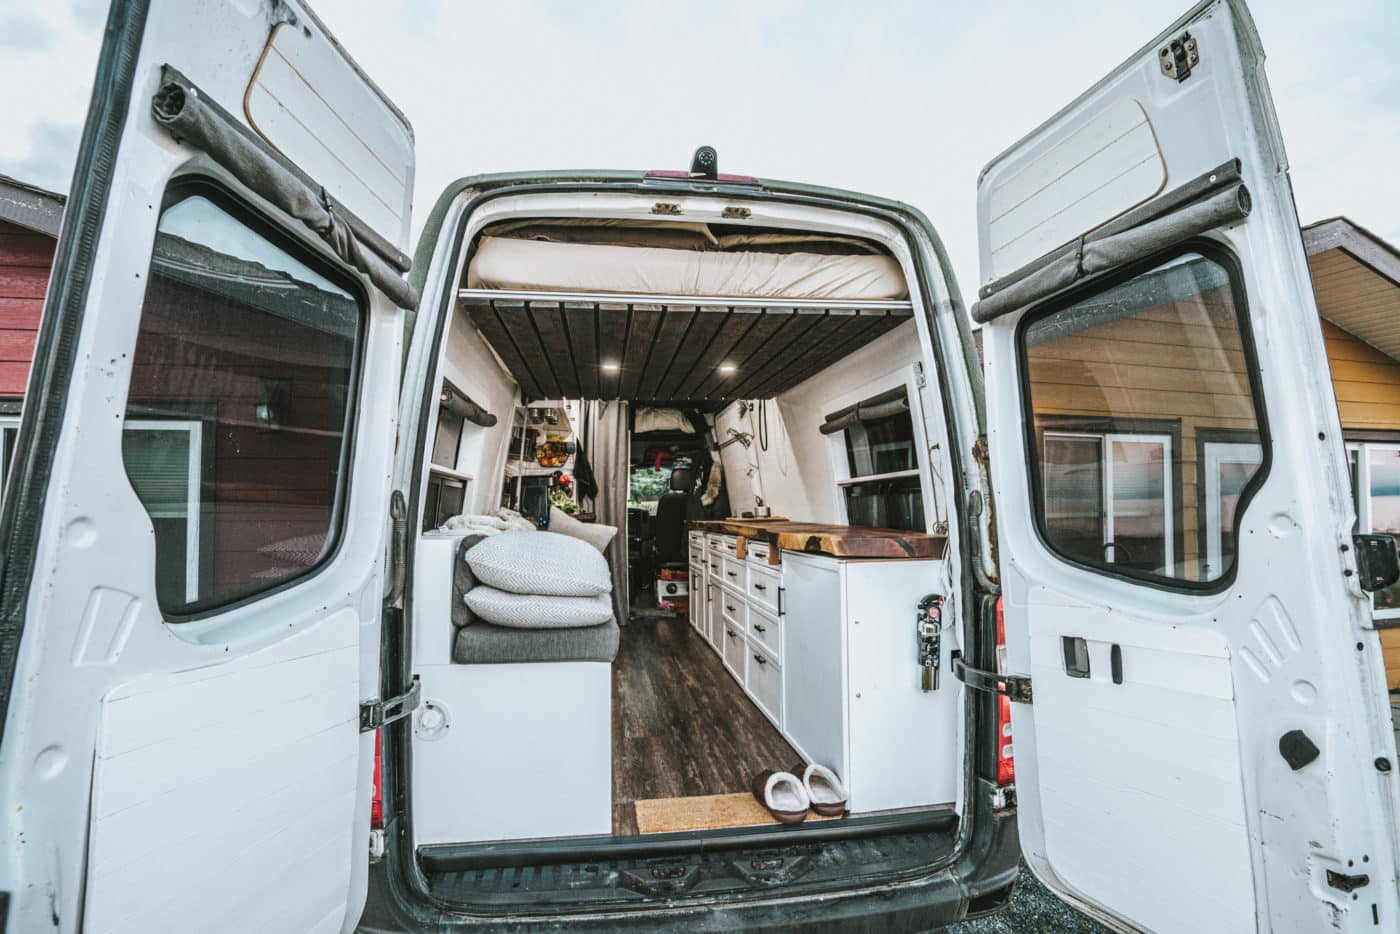
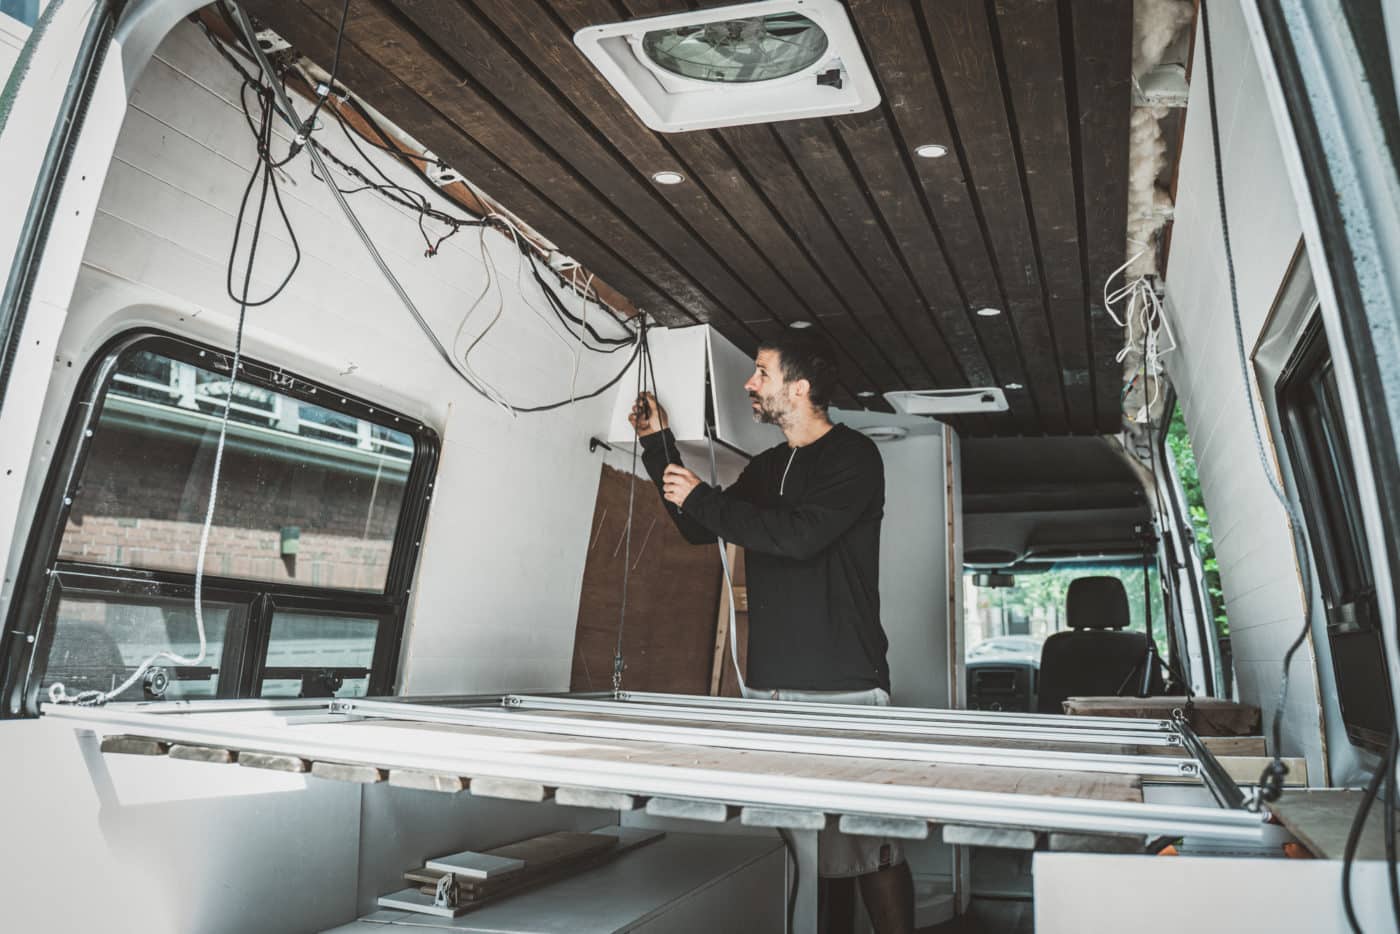
In our van construct, we determined to surrender the additional ceiling top to take care of our panoramic 270° views. This manner, we had been in a position to have a bigger queen dimension mattress body that raises and lowers with out overlaying up our home windows. We all the time get numerous gentle, whether or not we raise the place of the mattress or not. A Murphy mattress would have solely accommodated a twin mattress and lined up an entire wall of home windows. Our elevator mattress DIY is the proper compromise!
Try our elevator mattress in motion in our van tour video
<span data-mce-type=”bookmark” type=”show: inline-block; width: 0px; overflow: hidden; line-height: 0;” class=”mce_SELRES_start”></span>
How We Constructed our Campervan Elevator Mattress
We created our personal elevator mattress equipment with the next supplies.
Supplies Used
- 1 x Harken 16mm Airblock Double
- 2 x Harken Micro Upright Lead Block
- 1 x Harken 16mm Airblock Single
- 2 x Harken 16mm Airblock Cheek
- 1 x Artificial winch rope
- ATV 3,500lb Winch
- 6-8 x 80/20 aluminum extrusion (relying on the dimensions of the mattress you’re constructing)
- 1 x set Aluminum profile connectors
- Lauan Plywood (get at your native ironmongery store)
- Pine Slats (or one other different for underneath the mattress)
- Pegboard
- L observe
- T-Slot Hammer Head Nuts and bolts
- Stainless Metal Threaded Eye Bolts + nuts
- 4 x Stainless Metal Hook & Eye Turnbuckle
- 2 x Tie-down straps
- 2 x Heavy-duty carabiners
Step-by-Step DIY Elevator Mattress Construct Directions
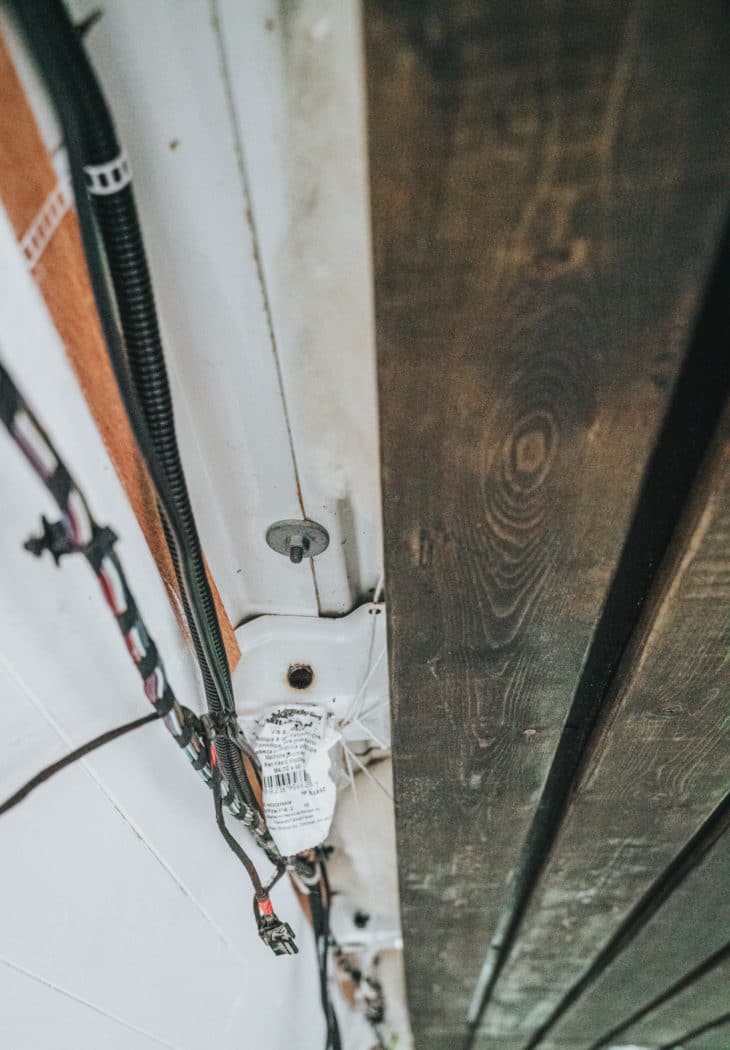
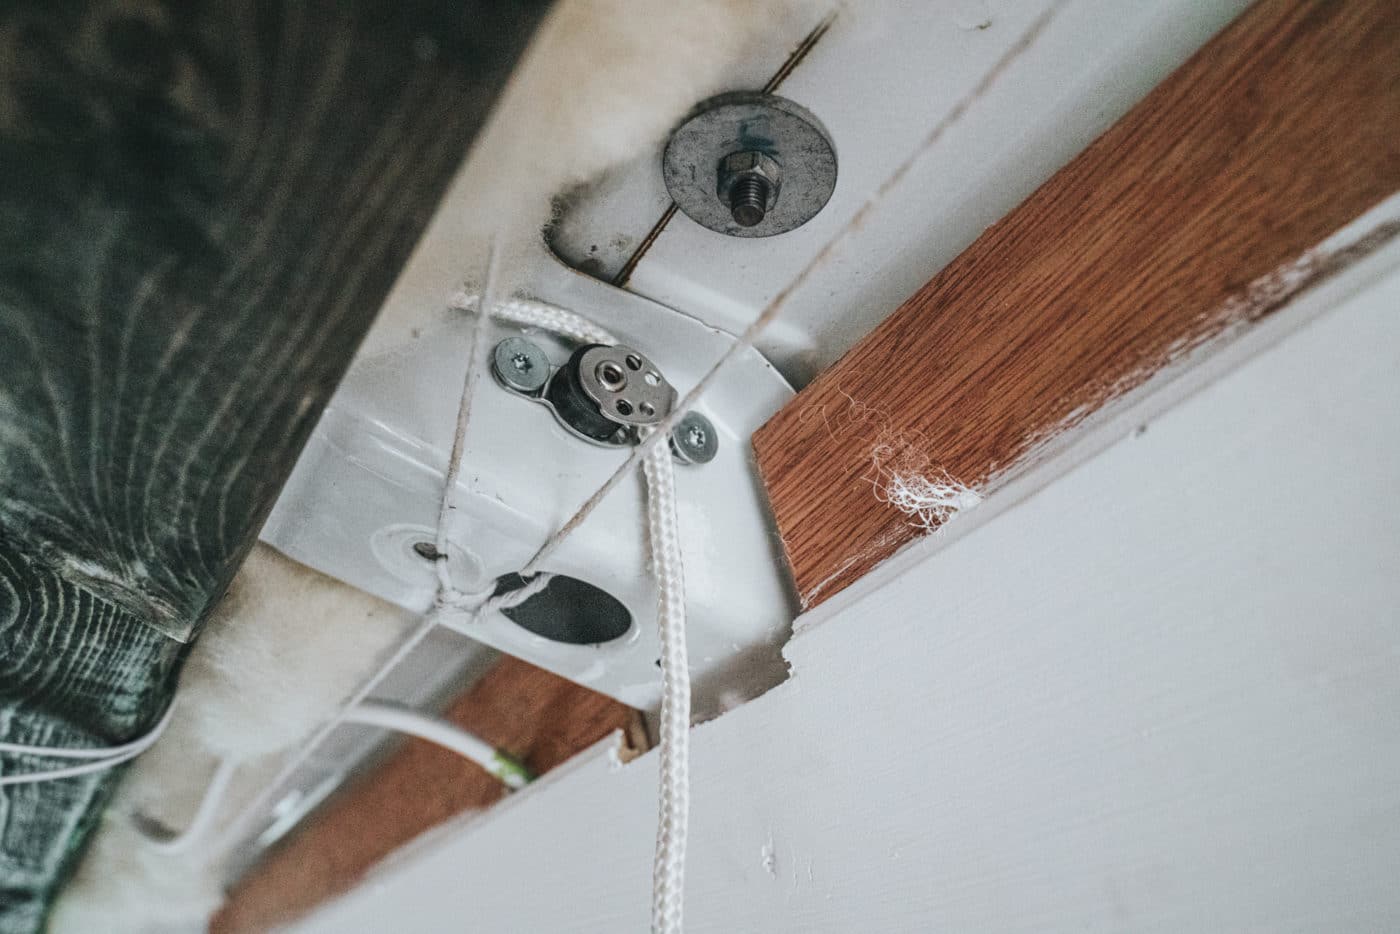
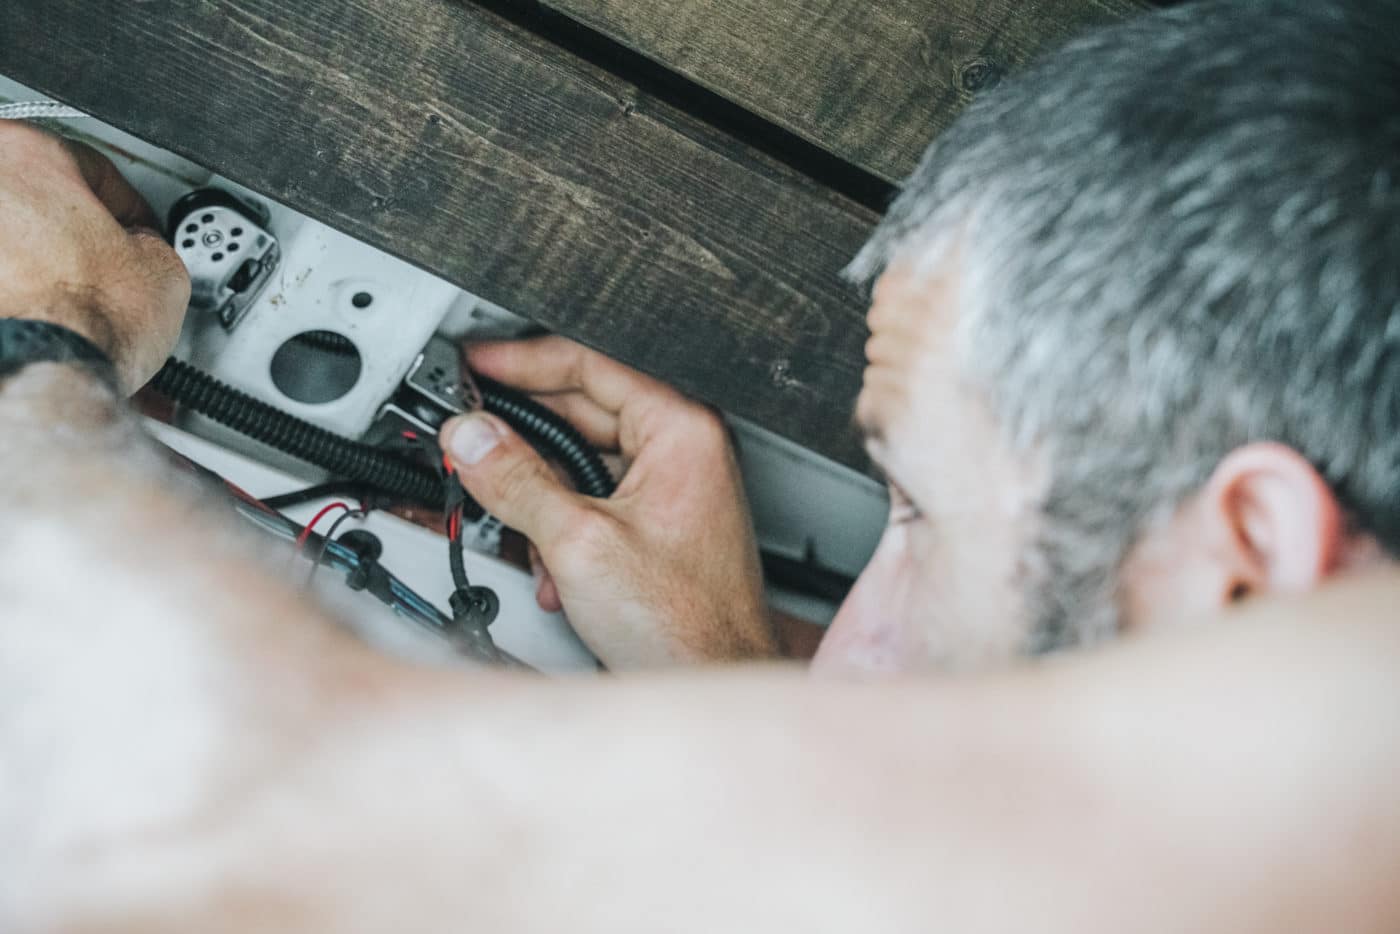
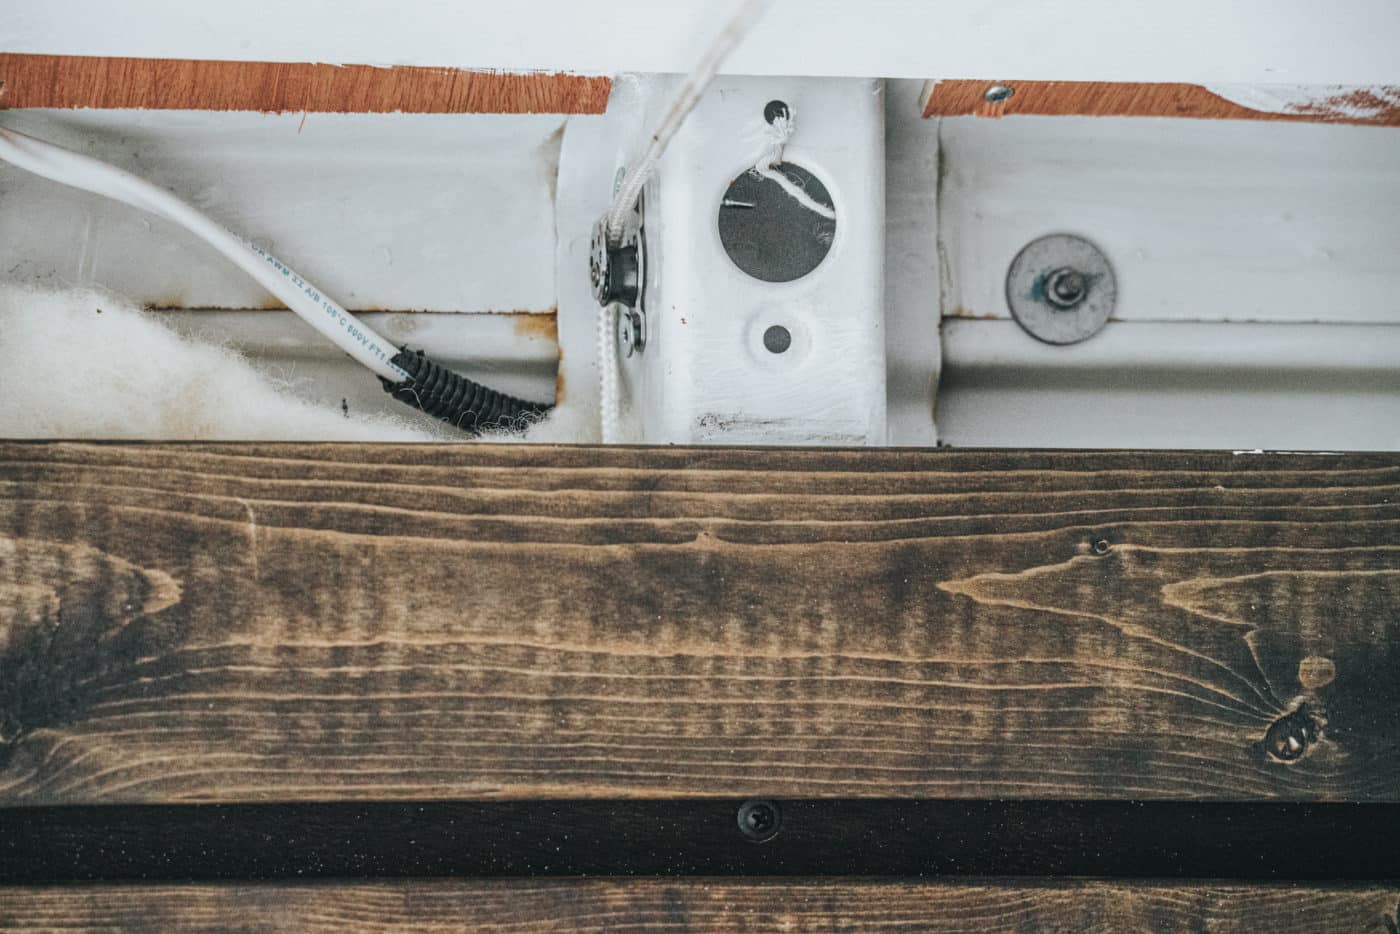
1. Set up the pulleys
Connect all pulleys to the beams of the Sprinter van ceiling. We bolted 2x Harken 16mm Airblock Cheek pulleys to the cross beams on the driving force facet of our Sprinter ceiling, 2 x Harken Micro Upright Lead Blocks in addition to the Harken 16mm Airblock Double and Harken 16mm Airblock Single on the passenger facet of the beams.
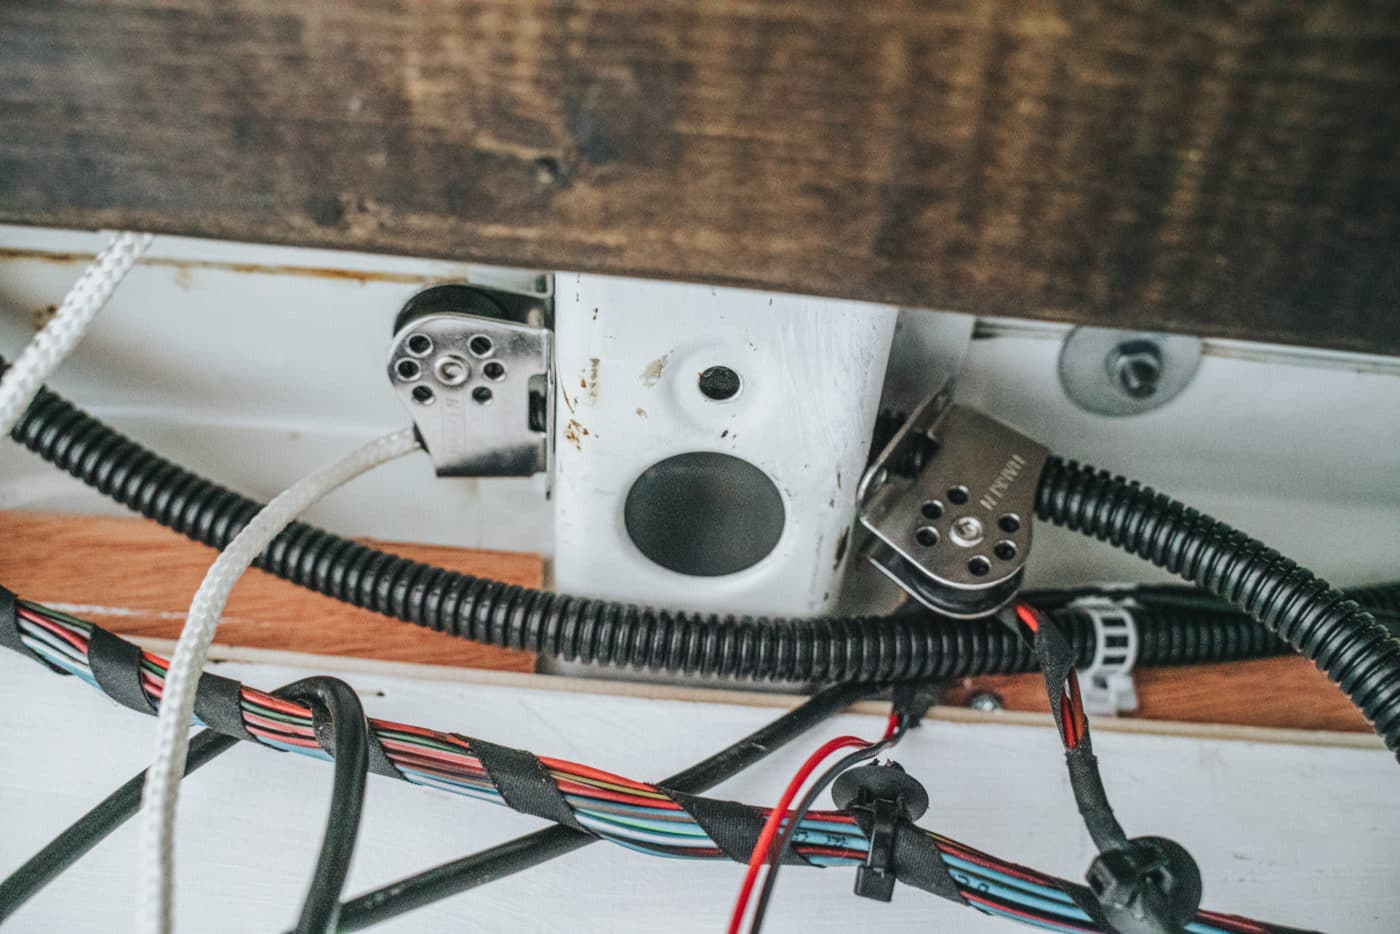
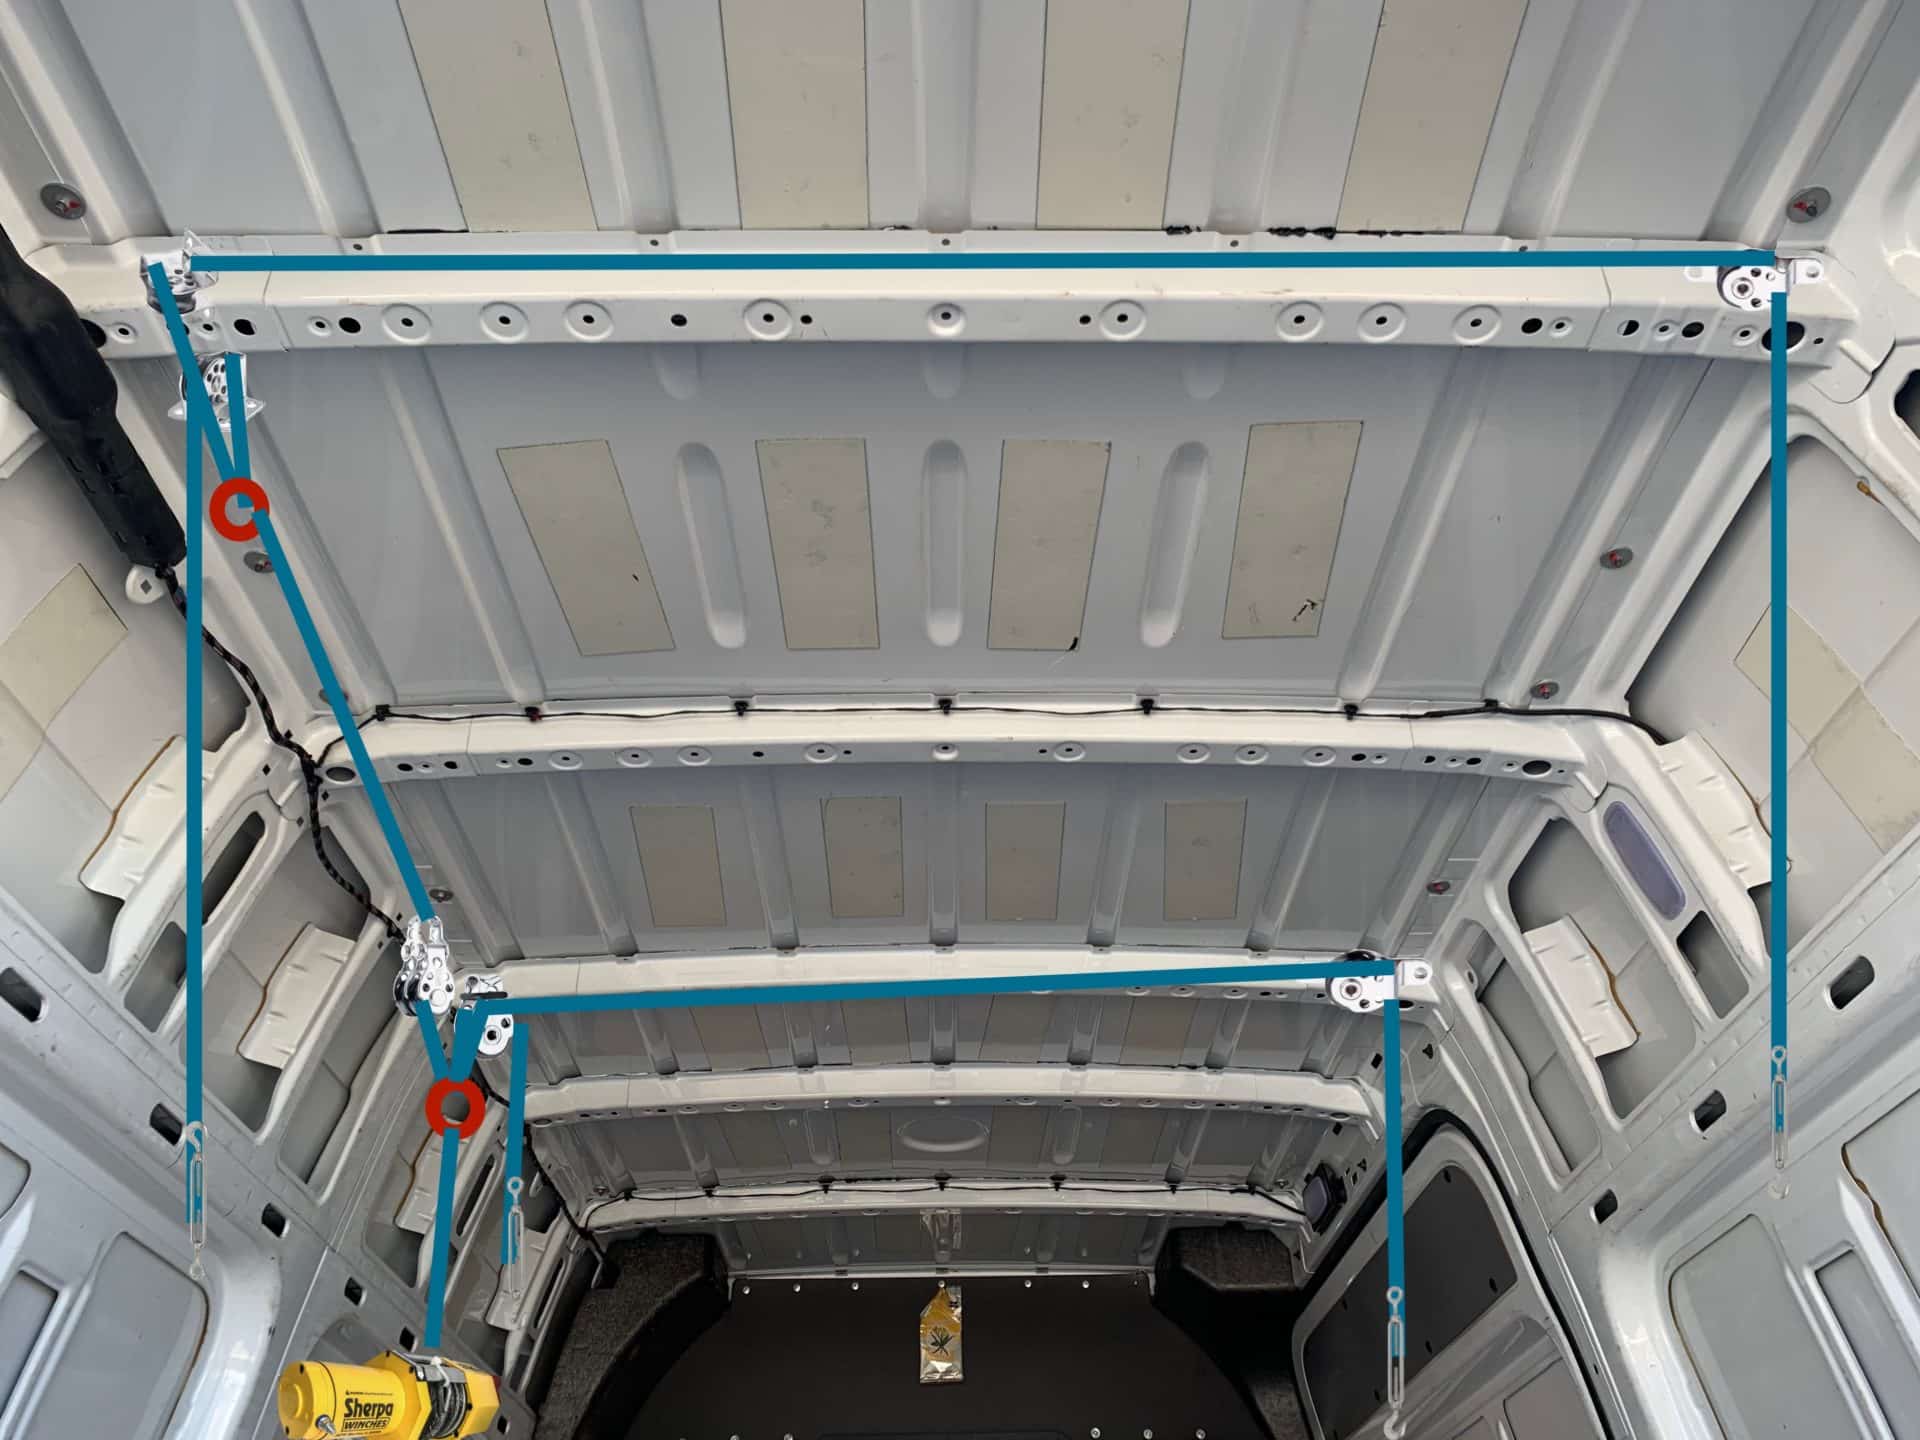
2. Connect the ropes
Pull the ropes by means of the pulleys and join them to 1 one other. The crimson circles within the photograph point out the place the ropes are related. You are able to do this by lock stitching or with an attachment ring.
Subsequent, connect a turnbuckle on the finish of every rope in all 4 corners of the mattress. Word that you could all the time skip this step and fix the ropes on to the mattress body. However, we wished to have the ability to disconnect the mattress from the winch when it’s down as a security function. This manner, if the winch motor ever decides to return to life within the evening, our mattress gained’t raise with it.
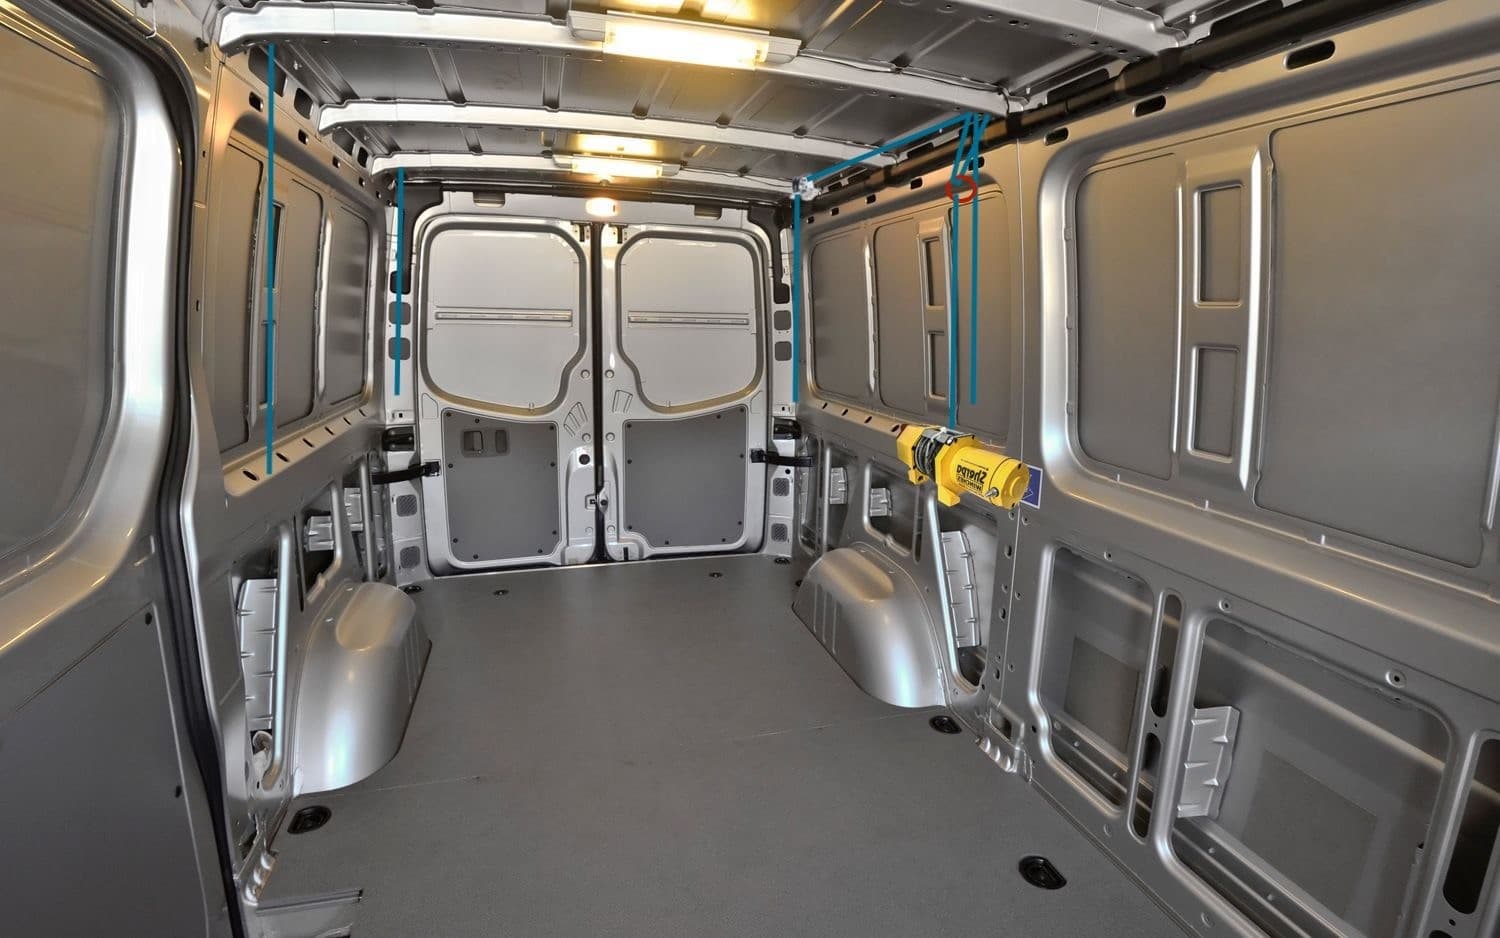
*Word: We advocate pulling the ropes by means of earlier than putting in the ceiling. Pulling them by means of from one facet of the van to the opposite turns into tougher as soon as the ceiling is in place. However not unimaginable—use a cable snake if wanted.
3. Construct the body
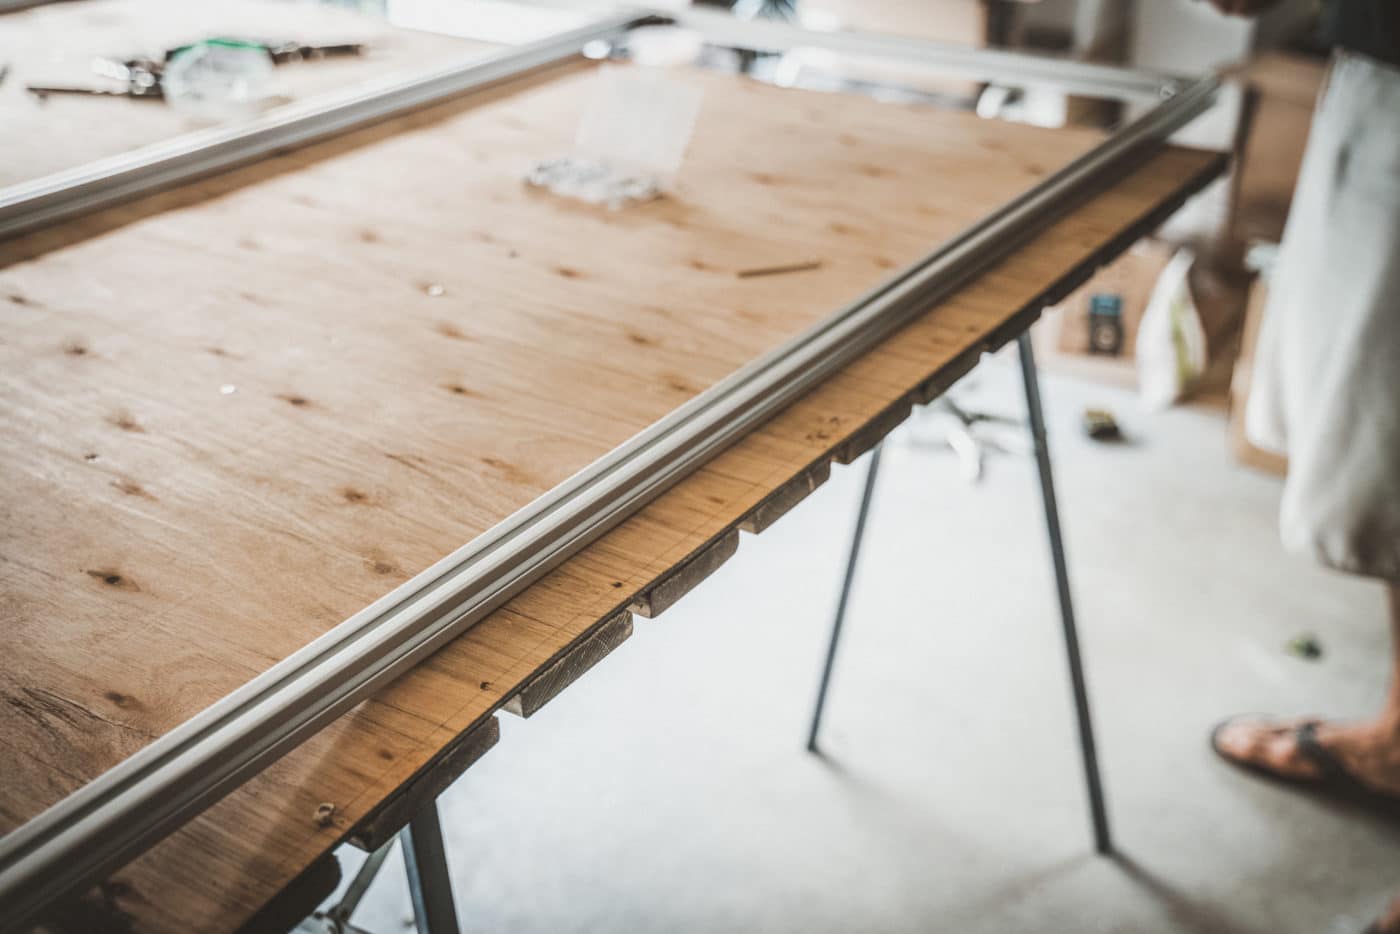
Utilizing 80/20 aluminum, we constructed a mattress body with 4 horizontal bars. In hindsight, it might have been a greater concept to make use of 6-8 horizontal bars to enhance structural integrity and weight distribution.
On the underside of the body, we hooked up a sheet of plywood and the identical planks we used on our ceiling. We used 1×4 pine slats on the ceiling of the remainder of our van so we continued the design right here.
On the highest of the body, we hooked up a sheet of pegboard. Pegboard is light-weight and the pre-drilled holes permit for air circulation underneath our mattress. We used t-slot nuts to connect the pegboard to the mattress body. They match completely into the 80/20 aluminum.
Lastly, we hooked up the attention bolts to the body the place the turnbuckles will join with the mattress.

4. Set up the winch
We bolted an ATV winch as our electrical mattress raise to the facet of the van’s wall utilizing our present L observe system. When you don’t have already got an L observe system, you’ll want to put in one. Then, paying attention to the fuses and wire gauge you’ll want, hook the winch as much as your electrical setup. When you don’t need to deliver electrical energy into the combination, you may all the time use a handbook hand crank.
5. Check the construct
Take your elevator mattress mechanism for a spin and push the up/down button in your winch. Within the occasion of energy failure, checking all of the fuses in your winch is an efficient place to start out. As soon as the motorized mattress lifts are up and working, mess around with the turnbuckle/eye bolt placement so the mattress place is centered. Ensure that it’s not swinging to 1 facet or one other while you raise and decrease it.
6. Safe the mattress
As soon as testing is full, your retractable ceiling mattress is nice to go! For extra safety, we added extra rope to ease the pressure on the winch and to additional shield the mattress throughout bumpy rides. We looped tie-down straps by means of the beams of the van and hooked up heavy-duty carabiners to the ends. When the mattress is up, we safe it by looping the carabiners by means of.
Suggestions for a Profitable Van Conversion Elevator Mattress Construct
- Select a winch with an artificial rope to attenuate the noise when elevating and reducing the mattress.
- Some winches might be very noisy. We constructed a soundproof field with pine plywood and soundproofing foam to muffle the noise.
- Set up the rope mechanism earlier than you end the ceiling.
- Make your mattress an appropriate dimension for the size of your van. Do not forget that in a Sprinter, the width of the van is smaller on the prime than within the center. This meant that our mattress dimension was restricted by the width of our ceiling.
- Guarantee that you’ve constructed one thing safe for the mattress to relaxation on when it’s lowered down. We advocate cupboards on either side of the van to create a raised platform mattress impact with numerous storage.
How A lot Does it Value to Construct a DIY Elevator Mattress?
In complete, our elevator mattress worth was CA$692.46 (roughly US$545 for our American pals). See the complete price breakdown beneath:
Wooden
Plywood + wood slats – $141.00
Pegboard – $33.89
{Hardware}
Pulleys + screws – $231.94
Turnbuckles + eye hooks – $41.42
Ropes – $83.48
Winch + bolts – $138.74
Soundproofing foam – $21.99
Whole – CA$692.46
![]()
All in all, we’re tremendous proud of our DIY elevator mattress. RV electrical beds that may be raised and lowered open up numerous further residing area in a van or tiny home. They’re an excellent different to loft beds that require a ladder or a convertible dinette that must be put collectively day by day. Hopefully, this data will show you how to create the mattress elevator of your desires!